FREE DINNER EBOOK! Get your copy!
  • Cookie Policy
  • GDPR Policy
  • Disclaimer
  • Terms Of Use
  • Visit my other site: Fun Cookie Recipes
spicy fork kitchen
  • Home
  • Dinner
  • Desserts
  • Drinks
  • Appetizers
  • Contact
  • About
  • Privacy Policy
  • Home
  • Dinner
  • Desserts
  • Drinks
  • Appetizers
  • Contact
  • About
  • Privacy Policy
  • Cookie Policy
  • GDPR Policy
  • Disclaimer
  • Terms Of Use
Visit my other site: Fun Cookie Recipes

HOME / CATEGORIES /

Latest

- 2 cups cooked brown rice - 3 cups fresh or frozen broccoli florets - 1 cup shredded cheddar cheese - 1 cup shredded mozzarella cheese - 1 can cream of mushroom soup - ½ cup milk - Garlic powder and onion powder - Salt and pepper to taste - ½ cup breadcrumbs for topping - 1 tablespoon olive oil or butter for greasing To make the Cheesy Broccoli Rice Casserole, you need simple and fresh ingredients. The main ingredients are easy to find and bring great flavor. Using cooked brown rice adds a nutty taste and fiber. Broccoli florets provide a pop of color and crunch. The mix of cheddar and mozzarella gives that cheesy goodness we all love. Next, you need cream of mushroom soup. It adds creaminess and depth to the dish. Don't forget the milk! It helps the casserole stay moist. Garlic and onion powders add a nice kick. Finally, season with salt and pepper for balance. You can make this dish even better by adding breadcrumbs on top. They give a crunchy texture. A little olive oil or butter helps the breadcrumbs brown nicely. This blend of ingredients makes a rich, creamy casserole that everyone will enjoy. It's perfect for family dinners or potlucks. Start by greasing the slow cooker insert. Use olive oil or butter. This step helps prevent sticking. A well-greased pot makes cleanup easy. In a large bowl, combine the cooked brown rice and broccoli florets. Add the shredded cheddar cheese and mozzarella cheese. Then, mix in the cream of mushroom soup and milk. Don't forget the garlic powder and onion powder. Season with salt and pepper to your taste. Stir everything until it is well combined. Next, pour the rice and broccoli mixture into the prepared slow cooker. Spread it out evenly. Make sure it fills the pot nicely. This ensures even cooking. If you want a crunchy topping, sprinkle breadcrumbs on top. Cover the slow cooker with its lid. Cook on low for 4 to 5 hours or on high for 2 to 3 hours. The casserole is ready when the broccoli is tender and the cheese is melted. Enjoy the wonderful smells as it cooks! To get a nice sauce, you may need to adjust the milk. If your mix seems too thick, add more milk. This helps the sauce blend well. A smooth mix gives the casserole a creamy texture. You want it to coat everything evenly. For the best cheese melt, add cheese at the right time. Stir in shredded cheese towards the end of cooking. This keeps it from clumping. Cook on low heat for a smooth melt. Stir gently to combine the melted cheese with the rest. This ensures every bite is cheesy and delicious. Cook time can vary by slow cooker model. If your cooker runs hot, check early. For a standard slow cooker, use low for 4-5 hours. If on high, 2-3 hours works well. Always look for tender broccoli and melted cheese. Adjust as needed to get the perfect casserole. {{image_2}} You can add other veggies to mix things up. Peas bring a sweet taste, while bell peppers add crunch. Just chop them up and throw them in the mix. You can use about 1 cup of any extra vegetables. This will make your casserole more colorful and tasty. Want to make this dish heartier? Add cooked chicken or beans. Shredded rotisserie chicken works well. You can also use black beans or chickpeas for a great vegan option. Aim for about 1 to 2 cups of protein. This makes the casserole filling while still being delicious. You can easily make this casserole gluten-free or vegan. For gluten-free, use a gluten-free cream of mushroom soup. If you want a vegan option, swap the cheeses for plant-based ones. Use coconut or almond milk instead of regular milk. These changes keep the flavor while meeting your dietary needs. To keep your Cheesy Broccoli Rice Casserole fresh, store leftovers in airtight containers. Make sure the casserole cools down before sealing. This helps prevent moisture buildup. Place the containers in the fridge. It will be good for up to three days. If you want to store the casserole for longer, freezing is a great option. First, let it cool completely. Then, transfer it to a freezer-safe container. You can also wrap it tightly in plastic wrap and foil. When ready to eat, thaw it in the fridge overnight. Reheat in the oven at 350°F until hot, about 25-30 minutes. The casserole stays fresh in the fridge for about three days. If frozen, it can last up to three months. For the best taste, eat it sooner rather than later. Always check for any signs of spoilage before enjoying. Yes, you can use brown rice in this recipe. Brown rice is healthier than white rice. It has more fiber and helps you feel full longer. It also adds a nutty flavor, which pairs well with the cheese and broccoli. Just remember, brown rice takes longer to cook than white rice, so adjust your time if needed. Absolutely! You can prepare this casserole ahead of time. Just mix all the ingredients in a bowl. Then, transfer it to a greased slow cooker. Cover it and store it in the fridge overnight. When you’re ready to cook, just set your slow cooker and let it do the work. To reheat leftovers, use the microwave or the oven. If using the microwave, place the casserole in a microwave-safe dish. Heat it on medium until warm. If using the oven, cover it with foil and heat at 350°F until hot. This keeps the cheese melted and the broccoli tender. Yes, this casserole is great for kids! To make it more kid-friendly, cut the broccoli into smaller pieces. You can also add some hidden veggies like carrots or peas. If your kids love a bit more flavor, add a sprinkle of extra cheese on top before serving. Kids usually love cheesy dishes! This blog post covers a creamy, cheesy casserole with brown rice and broccoli. You learned about the main ingredients and additional items needed. I provided step-by-step instructions to simplify your cooking process. You found tips to ensure the sauce is perfect and how to adjust cooking times. There are ideas for variations and storage tips to keep your leftovers fresh. This dish is simple and offers many options. You can customize it to fit your taste. Enjoy cooking and sharing this delicious meal!

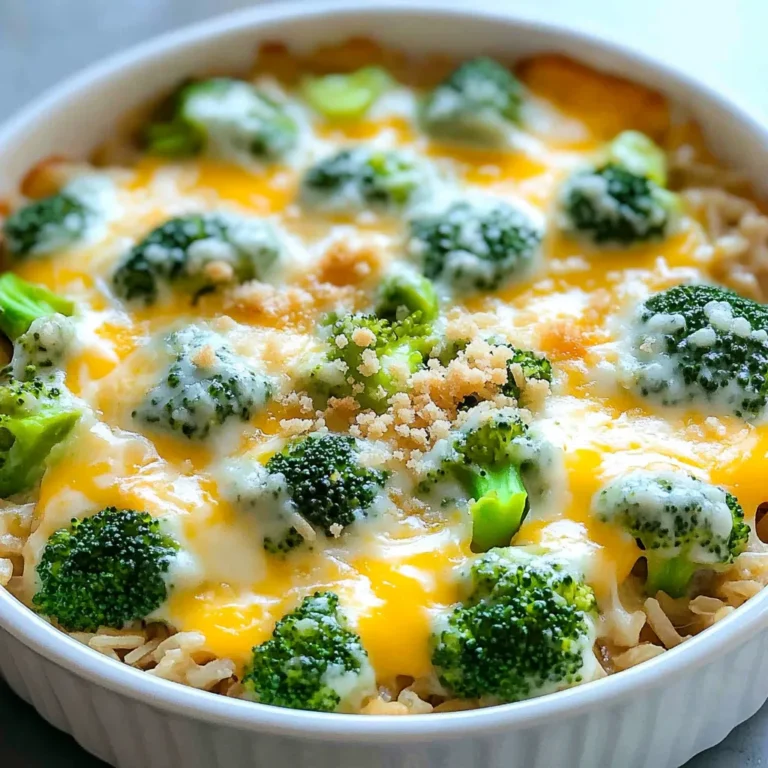
Cheesy Broccoli Rice Casserole Slow Cooker Delight

- 12 large portobello mushrooms: Start with fresh, large portobello mushrooms. Remove the stems gently. This creates space for the tasty filling. - 4 oz cream cheese: Use softened cream cheese for a smooth mixture. It adds a rich, creamy base. - 1/2 cup shredded cheddar cheese: Choose sharp or mild cheddar. It melts well and gives great flavor. - 1/4 cup jalapenos: Finely chop fresh or pickled jalapenos. They add heat and a tangy taste. - 1/4 cup breadcrumbs: Panko breadcrumbs work best. They give a nice crunch to the dish. - 2 tablespoons fresh chives: Chop fresh chives for a mild onion flavor. They also add color. - 1 tablespoon garlic powder: This adds a savory depth to the stuffing. Use it for a punch of flavor. - Salt and pepper: Season to taste. These simple spices enhance all the other flavors. - Olive oil spray: A light spray helps the mushrooms crisp up as they cook. This is key for a nice texture. Each ingredient plays a vital role in creating the perfect jalapeno popper stuffed mushrooms. The combination of creamy cheese, spicy jalapenos, and crunchy breadcrumbs makes every bite delightful. 1. Preheating the air fryer: Start by setting your air fryer to 375°F (190°C). This step gets it hot and ready for cooking. 2. Mixing the stuffing ingredients: In a mixing bowl, combine: - 4 oz cream cheese, softened - 1/2 cup shredded cheddar cheese - 1/4 cup jalapenos, finely chopped (fresh or pickled) - 1/4 cup breadcrumbs (panko for extra crunch) - 2 tablespoons fresh chives, chopped - 1 tablespoon garlic powder - Salt and pepper to taste Stir everything until it's well mixed. You want a smooth filling that sticks together nicely. 3. Stuffing the mushroom caps: Take your 12 large portobello mushrooms and remove the stems. Fill each cap with the cheese mixture. Don’t be shy; pile it on generously for the best flavor. 1. Cook time and temperature: Place the stuffed mushrooms into your air fryer basket. Cook them for 10-12 minutes. You’ll know they are done when the cheese is bubbly and the mushrooms are tender. 2. How to arrange mushrooms in the air fryer: Make sure to arrange the stuffed mushrooms in a single layer. This helps them cook evenly and get crispy all around. Avoid crowding the basket, as this can lead to uneven cooking. - Presentation ideas: Once cooked, carefully remove the mushrooms from the air fryer and let them cool for a couple of minutes. Arrange them on a serving platter. For an extra touch, garnish with chopped chives or a drizzle of sour cream. - Pairing recommendations: These stuffed mushrooms pair well with a light salad or some crunchy tortilla chips on the side. Enjoy the creamy, spicy flavors that these jalapeno popper stuffed mushrooms bring to your table! To get that perfect crunch on your jalapeno popper stuffed mushrooms, follow these tips: - Air Fryer Preheat: Always preheat your air fryer. This step helps ensure even cooking and crispiness. - Olive Oil Spray: Lightly spray the mushrooms with olive oil. This adds a golden color and crisp texture. - Use Panko Breadcrumbs: Panko is lighter and crispier than regular breadcrumbs. It gives a great texture boost. The quality of your ingredients matters a lot. Fresh jalapenos will give a better flavor than canned ones. Good cheese blends melt better and create a rich taste. If you don't have cream cheese or cheddar, here are some great alternatives: - Cream Cheese: Use Greek yogurt or ricotta for a lighter option. They still provide creaminess. - Cheddar Cheese: Try mozzarella or pepper jack. These will change the flavor but still taste great. For those who prefer less spice, remove the seeds from jalapenos. You can also use bell peppers for a milder taste. Enjoy customizing your stuffed mushrooms! {{image_2}} You can switch up the flavors in these stuffed mushrooms easily. Try adding different spices or herbs to the cheese mixture. A bit of cumin or smoked paprika can add a nice kick. You can also use fresh herbs like basil or oregano for a brighter taste. Incorporating vegetables or meats is another great way to change things. Diced bell peppers or spinach can add color and nutrition. If you want some protein, add crumbled bacon or cooked sausage for a savory twist. Each option makes the dish your own. If you want a vegan version, you can choose plant-based cheese. Many brands offer creamy vegan cheese that works well. Just substitute it for the cream cheese and cheddar in the recipe. For a gluten-free option, swap regular breadcrumbs with gluten-free breadcrumbs. You can also use ground nuts or oats as a crunchy filler. Both options keep your stuffed mushrooms tasty and safe for gluten-free diets. To keep your stuffed mushrooms fresh, store them in the fridge. Use an airtight container. This helps prevent them from drying out. They will stay good for about three days. If you want to keep them longer, freezing is a great option. To freeze, place the stuffed mushrooms on a baking sheet. Make sure they do not touch each other. Freeze them for about an hour. After they are frozen, transfer them to a freezer bag. This way, they won’t stick together. You can keep them in the freezer for up to three months. When you are ready to enjoy your leftovers, reheating is easy. For best results, use the air fryer. Preheat your air fryer to 350°F (175°C). Place the stuffed mushrooms in the basket. Heat them for about 5-7 minutes. This helps them get warm and crisp again. If you prefer the oven, you can do that too. Preheat your oven to 350°F (175°C). Place the mushrooms on a baking sheet. Cover them with foil to keep them from drying out. Heat them for about 10-15 minutes. Check to make sure they are heated through. Enjoy your delicious Jalapeno Popper Stuffed Mushrooms! How do you know when the mushrooms are done? You can tell when the mushrooms are done by checking the cheese. It should be bubbly and golden brown. The mushrooms will also feel soft when you touch them. A fork should easily pierce through. Make sure to keep an eye on them in the air fryer towards the end of cooking. Can I make Jalapeno Popper Stuffed Mushrooms ahead of time? Yes, you can prepare the stuffed mushrooms ahead of time. Just fill the mushroom caps and store them in the fridge. They can last for about a day. When you are ready to cook them, just pop them in the air fryer. You may need to add a minute or two to the cooking time. What are the best air fryer models for this recipe? Most air fryers work well for this recipe. I recommend models with a basket style, like the Philips or Ninja brands. These models cook evenly and provide good airflow. Check the size to ensure your mushrooms fit comfortably in a single layer. This helps them cook evenly and get that perfect crisp. This blog post covered everything you need to make delicious stuffed mushrooms. We explored the ingredients, preparation, cooking techniques, and serving tips. You can create a perfect dish by following the steps and using quality ingredients. Remember to try different flavors or substitutions for a unique twist. Storing and reheating tips help keep leftovers tasty. I hope you feel excited to make these mushrooms and share them with others! Enjoy cooking and experimenting with your new recipe.

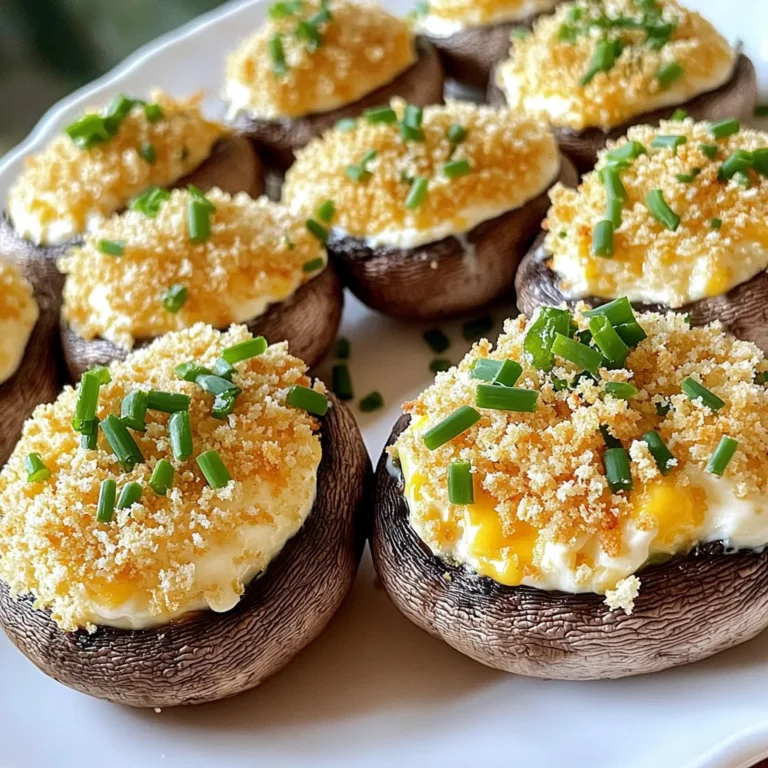
Jalapeno Popper Stuffed Mushrooms Air Fryer Delight

To make Caramel Apple Snack Mix, gather these simple ingredients: - 2 cups apple-flavored cereal - 1 cup puffed corn snacks - 1 cup pretzel sticks - 1 cup roasted or mixed nuts - 1 cup mini marshmallows - 1/2 cup caramel sauce - 1/4 teaspoon ground cinnamon - 1/4 cup chopped dried apples - 1/4 cup chocolate chips (optional) These ingredients work together to create a sweet and salty mix. The apple-flavored cereal provides a fruity crunch. Puffed corn snacks add a light texture. Pretzel sticks bring a nice saltiness. Nuts give a hearty bite, while mini marshmallows add softness. The caramel sauce is what ties everything together. Mixing in ground cinnamon enhances the flavor, giving it warmth. Dried apples add chewiness, and chocolate chips can make it even sweeter if you like. With these ingredients, you can create a tasty snack mix that everyone will love. It’s fun to make and even more fun to eat! - First, grab a large mixing bowl. - Add 2 cups of apple-flavored cereal. - Toss in 1 cup of puffed corn snacks. - Next, add 1 cup of pretzel sticks. - Now, include 1 cup of roasted peanuts or mixed nuts. - Mix in 1 cup of mini marshmallows. - Finally, stir in 1/4 cup of chopped dried apples. - Mix all these dry items well until they are combined. - In a small saucepan, pour in 1/2 cup of caramel sauce. - Set the heat to low and warm the sauce. - Stir in 1/4 teaspoon of ground cinnamon until it's mixed in. - Once warm, remove the saucepan from the heat. - Now, drizzle the warm caramel sauce over the dry mix. - Use a spatula to fold the ingredients together gently. - Make sure everything gets coated in caramel. - If you like, fold in 1/4 cup of chocolate chips for fun! - Spread the mix onto a baking sheet lined with parchment paper. - Let it cool for about 10-15 minutes on the sheet. - Once cooled, break apart any clumps gently. - Transfer the mix to an airtight container for storage. To get the best caramel coating, warm the caramel sauce slowly. This helps it stay smooth. Stir in the ground cinnamon well. This adds a nice touch of flavor. When you drizzle the caramel over the mix, do it slowly. This gives every piece a nice coating. When mixing and folding the snack mix, use a spatula. This tool helps you gently combine the ingredients. Be careful not to crush the pretzels or marshmallows. You want a mix that still has texture. If you want to add chocolate chips, fold them in last. This keeps the chips intact and adds fun flavor. For a great presentation, serve the mix in a colorful bowl. Drizzle some extra caramel sauce on top. This makes it look fancy and inviting. You can also add some whole dried apples on top for a pop of color. If you want to package the mix as gifts, use cellophane bags. Tie them with pretty ribbons to make them special. This makes your snack mix a great treat for friends or family. You can also add a little tag with the recipe. This way, others can make it too! {{image_2}} You can change some ingredients in this snack mix. Instead of apple-flavored cereal, try cinnamon toast or honey nut cereal. These swaps still taste great. For a nut-free mix, use seeds like pumpkin or sunflower seeds. If you need a gluten-free option, select gluten-free pretzels and snacks. Many stores offer these choices. Want to spice it up? Adding a pinch of nutmeg or ginger can give a warm taste. You can also try different chocolates. Dark chocolate adds a rich flavor, while white chocolate gives a sweet touch. For seasonal flavors, think pumpkin spice in the fall or peppermint in winter. These small changes can make your snack mix sing with flavor! To keep your Caramel Apple Snack Mix fresh, use an airtight container. A glass jar or a plastic container works well. Make sure it seals tightly to keep air out. Store it in a cool, dry place, away from sunlight. Your snack mix will stay fresh for up to one week. If you want to keep it longer, store it in the fridge for up to two weeks. If you find some of the snack mix has gone stale, don't throw it away. You can turn it into a tasty topping. Crush the mix and use it on ice cream or yogurt. You could also blend it into a smoothie for some added flavor. If you have leftovers, try mixing them into cookie dough for a fun twist. This way, you avoid waste while enjoying more delicious treats! What can I use instead of caramel sauce? You can use melted chocolate or peanut butter as a substitute. Both add sweetness and flavor. Honey or maple syrup can also work well. Can I make this recipe ahead of time? Yes, you can! Make the mix a day or two in advance. Just store it in an airtight container. How do I adjust the recipe for larger servings? To make more, simply double or triple the ingredient amounts. Keep the same ratios for the best taste. Is it possible to make a vegan version of this snack mix? Absolutely! Use dairy-free caramel sauce and vegan chocolate chips. All other ingredients are already vegan. Where can I buy pre-made caramel apple snack mixes? You can find them at grocery stores, specialty shops, or online. Look in the snack aisle or the seasonal section for fun mixes. We covered the tasty recipe for caramel apple snack mix today. You can easily make it with simple ingredients like cereal, nuts, and marshmallows. Follow the steps for mixing, cooling, and storing your tasty creation. Remember to try out our tips for perfecting the flavor and presentation. Feel free to customize with swaps or new toppings, too. This snack is great for sharing or gifting. Enjoy your cooking and get creative with the mix!

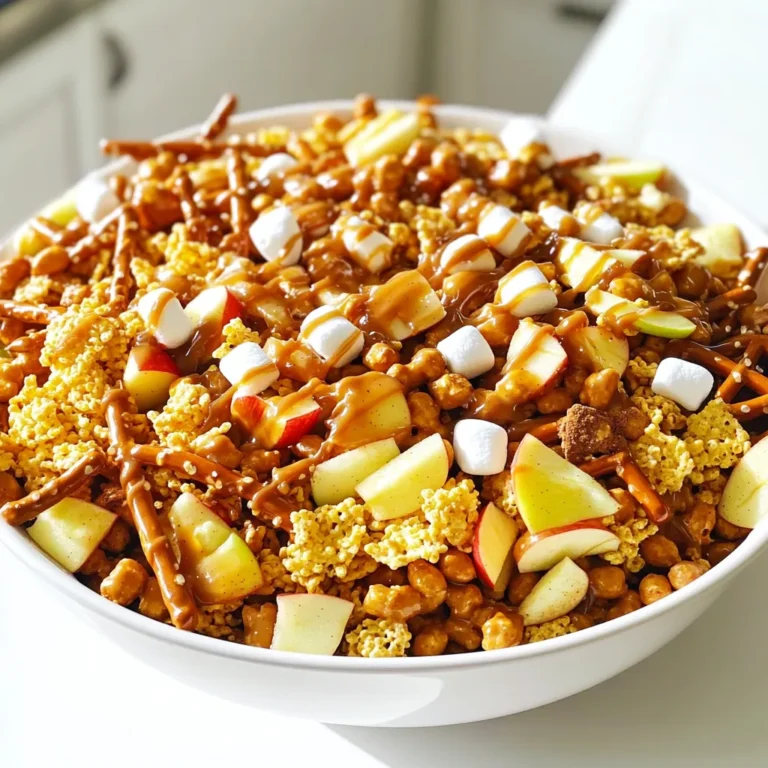
Caramel Apple Snack Mix Tasty and Simple Delight

To make Pumpkin Latte Tiramisu Cups, you need: - 1 cup pumpkin puree - 1 cup mascarpone cheese - 1 cup heavy cream - ½ cup sugar - 1 teaspoon vanilla extract These ingredients are the base of your dessert. The pumpkin puree brings warm, earthy flavors. Mascarpone cheese adds creaminess. Heavy cream helps create a light, fluffy texture. Sugar and vanilla extract sweeten the mix. Now, let's add some flavor: - ½ teaspoon pumpkin spice - 1 cup brewed coffee, cooled - 2 tablespoons maple syrup Pumpkin spice is key for that autumn taste. The brewed coffee adds depth and warmth. Maple syrup gives a nice touch of sweetness. Finally, we need some components to pull it all together: - 12 ladyfinger cookies - Cocoa powder for dusting - Whipped cream for topping - Cinnamon sticks for garnish (optional) Ladyfinger cookies soak up the coffee dip. Dusting cocoa powder on top adds a rich finish. Whipped cream gives a light touch. Cinnamon sticks can be a fun garnish to add flair. Each ingredient plays a role in making this dessert not just tasty but also visually appealing. Enjoy the process of gathering these ingredients; they will create a delightful dish! First, we make the pumpkin mascarpone mix. In a big bowl, add the mascarpone cheese, heavy cream, sugar, vanilla extract, and pumpkin spice. Mix these ingredients well. I use a handheld mixer for this. Beat the mixture until it forms stiff peaks. Stiff peaks mean the cream holds its shape well when you lift the whisk. This step is key for a light and creamy texture. Next, let’s get the coffee dip ready. In another bowl, combine the brewed coffee and maple syrup. Stir them well to mix the flavors. This sweet coffee dip adds a nice touch to the dessert. Now, dip each ladyfinger into the coffee mix. Make sure to dip them briefly. You want them moist but not soggy. A quick dip helps keep the ladyfingers firm. Now it’s time to layer our cups. Start by placing a dipped ladyfinger at the bottom of each cup. This serves as the base. Next, spoon a layer of the pumpkin mascarpone mix over the ladyfinger. Spread it evenly to cover the ladyfinger. Repeat this layering. Place another dipped ladyfinger, followed by more pumpkin mixture. Keep layering until your cups are full. Finish with a layer of the mascarpone mix on top. Once done, cover the cups with plastic wrap. Refrigerate them for at least four hours, or overnight if you can wait. This chilling time lets all the flavors blend together. Just before serving, dust the top with cocoa powder. Add a dollop of whipped cream, and garnish with a cinnamon stick if you like. Enjoy your delicious pumpkin latte tiramisu cups! To get the best pumpkin latte taste, you must balance the spices. Start with ½ teaspoon of pumpkin spice. You can add more if you want a stronger flavor. Always use freshly brewed coffee. This makes your dessert rich and aromatic. Whipping cream is key to a fluffy dessert. Use a cold bowl and cold beaters. This helps the cream whip up quickly. Aim for stiff peaks. This keeps your layers light and airy. When you dip ladyfingers, do it quickly. Soak them just long enough to absorb flavor but not too long, or they will turn soggy. A quick dip in the coffee mix is all it needs. Serving in clear cups lets the layers shine. You can use small glasses for a fun look. For extra flair, dust the top with cocoa powder. Add a dollop of whipped cream on top for a creamy finish. A cinnamon stick as a garnish adds a nice touch and a hint of spice. {{image_2}} You can change up the spices in your Pumpkin Latte Tiramisu Cups. Instead of pumpkin spice, try using nutmeg or ginger. These spices add a different twist. You can also switch the coffee type. Use espresso for a stronger flavor or a flavored coffee for fun. If you want a vegan option, replace the mascarpone with cashew cream. Blend soaked cashews with a bit of maple syrup and vanilla. For gluten-free choices, use gluten-free ladyfingers. They work just as well and keep the dessert tasty. You can serve this dessert in individual cups. It makes each portion special. If you prefer a larger dish, use a trifle dish for a striking look. For parties, make mini cups. They are easy to grab and perfect for sharing. To keep your pumpkin latte tiramisu cups fresh, store them in the refrigerator. Use an airtight container or cover each cup with plastic wrap. This helps keep moisture in and prevents any fridge odors from affecting your dessert. For the best flavor, chill your tiramisu cups for at least four hours or overnight. You can store them for up to three days in the fridge. The longer they sit, the better the flavors blend. You should not reheat tiramisu. It tastes best cold. To serve after storage, simply remove the cups from the fridge. Dust them with cocoa powder and add whipped cream just before serving. Enjoy the delightful layers of flavor! Pumpkin tiramisu is a fun twist on the classic Italian dessert. It uses pumpkin puree and coffee, which gives it a cozy, fall flavor. The key components include ladyfinger cookies, mascarpone cheese, and whipped cream. The layers create a delicious mix of creamy and coffee flavors. Yes, you can make this dessert ahead of time. I recommend preparing it at least 4 hours before serving. For the best taste, chill it overnight. This allows the flavors to blend beautifully. To keep ladyfingers from getting soggy, dip them quickly. Just a second in the coffee mixture is enough. You want them to soak up some flavor but stay firm. This keeps your dessert nice and layered. If you can't find mascarpone cheese, you can use cream cheese. Mix it with a bit of heavy cream to mimic the texture. Another option is ricotta cheese, but it will change the taste slightly. This pumpkin tiramisu combines creamy mascarpone, rich pumpkin, and brewed coffee. You learned about main ingredients, from pumpkin puree to ladyfingers. Step-by-step instructions helped you create layers of flavor. The tips for texture, flavor, and presentation made your dessert shine. Experiment with variations and enjoy this treat at any gathering. Store it right to keep it fresh. Now, you have all you need to impress friends and family with your delicious creation!

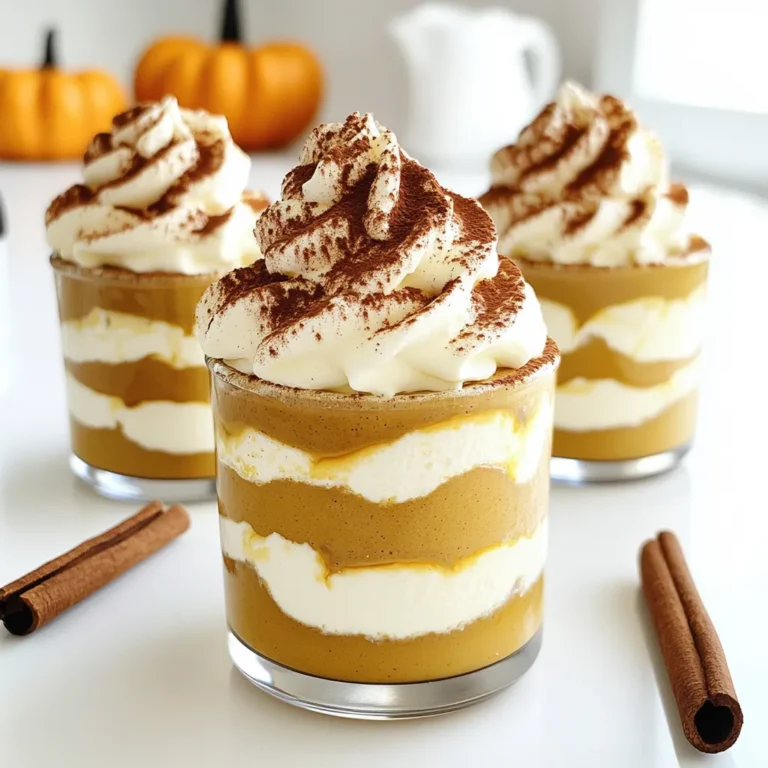
Pumpkin Latte Tiramisu Cups Delightful Easy Dessert

- 1 pound boneless, skinless chicken breasts - 1 cup orzo pasta - 4 cups chicken broth - 1 medium onion, finely chopped - 2 cloves garlic, minced - 2 carrots, diced - 2 celery stalks, diced - 1 cup fresh spinach Chicken forms the base of this soup. I love using boneless, skinless breasts for easy cooking. They cook fast and shred well. Orzo pasta adds a fun texture and heartiness. It swells nicely in the broth. The vegetables—onion, carrots, and celery—bring flavor and nutrition. They make the soup feel fresh and bright. Fresh spinach rounds out the mix, adding color and nutrients. - Juice and zest of 1 lemon - 1 cup heavy cream - Salt and pepper to taste - 2 tablespoons olive oil Lemon juice and zest create a zingy flavor. They brighten up the dish and make it feel light. Heavy cream adds richness and creaminess to the broth. It balances the tartness of the lemon. Don't forget salt and pepper for seasoning. They enhance all the flavors in the soup. Olive oil helps to sauté the veggies and adds a layer of flavor. - Fresh parsley, chopped (for garnish) - Additional spices Fresh parsley gives a pop of green and fresh taste. It makes the soup look great, too. You can add more spices for extra flavor. Try thyme or dill for a new twist. These garnishes are not just pretty; they also boost flavor. To start, heat 2 tablespoons of olive oil in a large pot over medium heat. Add 1 finely chopped medium onion, 2 diced carrots, and 2 diced celery stalks. Sauté these veggies for about 5 minutes. You want them soft and fragrant. Next, stir in 2 minced garlic cloves and cook for another minute. This will add a lovely aroma to your soup. Now, take 1 pound of boneless, skinless chicken breasts. Season them with salt and pepper. Add the chicken to the pot. Pour in 4 cups of chicken broth and bring everything to a boil. Once it boils, lower the heat. Let it simmer for 15 to 20 minutes until the chicken is cooked through. While the chicken cooks, bring a separate pot of salted water to a boil. Add 1 cup of orzo pasta to the water and cook it according to the package instructions, usually about 8 to 10 minutes. While the orzo cooks, mix 1 cup of heavy cream with the juice and zest of 1 lemon in a bowl. This creamy lemon mixture will give your soup a bright flavor. Once the orzo is done, drain it and set it aside. After the chicken is cooked, remove it from the pot. Use two forks to shred it into bite-sized pieces. Set the shredded chicken aside. Now, add the cooked orzo and 1 cup of fresh spinach to the pot. Stir in your creamy lemon mixture and mix well. Heat everything through and adjust the seasoning with salt and pepper to taste. Serve the soup hot, topped with fresh chopped parsley for a beautiful finish. Enjoy your creamy lemon chicken orzo soup! To make this soup truly shine, focus on the cooking methods. Start by sautéing the onion, carrots, and celery until soft. This builds a flavor base. Always use fresh, quality chicken. It gives the soup a rich taste. For a creamy texture, mix heavy cream with lemon juice and zest. Add this mixture at the end. It ensures your soup remains smooth and rich. Stir gently to combine, and avoid boiling after adding cream to keep it perfect. Prepping ingredients in advance saves you time. Chop the veggies and store them in the fridge. This way, you can start cooking right away. Using rotisserie chicken is a great shortcut. It’s already cooked, tender, and flavorful. Just shred it and add it to the pot. This saves you cooking time and still adds great taste. Herbs can enhance your soup easily. Try adding fresh parsley or thyme. These herbs add depth and freshness. You can also use dried herbs if fresh ones aren’t available. Adjusting acidity is key. If the soup tastes too rich, add a bit more lemon juice. This brightens the flavors and balances the creaminess. Just taste as you go for the best results. {{image_2}} You can switch up the protein in this soup. Turkey works well if you have leftovers. For a plant-based option, try tofu. It adds a nice texture and soaks up flavor. If you're out of orzo, you can use other pasta. Small shapes like ditalini or even rice are great substitutes. They will still soak in the creamy goodness. Adding herbs can boost the taste. Thyme brings a warm flavor, while dill adds a fresh twist. Both pair well with the lemon. You can also play with the veggies. Try adding peas, zucchini, or bell peppers. Each adds a unique taste and texture to the soup. For a lighter version, swap heavy cream for low-fat yogurt or milk. This keeps the soup creamy without the extra calories. You can also add more veggies. Spinach is a great start, but you can include kale, broccoli, or cauliflower. More veggies mean more nutrients and fiber. To store leftovers of the creamy lemon chicken orzo soup, let it cool first. Transfer the soup to an airtight container. This keeps the soup fresh and prevents it from absorbing other fridge smells. In the fridge, it will last about 3 to 4 days. If you think you won't eat it in that time, freezing is a better option. To freeze the soup, wait until it cools completely. Pour it into freezer-safe bags or containers, leaving some space for expansion. Label the bags with the date. This soup can freeze well for up to 3 months. When you want to eat it, move it to the fridge overnight to thaw. You can also use a microwave for quicker thawing. For reheating, avoid boiling the soup as it can change the texture. Instead, heat it gently on the stove over low heat. Stir often to keep everything smooth. If the soup seems thick, add a bit of chicken broth or water. To boost the flavor, squeeze in some fresh lemon juice just before serving. This brightens the taste nicely! Orzo pasta is a small, rice-shaped pasta. It cooks quickly and is great in soups. You can use it in salads or as a side dish too. Its shape absorbs flavors well, making it perfect for creamy soups like this one. Yes, you can make this soup ahead of time. To do this, cook the soup without the orzo. Store it in the fridge for up to three days. When you are ready to eat, heat it up and add the orzo. This keeps the pasta from getting too soft. Yes, you can make this soup gluten-free. Use gluten-free orzo or a different gluten-free pasta. You can also swap the chicken broth for a gluten-free version. Just check the labels to be sure! This soup combines chicken, orzo, and fresh veggies for a hearty meal. By adding lemon juice and cream, you enhance the flavor and richness. You can tailor it to fit your tastes by swapping proteins or adding herbs. Remember to store leftovers properly to keep them fresh. This recipe is easy to adapt, making it perfect for anyone. Enjoy crafting your own delicious version, and don’t hesitate to experiment a bit. You'll find the perfect balance for your kitchen.

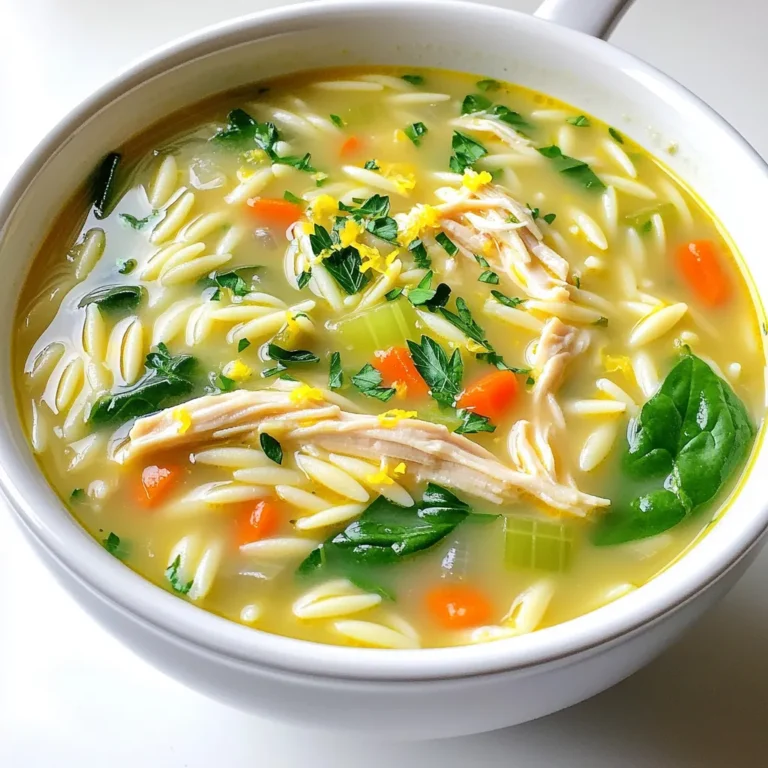
Creamy Lemon Chicken Orzo Soup Quick and Tasty Treat

To make tasty buttermilk fried chicken tenders, you need a few key items. Here’s what you’ll need: - 1 pound chicken tenderloins - 1 cup buttermilk - 1 teaspoon garlic powder - 1 teaspoon onion powder - 1 teaspoon paprika - 1 teaspoon black pepper - 1 teaspoon salt - 1 cup all-purpose flour - 1/2 cup cornstarch - 1 teaspoon baking powder - Vegetable oil, for frying These ingredients work together to create a crispy and flavorful coating. The buttermilk adds moisture and flavor. The spices give the chicken a nice kick. For the seasoning blend, you will mix garlic powder, onion powder, paprika, black pepper, and salt into the buttermilk. Each spice plays its part. - Garlic powder adds a nice aroma. - Onion powder gives a hint of sweetness. - Paprika adds color and a smoky flavor. - Black pepper adds a bit of heat. - Salt enhances all the flavors. This blend makes your chicken tender and full of taste. Don't skip this step; it makes a big difference! If you want to switch things up, there are options. Here are a few ideas: - Chicken: You can use chicken breasts instead of tenderloins. Just cut them into strips. - Buttermilk: If you don’t have buttermilk, mix milk with a bit of vinegar. Let it sit for a few minutes to sour. - Flour: For a gluten-free option, use almond flour or a gluten-free flour blend. - Spices: Feel free to add cayenne pepper for heat or Italian herbs for a different flavor. These alternatives keep the dish fresh and fun. Experiment and find what you love best! {{ingredient_image_1}} Start by making the buttermilk marinade. In a large bowl, mix 1 cup of buttermilk, 1 teaspoon of garlic powder, 1 teaspoon of onion powder, 1 teaspoon of paprika, 1 teaspoon of black pepper, and 1 teaspoon of salt. Whisk this mixture well until it is smooth. This blend adds flavor and tenderizes the chicken. Next, add 1 pound of chicken tenderloins to the bowl. Make sure each piece is fully submerged in the buttermilk. Cover the bowl with plastic wrap and refrigerate it for at least 1 hour. If you have more time, letting it sit overnight gives even better flavor. Once the chicken has marinated, it's time to dredge it. In another bowl, mix together 1 cup of all-purpose flour, 1/2 cup of cornstarch, and 1 teaspoon of baking powder. Stir this mixture well to combine. Take the chicken out of the fridge. Allow the excess buttermilk to drip off each piece. One by one, coat the chicken in the flour mixture. Make sure each piece is evenly covered. Shake off any extra flour before frying. Now, heat about 1 inch of vegetable oil in a large skillet over medium-high heat. Use a thermometer to check the temperature. You want it to reach 350°F (175°C). Carefully place the coated chicken tenders into the hot oil. Avoid overcrowding the pan, as this can make the coating soggy. Fry the tenders for about 4-6 minutes on each side. They should be golden brown and reach an internal temperature of 165°F (75°C). When the chicken is done, use a slotted spoon to transfer the tenders to a paper towel-lined plate. This helps drain off excess oil. Repeat this process with the remaining chicken tenders. Enjoy the crispy and delicious results! To get that crispy coating, the secret is in the dredging. After marinating the chicken in buttermilk, let the excess drip off. Then, coat the chicken with the flour mix. Make sure every area is covered. A light dusting works best. If you want an extra crunch, double dip! First, coat the chicken, dip it back in buttermilk, and coat it again in flour. This adds more layers for crunch. For frying, I recommend using vegetable oil. It has a high smoke point, which helps the chicken cook well. You can also use peanut oil or canola oil. Both work great and add a nice flavor. Avoid oils like olive oil. They burn too quickly and can change the taste. To be sure your chicken is safe to eat, check the internal temperature. It should reach 165°F (75°C). Use a meat thermometer for accuracy. If you don’t have one, cut into the thickest part of a tender. The meat should be white, not pink. Juices should run clear. This ensures your chicken is delicious and safe! Pro Tips Marinate Longer for Flavor: For the best flavor and tenderness, marinate the chicken in the buttermilk mixture overnight. This allows the spices to penetrate deeply. Use a Thermometer: To ensure perfectly cooked chicken, use a meat thermometer to check that the internal temperature reaches 165°F (75°C). Don’t Overcrowd the Pan: Fry the chicken tenders in batches to avoid lowering the oil temperature, which can make them greasy instead of crispy. Double Dredge for Extra Crunch: For an extra crispy coating, dip the chicken tenders back in the buttermilk and then dredge them in the flour mixture a second time before frying. {{image_2}} To make spicy buttermilk fried chicken tenders, add heat to your marinade. I suggest adding 1 to 2 teaspoons of cayenne pepper or hot sauce. This spice gives a nice kick. You can also mix in some chili powder for more depth. The heat balances well with the creamy buttermilk. If you need a gluten-free option, swap regular flour for gluten-free flour. You can also use almond flour or chickpea flour. Make sure your cornstarch is pure and gluten-free too. This keeps your tenders just as crispy without the gluten. You won’t lose flavor or crunch with this swap. You can customize your chicken tenders by adding different seasonings. Try adding Italian herbs like oregano and thyme for a fresh twist. A bit of lemon zest can brighten the flavor, too. For a smoky taste, use smoked paprika instead of regular paprika. Experiment with these ideas to find your favorite flavor profile! After enjoying your crispy buttermilk fried chicken tenders, store any leftovers in an airtight container. This method keeps them fresh and safe to eat. Place the container in the fridge. They will stay good for about 3 to 4 days. If you want to keep them longer, consider freezing. To bring back the crunch, reheat the chicken tenders in the oven. Preheat your oven to 375°F (190°C). Spread the tenders on a baking sheet lined with parchment paper. Bake them for about 10 to 15 minutes. This method helps them stay crispy. You can also use an air fryer for reheating. Set it to 350°F (175°C) and cook for about 5 to 7 minutes. If you want to freeze the tenders, first let them cool completely. Place them in a single layer on a baking sheet and freeze for about 1 hour. Once frozen, transfer them to a freezer-safe bag or container. Be sure to remove as much air as possible. They can last in the freezer for about 2 to 3 months. When ready to eat, thaw in the fridge overnight and reheat as mentioned above. Enjoy your crispy chicken tenders anytime! Marinating the chicken is key for great flavor. I recommend marinating the chicken for at least 1 hour. This allows the buttermilk and spices to soak in. For even better results, marinate overnight. The longer you marinate, the more tender and tasty your chicken will be. Yes, you can use chicken breasts. However, cut them into strips. This way, they will cook evenly like tenders. Adjust the cooking time since thicker pieces may need longer. Aim for an internal temperature of 165°F (75°C) for safety. Dipping sauces can make your meal more fun. I love using honey mustard or ranch dressing. These sauces add creaminess and sweetness that balance the crispy chicken. You can also try BBQ sauce or a spicy aioli for a kick. A squeeze of lemon adds freshness too! In this article, we explored how to make buttermilk fried chicken tenders. We covered everything from key ingredients to step-by-step cooking methods. You learned tips for a perfect crispy coating, variations you can try, and how to store your leftovers. Remember, the right marinade and frying technique matter. Enjoy your cooking journey, and don't hesitate to experiment with flavors. Fried chicken can be simple and yet so rewarding. Happy cooking!

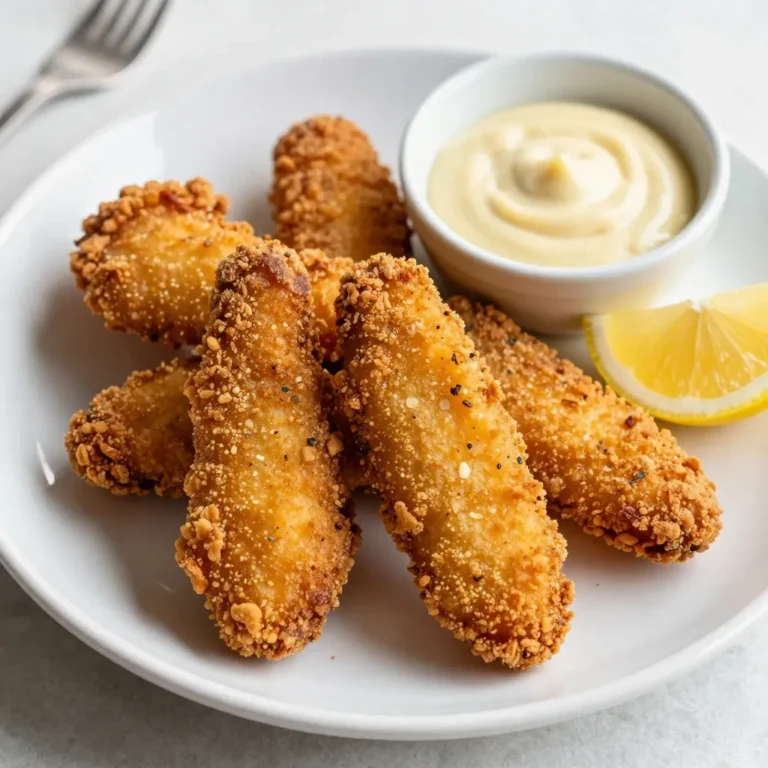
Buttermilk Fried Chicken Tenders Crispy and Delicious

- 1 ½ cups chocolate cookie crumbs - ⅓ cup unsalted butter, melted - 2 (8 oz) packages cream cheese, softened - 1 cup granulated sugar - 1 teaspoon vanilla extract - 2 teaspoons peppermint extract - 3 large eggs - 1 cup heavy cream - ½ cup mini chocolate chips - Green food coloring (optional) - Extra mini chocolate chips for topping To make mint chocolate chip cheesecake, gather these fun ingredients. The chocolate cookie crumbs create a tasty crust. Melt the unsalted butter to mix with the crumbs. Cream cheese gives the filling its smooth texture. Granulated sugar adds the right sweetness. Vanilla and peppermint extracts bring wonderful flavors. Eggs help bind everything together. Heavy cream makes the filling rich and creamy. Mini chocolate chips add extra chocolate goodness. If you want a minty color, use green food coloring. Finally, save some mini chocolate chips to top the cheesecake for a sweet finish. Enjoy selecting these ingredients and get ready to bake! {{ingredient_image_1}} First, preheat your oven to 325°F (160°C). This step is key to getting the cheesecake just right. In a medium bowl, mix 1 ½ cups of chocolate cookie crumbs with ⅓ cup of melted unsalted butter. Stir until all the crumbs are coated. Next, press this mixture into the bottom of a 9-inch springform pan. Make it even and firm. Bake this crust for 10 minutes. Once done, let it cool. In a large bowl, beat 2 packages of softened cream cheese until smooth. Gradually add 1 cup of granulated sugar. Keep mixing until they blend well. Now, add 1 teaspoon of vanilla extract and 2 teaspoons of peppermint extract. Add 3 large eggs one at a time. Mix on low speed after each egg until just combined. Next, pour in 1 cup of heavy cream. Mix it until the batter is smooth. If you want, add a few drops of green food coloring to give it a minty look. Gently fold in ½ cup of mini chocolate chips. Make sure they are evenly spread in the batter. Now, pour this batter over the cooled crust in the springform pan. Bake it in your preheated oven for about 50-60 minutes. The center should be set but still slightly jiggly. After baking, turn off the oven and crack the door. Let the cheesecake cool inside for 1 hour. Then, remove it and refrigerate for at least 4 hours, or better yet, overnight. Before serving, add extra mini chocolate chips on top for garnish. Slice the cheesecake into wedges. You can serve it with a dollop of whipped cream beside it and a sprig of fresh mint for a nice touch. Enjoy your Mint Chocolate Chip Cheesecake! To get smooth cheesecake, use softened cream cheese. Beat it well to remove lumps. Mix in sugar slowly for a creamy blend. Add eggs one at a time. This keeps the batter light and fluffy. When you add heavy cream, do it gently. Mix until smooth, but don’t overdo it. Overmixing can create cracks in your cheesecake. While peppermint is a star, you can play with flavors. Try adding a bit of orange zest for a citrus twist. Almond extract can also add a nice touch. If you enjoy dark chocolate, swap mini chocolate chips for dark ones. For a fun surprise, add crushed mint candies. You can even make it fun with different colored food dye. Slice the cheesecake into neat wedges. A sharp knife helps get clean cuts. Serve with whipped cream on the side. A sprig of fresh mint makes each plate pop with color. For a touch of elegance, drizzle chocolate sauce on the plate. A sprinkle of extra mini chocolate chips on top adds a delightful crunch. Pro Tips Use Room Temperature Cream Cheese: Ensure your cream cheese is softened to room temperature before mixing. This helps achieve a smooth and creamy texture without lumps. Don’t Overmix: Once you add the eggs, mix on low speed just until incorporated. Overmixing can lead to cracks in your cheesecake. Check for Doneness: The cheesecake is done when the edges are set but the center still has a slight jiggle. It will firm up as it cools. Chill Overnight: For the best flavor and texture, allow your cheesecake to chill overnight before serving. This enhances the mint flavor and makes it easier to slice. {{image_2}} You can make a gluten-free mint chocolate chip cheesecake easily. Just swap regular chocolate cookie crumbs for gluten-free ones. Look for brands that use rice flour or almond flour. Make sure your other ingredients, like cream cheese and butter, are also gluten-free. This way, everyone can enjoy this yummy treat! If you want a no-bake version, skip the oven altogether! Just mix the crust with chocolate cookie crumbs and melted butter. Press it into your pan as usual. For the filling, blend cream cheese, sugar, and extracts. Fold in whipped cream and chocolate chips. Chill it in the fridge for at least four hours. This version is cool and creamy, perfect for hot days! You can play with different types of chocolate in this recipe. Try using dark chocolate cookie crumbs instead of regular ones for a richer flavor. You can also use dark chocolate chips instead of mini chocolate chips. This adds a nice contrast to the mint flavor. For a sweeter treat, use white chocolate chips. Each choice gives a unique twist to your cheesecake! After you make the mint chocolate chip cheesecake, let it cool. Cover the cheesecake with plastic wrap or foil. Store it in the fridge. It stays fresh for up to a week. If you want to keep it longer, freezing is a great option. To freeze your cheesecake, first, let it cool fully. Then, wrap it tightly in plastic wrap. Place the wrapped cheesecake in a freezer-safe container or bag. It can last for up to three months in the freezer. When you are ready to eat it, thaw it in the fridge overnight. If you want to enjoy it warm, you can reheat individual slices. Place a slice on a microwave-safe plate. Heat it in the microwave for about 10 to 15 seconds. This warms it without cooking it further. For a fresh taste, top it with whipped cream or extra chocolate chips before serving. The best way to serve this cheesecake is chilled. Slice it into wedges and place them on plates. Add a dollop of whipped cream on the side. A sprig of fresh mint on top adds a nice touch. You can also sprinkle extra mini chocolate chips for added fun. Yes! You can use any type of cookie you like. Oreos are a great choice, but you can also try graham crackers or even vanilla wafers. Each cookie will give a unique flavor to the crust. Just crush them into crumbs and mix with melted butter. This cheesecake can last in the fridge for about 5 days. Make sure to cover it well to keep it fresh. If you want to enjoy it later, you can freeze it for up to 2 months. Absolutely! Light cream cheese works well as a substitute. It keeps the cheesecake creamy while reducing some calories. Just make sure it is softened for easy mixing. If you don't have peppermint extract, you can use mint extract. It has a similar flavor. You can also use vanilla extract for a different taste, just keep in mind it won’t have that minty zing. You learned how to make a delicious Mint Chocolate Chip Cheesecake. We covered simple ingredients and step-by-step instructions. Remember the tips for perfect texture and flavor. You can even try fun variations like gluten-free or no-bake options. Don't forget the best ways to store and serve your cheesecake. Creating this treat can be easy and fun. I hope you feel inspired to bake. Enjoy every bite of your creamy dessert!

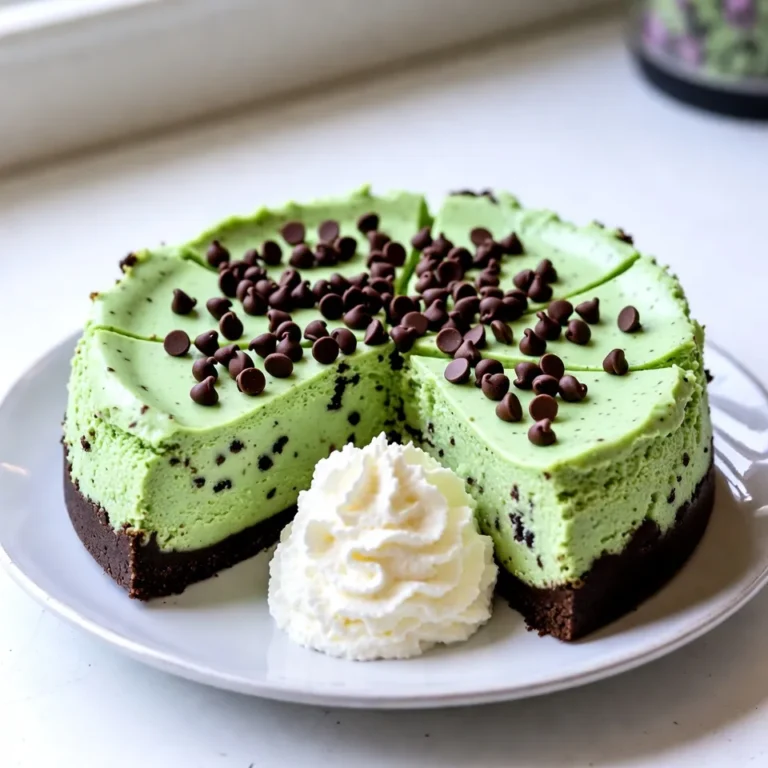
Mint Chocolate Chip Cheesecake Delightful and Easy Recipe

To make Buffalo Cauliflower Bites, you need: - Cauliflower - 1 medium head of cauliflower, cut into bite-sized florets - Batter Ingredients - 1 cup all-purpose flour - 1 tablespoon garlic powder - 1 tablespoon paprika - 1 teaspoon salt - 1 teaspoon black pepper - 1 cup water - Buffalo Sauce and Garnish - 1 cup buffalo sauce - 2 tablespoons melted vegan butter (optional) - Fresh parsley, chopped (for garnish) Each ingredient plays an important role. The cauliflower brings a hearty base. The batter adds that crunch and flavor. The buffalo sauce gives it that spicy kick. The parsley adds freshness and color. This simple list helps you create a tasty snack. {{ingredient_image_1}} Start by cutting the cauliflower into bite-sized florets. You want them small enough to cook well but large enough to hold their shape. This step is crucial. Even pieces cook evenly, and you get that nice crunch. Once you cut the cauliflower, rinse it under cold water. This helps remove any dirt. Pat them dry with a clean towel, so they are not too wet. In a large mixing bowl, combine 1 cup of all-purpose flour, 1 tablespoon of garlic powder, 1 tablespoon of paprika, 1 teaspoon of salt, and 1 teaspoon of black pepper. Mix these dry ingredients well. Next, slowly add 1 cup of water while whisking. You want the batter to be smooth, like pancake batter. It should coat the cauliflower well, creating that crispy texture when baked. Toss the cauliflower florets in the batter until they are evenly coated. Preheat your oven to 450°F (230°C) and line a baking sheet with parchment paper. Spread the coated cauliflower in a single layer on the sheet. Bake them for 25 to 30 minutes, turning halfway through. Look for a golden-brown color and crispiness. After they bake, mix 1 cup of buffalo sauce with 2 tablespoons of melted vegan butter in another bowl. Once the cauliflower is done, toss the hot bites in this mixture. Return them to the baking sheet and bake for an extra 10 to 15 minutes. This step makes them extra crispy. Serve hot, and don’t forget to sprinkle some fresh parsley on top for a pop of color! To make your Buffalo cauliflower bites extra crispy, follow these tips: - Use cold water: Start with cold water when making your batter. This helps create a nice crunch. - Don’t overcrowd the pan: Spread the florets out on the baking sheet. If they touch, they won’t crisp up. - Flip halfway: Turn the cauliflower bites halfway through baking. This ensures even cooking. Boost the flavor with these simple ideas: - Add spices to the batter: Consider extra garlic powder or onion powder for more depth. You can also add cayenne pepper for heat. - Use different sauces: Instead of just buffalo sauce, try mixing in a bit of barbecue sauce for a sweet twist. - Mix with herbs: Fresh parsley adds a nice touch. Try other herbs like cilantro or chives for variety. Serve your Buffalo cauliflower bites with these ideas: - Dips: Pair them with ranch or blue cheese dressing for a classic combo. - Veggie platter: Add celery and carrot sticks on the side for a crunchy contrast. - As a main dish: Serve with rice or quinoa. This makes for a filling meal, perfect for lunch or dinner. Pro Tips Choose Fresh Cauliflower: Opt for a head of cauliflower that feels heavy and has tightly packed florets for the best texture and flavor. Adjust the Spice Level: If you prefer milder bites, mix the buffalo sauce with a bit of ranch or yogurt to tone down the heat. Double Coating for Extra Crunch: For an even crispier texture, you can double-dip the cauliflower by coating it in the batter, baking it, and then tossing it in the buffalo sauce before a second bake. Garnish Thoughtfully: Adding fresh herbs like cilantro or green onions can elevate the dish and provide a refreshing contrast to the spicy buffalo sauce. {{image_2}} You can easily make these bites gluten-free. Just swap the all-purpose flour for a gluten-free flour blend. Look for options like almond flour or chickpea flour. These flours provide great taste and texture. You won’t lose any crunch! Want more heat? Add cayenne pepper to the batter. Start with a pinch and adjust to your taste. For a milder version, use less buffalo sauce. You can even mix it with ranch dressing for a creamy dip. This way, you can enjoy your favorite flavor without feeling overwhelmed. Instead of baking, you can fry the cauliflower bites. Heat oil in a pan and fry until golden brown. This gives you a crispy outside and tender inside. If you prefer a healthier option, try air frying. Set your air fryer to 400°F (200°C) and cook for about 15 minutes. This method cuts down on oil while keeping your bites crispy. To store leftover Buffalo Cauliflower Bites, let them cool first. Place them in an airtight container. They will stay fresh in the fridge for about three days. Make sure the container fits well. This keeps the bites crisp and tasty. When you're ready to enjoy leftovers, preheat your oven to 350°F (175°C). Place the cauliflower bites on a baking sheet. Heat them for about 10-15 minutes. This will help restore their crispy texture. You can also use an air fryer for a faster option. Set it to 350°F (175°C) and cook for about 5-7 minutes. If you want to freeze the bites, let them cool completely. Arrange them in a single layer on a baking sheet. Freeze them for about two hours. Once frozen, transfer them to a freezer-safe bag. Remove as much air as possible before sealing. They can stay in the freezer for up to three months. When ready to eat, bake them straight from the freezer at 450°F (230°C). You can serve Buffalo Cauliflower Bites with many tasty things. Pair them with ranch or blue cheese dressing for dipping. A fresh veggie platter adds crunch and color. You can also enjoy them with celery sticks or carrot sticks. These bites go great with a side of crispy fries or a simple salad. For a fun twist, serve them on a platter with sliders. This mix keeps your meal interesting and fun. Yes, you can easily make these Buffalo Cauliflower Bites vegan. Use plant-based butter instead of regular butter. Most buffalo sauces are vegan, but check the label. The batter is already vegan, so you’re good to go. This means everyone can enjoy these bites, no matter their diet. Buffalo Cauliflower Bites last about 3 to 5 days in the fridge. Store them in an airtight container to keep them fresh. When you’re ready to eat them, reheat in the oven for the best taste. They may lose some crispiness in the fridge but still taste great. Enjoy them as a quick snack or meal anytime! In this post, we explored making buffalo cauliflower bites. We covered ingredients, prep steps, and baking methods. I shared tips for crispy texture and flavor boosts. You can also find variations, storage advice, and answers to common questions. These bites are fun, tasty, and easy to make. Whether you enjoy spicy or mild, you now have options. Try these out for your next snack or meal. You’ll impress your friends and family with this healthy twist!

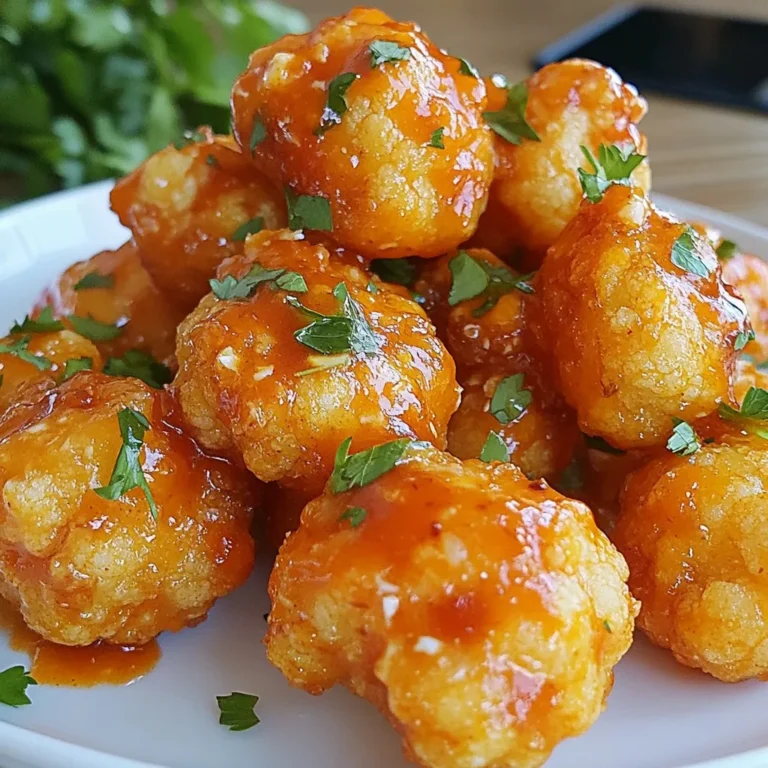
Buffalo Cauliflower Bites Crispy and Flavorful Snack

To make roasted cauliflower soup, gather these main ingredients: - 1 large head of cauliflower, cut into florets - 1 tablespoon olive oil - 1 medium onion, chopped - 3 cloves garlic, minced These ingredients form the base of your soup. The cauliflower gives it a nice body. The onion and garlic add great flavor. You can add these optional ingredients for extra creaminess and taste: - 1 cup coconut milk or heavy cream - Fresh parsley, chopped (for garnish) Coconut milk makes the soup rich and creamy. Heavy cream works well too if you prefer. Don’t forget these seasonings to boost the taste: - 1 teaspoon ground cumin - 1 teaspoon smoked paprika - Salt and pepper to taste Ground cumin adds warmth. Smoked paprika gives it a wonderful depth. Adjust salt and pepper to your liking for the perfect flavor. 1. Preheat the Oven: Start by setting your oven to 425°F (220°C). This high heat helps the cauliflower roast nicely. 2. Prepare the Baking Sheet: Grab a baking sheet and line it with parchment paper for easy cleanup. 3. Toss the Cauliflower: Place the cauliflower florets in a bowl. Add 1 tablespoon of olive oil, salt, pepper, ground cumin, and smoked paprika. Mix well until all florets are coated evenly. 1. Roasting Duration: Spread the cauliflower on the baking sheet in a single layer. Roast for about 25-30 minutes. The florets should turn golden brown and tender. 2. Flipping Halfway Through: Remember to flip the cauliflower halfway through cooking. This ensures even roasting and a nice crisp on all sides. 1. Sautéing Onion and Garlic: In a large pot, heat a splash of olive oil over medium heat. Add the chopped onion and cook for 5-7 minutes until soft and translucent. Then add 3 minced garlic cloves and cook for one more minute, stirring to prevent burning. 2. Adding Roasted Cauliflower and Broth: Once the cauliflower is roasted, add it to the pot. Pour in 4 cups of vegetable broth and bring everything to a simmer. Let it cook for 5-10 minutes to blend the flavors. 1. Immersion Blender vs. Standard Blender: Use an immersion blender to puree the soup until smooth. If you don’t have one, transfer the soup in batches to a standard blender. 2. Achieving Desired Creaminess: Blend until you reach a creamy texture. If you like a chunkier soup, blend less. 1. Incorporating Coconut Milk or Heavy Cream: Stir in 1 cup of coconut milk or heavy cream for richness. This adds a nice creaminess and depth to the soup. 2. Adjusting Seasoning Before Serving: Taste your soup and adjust salt and pepper as needed. If you want, add 1 tablespoon of lemon juice for a bright finish. Serve hot, garnished with fresh parsley. To make your roasted cauliflower soup even better, try adding spices. Here are a few ideas: - Curry powder gives a warm, rich flavor. - Thyme adds a fresh, herbal note. - Chili flakes can bring some heat. - Nutmeg adds a sweet, earthy touch. These spices can elevate the taste and make it more exciting. You might want your soup thicker or thinner. Here’s how: - To thicken: Add more roasted cauliflower or a potato. Blend until smooth. - To thin: Stir in extra vegetable broth or some water. Blend again to mix. These tips help you reach the perfect texture for your taste. Pair your soup with tasty sides for a full meal. Here are some ideas: - Warm crusty bread complements the soup well. - A fresh green salad adds crunch and brightness. - Grilled cheese sandwiches are a classic choice, too. These sides enhance the dining experience and make it even more enjoyable. {{image_2}} If you want a creamy soup but need to skip dairy, coconut milk is great. It adds a nice richness without making it heavy. You can use one cup of coconut milk in place of heavy cream. This keeps the soup smooth and rich while still being dairy-free. Plus, it adds a hint of sweetness that pairs really well with roasted cauliflower. Want to make your soup heartier? You can add protein like beans or tofu. Canned white beans work well. Just rinse and stir them in during the blending step. Tofu is another option. Use firm tofu, cut into cubes. Sauté it with the onion and garlic for added flavor. Both options boost the nutrition and make the soup more filling. You can mix in other veggies with the cauliflower for more flavor. Carrots add sweetness and color. Sweet potatoes bring a nice creaminess. Just roast them along with the cauliflower. Broccoli is another good choice. It complements the cauliflower well and adds more nutrients. Feel free to get creative and use what you have on hand! To store your leftover roasted cauliflower soup, let it cool first. Once cooled, pour it into an airtight container. Make sure to seal it well. This way, it stays fresh longer. You can keep it in the fridge for up to 5 days. When you reheat, do so on low heat to preserve the flavor. You can freeze this soup too! Pour cooled soup into freezer-safe containers. Leave some space at the top for expansion. Seal tightly and label with the date. To reheat, thaw in the fridge overnight. Then, heat on the stove until warm. If it seems thick, add a splash of broth or water. In the fridge, your soup lasts about 5 days. In the freezer, it can stay good for up to 3 months. After that, the quality may drop. Always check for any off smells or changes in texture before eating. This ensures you enjoy the rich, flavorful taste every time! You can use coconut milk or almond milk instead of dairy. Both options add creaminess. If you want a richer taste, use cashew cream. Simply soak cashews in water, blend them until smooth, and add them to the soup. This way, you keep the soup rich and tasty without using milk. Yes, frozen cauliflower works well in this soup. It is often frozen right after harvest, so it stays fresh. Just make sure to thaw it before roasting. This helps it roast evenly. You may also skip the roasting step if you prefer. Simply cook the frozen cauliflower in the broth until tender. Cauliflower is low in calories and high in fiber. It contains vitamins C, K, and B6. These vitamins support your immune system and promote healthy skin. Cauliflower also has antioxidants, which help fight inflammation. Eating cauliflower soup is a great way to enjoy these benefits while also savoring a delicious dish. Absolutely! If you have a regular blender, you can use it. Just blend the soup in small batches. Be careful with hot soup; it can splatter. Let the soup cool a bit before blending to avoid burns. Blend until smooth, then return it to the pot to heat through. This blog post covered every step to make delicious roasted cauliflower soup. We highlighted the key ingredients, cooking methods, and even variations to fit your needs. Remember, you can use your favorite spices or add protein sources. It's all about making the soup your own. Enjoy your cooking, and don't be afraid to experiment. This soup is easy to store and reheat, making it perfect for meal prep. Dive in, savor each bite, and turn this recipe into your new favorite.

Roasted Cauliflower Soup Rich and Flavorful Recipe

- 1 cup unsalted butter (2 sticks) - 2 cups granulated sugar - 4 large eggs - 1 teaspoon vanilla extract - 1 cup all-purpose flour - 1 cup unsweetened cocoa powder - 1 teaspoon baking powder - 1/2 teaspoon salt - 1 cup semi-sweet chocolate chips - 1 cup soft caramel candies (unwrapped) - 1/2 teaspoon sea salt (for topping) These ingredients create a rich and gooey brownie base. The butter adds moisture, while sugar gives sweetness. Eggs help bind everything together. Vanilla extract adds depth to the flavor. The dry ingredients bring balance. Flour provides structure, and cocoa powder gives that chocolatey taste. Baking powder helps the brownies rise, while salt enhances all the flavors. The chocolate chips add bursts of chocolate throughout. Soft caramel candies melt beautifully, creating a luscious layer. Topping with sea salt adds a perfect contrast to the sweetness. Each ingredient plays a role in making these salted caramel brownies truly special. Use fresh, high-quality items for the best results. Enjoy the process of gathering these ingredients; they set the stage for a tasty treat! 1. Preheat your oven to 350°F (175°C). Grease a 9x13-inch baking pan. Line it with parchment paper, letting the paper hang over the sides. This helps with easy removal later. 2. In a medium saucepan, melt 1 cup of unsalted butter over low heat. Add 2 cups of granulated sugar. Stir until the mix is smooth and combined. Remove from heat and let it cool slightly. 1. Stir in 4 large eggs, one at a time. Make sure each egg is blended well. 2. Add 1 teaspoon of vanilla extract to the mixture. 3. In a separate bowl, whisk together 1 cup of all-purpose flour, 1 cup of unsweetened cocoa powder, 1 teaspoon of baking powder, and 1/2 teaspoon of salt. 4. Gradually mix the dry ingredients into the wet mixture. Stir until just combined. Then, fold in 1 cup of semi-sweet chocolate chips. 1. Pour half of the brownie batter into the prepared pan. Spread it evenly across the bottom. 2. In a small bowl, melt 1 cup of soft caramel candies in the microwave for about 30 seconds until smooth. Drizzle this melted caramel over the brownie layer. 3. Carefully spread the remaining brownie batter on top of the caramel layer. Ensure it is evenly distributed. 1. Bake in the preheated oven for 25-30 minutes. Check for doneness by inserting a toothpick in the center. It should come out with moist crumbs, not wet batter. 2. Once baked, remove from the oven and sprinkle 1/2 teaspoon of sea salt over the top while it's warm. Let the brownies cool completely in the pan. Use the parchment paper to lift them out. 3. After cooling, cut into squares or rectangles and serve. To get the best texture in your brownies, avoid overmixing. Once you add the dry ingredients, stir just until combined. This keeps your brownies soft and chewy. If you mix too much, they can turn out tough and dry. Even baking is key for a great brownie. Make sure your oven is preheated correctly. Place the pan in the center of the oven for even heat. Rotate the pan halfway through baking for a perfect bake. For the best salted caramel taste, use high-quality caramel candies. Soft caramels melt well and create a rich flavor. You can even make your own caramel if you're feeling adventurous. Adjust the sweetness with toppings. A sprinkle of sea salt enhances the caramel taste. If you want less sweetness, use dark chocolate chips. This gives a nice contrast to the caramel. Presentation can make your brownies stand out. Serve them in a stack for a fun look. Dust them with cocoa powder or powdered sugar for extra flair. You can also add a scoop of vanilla ice cream on the side. This adds a creamy element that pairs well with the rich brownies. A drizzle of chocolate sauce can also add a nice touch. {{image_2}} You can make these brownies even more exciting! Try adding chopped nuts like walnuts or pecans for a crunchy texture. You can also mix in other types of chocolate. Dark chocolate or white chocolate chips can add a new flavor twist. You might also consider flavored caramel. Salted caramel adds richness, while vanilla caramel gives a sweet note. Want gluten-free brownies? Just use gluten-free all-purpose flour instead of regular flour. This simple swap makes a big difference! For a vegan option, replace eggs with flax eggs. Mix one tablespoon of ground flaxseed with three tablespoons of water. Let it sit for five minutes to thicken. Use coconut oil instead of butter for a rich taste. Get creative with seasonal flavors! For holidays, add peppermint extract for a festive touch. You might also fold in crushed candy canes for extra color and crunch. During fall, stir in pumpkin spice or chopped apples for a cozy feel. For summer, try a fruity twist by adding fresh berries or citrus zest. Each season brings new ways to enjoy these delicious brownies! To keep your salted caramel brownies fresh, follow these simple steps: - Cool Completely: Let the brownies cool fully in the pan. - Use Airtight Containers: Store them in a tight container. This keeps moisture in and air out. - Layer with Parchment: Place a piece of parchment paper between layers if stacking. This prevents sticking. Freezing brownies allows you to enjoy them later. Here’s how to do it: - Wrap Well: Cut brownies into squares. Wrap each piece in plastic wrap. Then, put them in a freezer bag. - Label and Date: Write the date on the bag. This helps track how long they’ve been frozen. For thawing: - Leave at Room Temperature: Take out the brownies and let them sit for about 30 minutes. They taste best this way. - Microwave Heating: If you want them warm, use the microwave for 10-15 seconds. Salted caramel brownies can last for a while if stored right: - At Room Temperature: They stay fresh for up to 5 days. - In the Fridge: They can last up to 10 days in the fridge. Watch for signs of spoilage: - Dry or Hard Texture: If they feel dry, it’s time to toss them. - Unpleasant Smell: A strange smell means they have gone bad. Enjoy these delicious brownies while they are fresh! Can I use dark chocolate instead of semi-sweet? Yes, you can use dark chocolate. It will add a richer taste. Just keep in mind that it will make the brownies less sweet. If you like dark chocolate, go for it! How do I prevent the caramel from burning? To prevent burning, melt the caramel on low heat. Stir it often and keep an eye on it. If it looks too thick, you can add a little cream to keep it smooth. What pairs well with salted caramel brownies? These brownies pair well with vanilla ice cream. The cold ice cream balances the warm, gooey brownies. You can also serve them with a drizzle of chocolate sauce for extra flavor. Can I serve them warm or cold? You can serve them either way! Warm brownies are soft and gooey. Cold brownies are fudgy and rich. It’s all about your personal choice. What can I use instead of soft caramel candies? If you cannot find soft caramel candies, try using caramel sauce. You can also use homemade caramel if you have the time. Just make sure it’s thick enough to layer. Are there alternatives to butter for a healthier option? Yes, you can use coconut oil or applesauce instead of butter. Coconut oil gives a nice flavor, while applesauce keeps the brownies moist without added fat. This blog post covered how to make delicious salted caramel brownies. We talked about the main and dry ingredients, plus tips for mixing and baking. You learned how to layer your brownies for the best flavor and texture. I shared variations to fit dietary needs and seasonal occasions. Remember to store them properly for the best taste. With these steps, you'll bake tasty brownies that impress everyone. Enjoy your baking journey and happy treating!

Salted Caramel Brownies Bakery-Style Delight

PREV 1 … 10 11 12 … 86 NEXT
spicy fork kitchen

explore

DessertsDinnerAppetizersDrinks

Our Policies

  • Cookie Policy
  • Copyright Policy
  • Disclaimer
  • GDPR Policy
  • Terms Of Use
Back to Top
  • About
  • Contact Us
  • Privacy Policy
© 2026 spicy fork kitchen