FREE DINNER EBOOK! Get your copy!
  • Cookie Policy
  • GDPR Policy
  • Disclaimer
  • Terms Of Use
  • Visit my other site: Fun Cookie Recipes
spicy fork kitchen
  • Home
  • Dinner
  • Desserts
  • Drinks
  • Appetizers
  • Contact
  • About
  • Privacy Policy
  • Home
  • Dinner
  • Desserts
  • Drinks
  • Appetizers
  • Contact
  • About
  • Privacy Policy
  • Cookie Policy
  • GDPR Policy
  • Disclaimer
  • Terms Of Use
Visit my other site: Fun Cookie Recipes

HOME / CATEGORIES /

Latest

- 12 mozzarella cheese sticks - 1 cup all-purpose flour - 2 large eggs, beaten - 1 cup breadcrumbs (preferably panko) - 1 teaspoon garlic powder - 1 teaspoon Italian seasoning - ½ teaspoon salt - ½ teaspoon black pepper - Cooking spray These ingredients are key for making air fryer mozzarella sticks. The mozzarella cheese gives them that gooey, stringy texture we all love. Using panko breadcrumbs adds extra crunch, which is vital for that crispy bite. The eggs help the breadcrumbs stick, while the flour gives a nice base layer. The seasoning mix with garlic powder, Italian seasoning, salt, and pepper boosts the flavor. You can always adjust the seasonings to match your taste. Cooking spray is essential for ensuring the sticks crisp up nicely in the air fryer. Make sure to gather all these items before you start. This way, you can move smoothly through the recipe without a hiccup. Enjoy gathering your ingredients! - Cut mozzarella sticks in half if you want shorter bites. - Arrange the sticks on a parchment-lined baking sheet. This keeps them from sticking. - Set up three bowls: one with flour, one with beaten eggs, and one with breadcrumbs. - In the bowl with breadcrumbs, mix in garlic powder, Italian seasoning, salt, and pepper. - Take a mozzarella stick and coat it in flour first, shaking off any extra. - Dip the floured stick into the beaten eggs, ensuring it is fully coated. - Roll the egg-coated stick in the breadcrumb mix, pressing lightly to stick. - Repeat this for all the sticks until they are all coated well. - Place the coated mozzarella sticks in the freezer for about 30 minutes. This step helps prevent cheese from melting too much. - Preheat your air fryer to 390°F (200°C) for about 5 minutes. - Lightly spray the air fryer basket with cooking spray. - Arrange the mozzarella sticks in a single layer, ensuring they do not touch. This helps them cook evenly. - Spray the tops of the sticks lightly with cooking spray for extra crispiness. - Air fry for 6-8 minutes until they are golden brown and crispy. Shake the basket halfway through for even cooking. - Remove the mozzarella sticks and let them cool slightly before serving. Freezing your mozzarella sticks before air frying is key. It helps keep the cheese from melting too fast. When you freeze them for about 30 minutes, they firm up nicely. This will give you a crispier outside and gooey inside. Arrange the sticks in the air fryer basket without touching each other. This allows hot air to flow around each stick. A good layout helps them cook evenly, giving you that perfect crunch. For cooking, set your air fryer to 390°F (200°C). Cook your sticks for 6-8 minutes. Check them halfway through to ensure even cooking. Shake the basket gently to move them around. This helps them brown nicely on all sides. Serve your crispy mozzarella sticks with marinara sauce for dipping. It adds flavor and makes for a fun snack. You can also garnish with fresh parsley for a nice touch. Pair these sticks with a simple salad or some crunchy veggies. They make a great party appetizer too! {{image_2}} You can easily change the taste of your mozzarella sticks. Start by adding herbs or spices to the breadcrumb mix. Try mixing in oregano, paprika, or even red pepper flakes for a spicy kick. You can also stuff the cheese sticks with herbs or other cheeses. For example, adding a little basil or cheddar cheese gives a new twist. If you need gluten-free options, you can swap regular breadcrumbs. Use gluten-free breadcrumbs made from rice or corn. You can also use almond flour instead of all-purpose flour for a crunchy coating. For those who want a dairy-free option, look for dairy-free mozzarella sticks. There are many brands that make tasty non-dairy cheese. Air frying isn't the only way to cook these sticks. You can bake them in the oven, too. Preheat your oven to 400°F (200°C) and arrange the sticks on a baking sheet. Bake them for about 10-12 minutes or until golden brown. If you prefer traditional frying, heat oil in a pan. Fry the sticks for 2-3 minutes on each side until they are crispy. Each method gives a different texture and flavor. After cooking, let the mozzarella sticks cool down. Place them in an airtight container. You can store them in the fridge for up to 3 days. To keep them crispy, reheat in the air fryer at 350°F for about 5 minutes. This helps restore their crunch. If you want to freeze uncooked mozzarella sticks, first place them on a baking sheet. Make sure they do not touch each other. Freeze them for 30 minutes until solid. After that, transfer the sticks to a freezer bag. They will stay fresh for about 2 months. For best quality, label the bag with the date. Cooked mozzarella sticks can last for 3 days in the fridge. If frozen, they are best used within 2 months. Over time, they may lose some taste and texture. Always check for any off smells or changes in texture before eating. You should freeze the mozzarella sticks for about 30 minutes. This helps the cheese keep its shape while cooking. If you skip this step, the cheese may melt out during frying, and you will lose that gooey, melty center. Yes, you can prepare the mozzarella sticks in advance. After you coat them, freeze them directly. Once frozen, you can store them in a bag. This way, you can air fry them whenever you want a tasty snack. Some popular dips include marinara sauce, ranch dressing, or garlic aioli. Each sauce adds a new flavor dimension to the sticks. Feel free to try different sauces to find your favorite pairing! You now know how to make air fryer mozzarella sticks. We covered the main ingredients, step-by-step instructions, and tips for a perfect crunch. Remember to freeze them for the best results. You can also try different flavors or cooking methods. Store leftovers properly to keep them tasty. With these easy steps, you can enjoy a delicious snack anytime. Happy cooking!

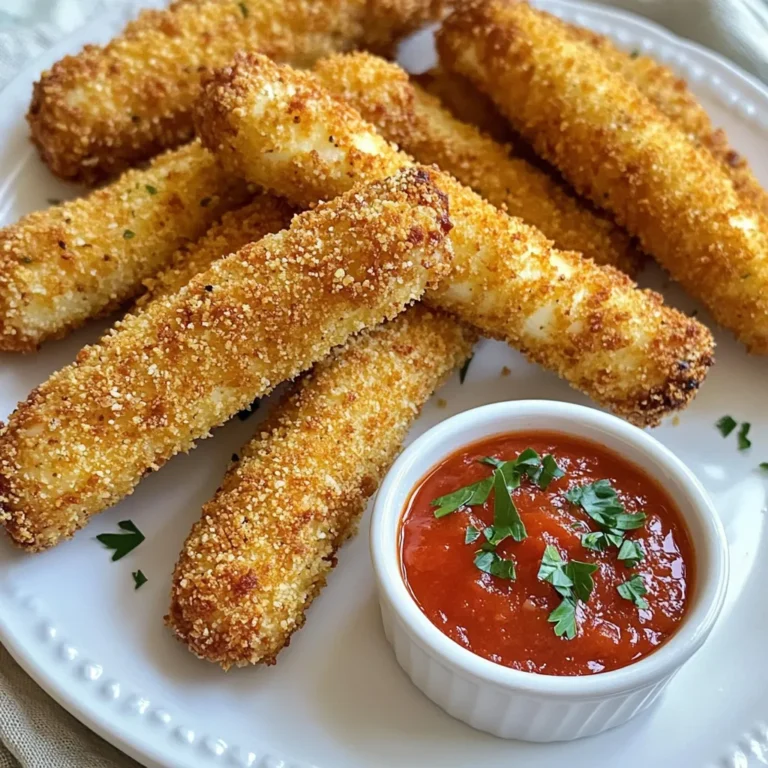
Air Fryer Mozzarella Sticks Crispy and Delicious Treat

- 2 medium delicata squashes - 4 tablespoons unsalted butter - 2 tablespoons honey - 1 teaspoon cinnamon - 1/2 teaspoon nutmeg - Salt and pepper to taste - Fresh parsley or thyme for garnish You will need two medium delicata squashes for this recipe. Look for ones that feel firm and have smooth skin. You will also need four tablespoons of unsalted butter. It adds a rich flavor that balances the sweet honey. Two tablespoons of honey bring a delightful sweetness to the dish. Honey pairs perfectly with the spices. One teaspoon of cinnamon adds warmth, while half a teaspoon of nutmeg brings depth to the flavor. Don't forget salt and pepper for seasoning! They enhance the natural taste of the squash. Lastly, fresh parsley or thyme adds a colorful touch and fresh flavor to the final dish. These ingredients come together to create a dish that is both savory and sweet. - Preheat your oven to 400°F (200°C). Line a baking sheet with parchment paper. - Cut the delicata squashes in half lengthwise. Scoop out the seeds with a spoon. - Slice the squashes into 1/2-inch thick half-moons. This ensures even cooking. - In a small saucepan over medium heat, melt the unsalted butter. - Once melted, stir in honey, cinnamon, nutmeg, salt, and pepper. Mix well until combined. - In a large bowl, add the delicata squash slices. Pour the honey butter mixture over them. - Toss well so each slice is coated with the honey butter mix. - Spread the squash slices in a single layer on the prepared baking sheet. - Roast in the oven for 20-25 minutes. Flip halfway through for even browning. - Remove from the oven once tender and caramelized. Let cool for a minute. - Transfer the roasted squash to a serving dish. - Garnish with fresh parsley or thyme for a touch of color and flavor. - Look for firm and unblemished squashes. Soft spots can mean spoilage. - Choose medium-sized squashes for a balance of flavor and texture. Heavier ones often have more flesh. - Aim for a 2:1 ratio of butter to honey. This balance gives a rich flavor. - If you want alternatives, try maple syrup or agave. They both add sweetness. - Cut the squash into even half-moons. This helps them cook uniformly. - Flip the squash halfway through roasting. This ensures even browning and caramelization. {{image_2}} You can switch things up with flavors. Try using maple syrup instead of honey. It gives a unique taste, sweet and rich. You can also add minced garlic for a savory twist. Garlic adds depth and pairs well with the sweetness. If you want to cook the squash differently, try using an air fryer. Set it to 375°F (190°C) and cook for about 15 minutes. This method makes the squash crispy and delicious. You can also grill the squash for a smoky flavor. Just slice it, brush with oil, and grill for about 5-7 minutes on each side. If you need a vegan option, use vegan butter and agave syrup instead of honey and butter. These keep the dish tasty and plant-based. For gluten-free eaters, this recipe is naturally gluten-free. Just ensure any added ingredients are also gluten-free, like the seasoning. To store leftovers, place them in an airtight container. Make sure to cool the squash first. This keeps it fresh and safe. You can store it in the fridge for about 3 to 5 days. If you see any mold, throw it away. Always check before eating leftovers. For freezing, let the squash cool completely. Spread it in a single layer on a baking sheet and freeze for 2 hours. Once frozen, transfer the pieces to a freezer bag. Remove as much air as possible. This method helps avoid freezer burn. You can freeze the squash for up to 3 months. To thaw, move the bag to the fridge overnight. For quick thawing, place the bag in cold water. To keep the texture, the oven works best. Preheat it to 350°F (175°C). Place the squash on a baking sheet and heat for about 10-15 minutes. If you use a microwave, cover the squash with a damp paper towel. Heat in short bursts to avoid sogginess. This way, you enjoy your squash just as much as before! Delicata squash is a sweet, creamy vegetable. It has a thin, edible skin. This squash is often yellow with green stripes. You can roast, bake, or steam it. It works well in soups, salads, or as a side dish. The taste is mild and slightly nutty. Yes, you can use other types of squash. Butternut squash is sweet and creamy. It needs longer cooking time. Acorn squash has a slightly earthy flavor. It cooks faster and is easier to cut. Delicata squash offers a unique texture and taste that stands out. You can tell when the squash is done by its softness. Use a fork to poke it. If it goes in easily, it’s ready. Look for a golden-brown color on the edges. This shows it has caramelized well. The sweet flavors will shine when cooked properly. This blog post covers how to prepare delicious delicata squash. You learned about the simple ingredients, preparation, and roasting steps. I shared tips for selecting the best squash and variations to enhance flavor. You can store leftovers safely and even freeze them for later. By using this guide, you can enjoy a tasty dish that caters to many diets. Cook with confidence and enjoy the sweet and savory flavors that delicata squash brings to your table.

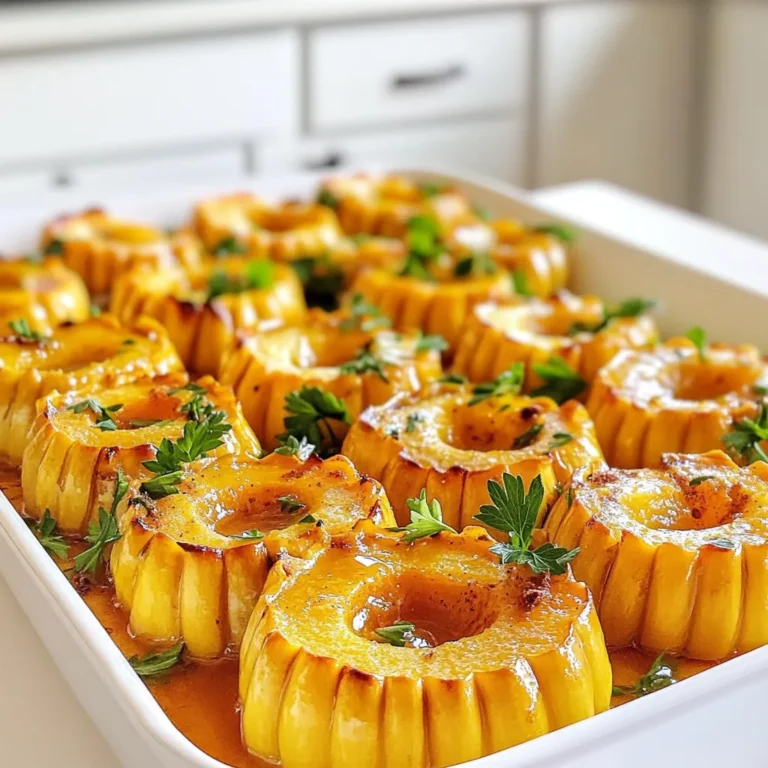
Honey Butter Delicata Squash Savory and Simple Recipe

- 1 cup rolled oats - 1/2 cup almond butter (or peanut butter) - 1/2 cup pumpkin puree - 1/4 cup honey or maple syrup - 1 teaspoon pumpkin spice mix - 1/2 teaspoon vanilla extract - 1/4 cup ground flaxseed - 1/3 cup mini chocolate chips (optional) - A pinch of salt Each of these ingredients brings something special. First, rolled oats provide fiber. They help with good digestion and keep you full. Almond butter adds healthy fats and protein. It’s good for your heart. Pumpkin puree is low in calories but high in vitamins. It’s full of vitamin A, which is great for your eyes. Honey or maple syrup sweetens the bites naturally. Both offer some antioxidants. Ground flaxseed adds omega-3 fatty acids. These are good for your brain. Lastly, mini chocolate chips can add some fun. They make your bites taste sweeter and more enjoyable. You can swap almond butter for peanut butter if you wish. Both work well in this recipe. If you want a nut-free option, try sunflower seed butter. It has a similar texture. For sweeteners, use agave syrup instead of honey or maple syrup. It’s a great vegan choice. You can also leave out chocolate chips for fewer sugars. If you don’t have pumpkin spice mix, make your own with cinnamon, nutmeg, and ginger. Each alternative keeps the flavor and fun of the bites. To make these pumpkin spice energy bites, start by gathering all your ingredients. You need rolled oats, almond butter, pumpkin puree, honey or maple syrup, pumpkin spice mix, vanilla extract, ground flaxseed, mini chocolate chips, and a pinch of salt. This recipe takes about 15 minutes to prep and 30 minutes to chill. 1. In a large mixing bowl, combine the rolled oats, almond butter, pumpkin puree, honey (or maple syrup), and vanilla extract. Mix everything well until you have a thick, sticky mixture. 2. Next, add the pumpkin spice mix, ground flaxseed, and a pinch of salt. Stir until all the ingredients blend together nicely. 3. If you want some extra sweetness, fold in the mini chocolate chips. They add a fun touch to your bites. 4. Now, use your hands to form the mixture into bite-sized balls. Press them tightly so they hold their shape. Place the balls on a parchment-lined baking sheet. 5. Once all the mixture is rolled, refrigerate the bites for at least 30 minutes. This helps them set up and makes them easier to eat. 6. After chilling, store the energy bites in an airtight container in the fridge. They stay fresh for up to a week. When mixing, use a sturdy spoon or spatula. If the mixture feels too sticky, dampen your hands slightly before rolling. This makes it easier to shape the bites. If you want to get creative, try adding nuts or dried fruits. Have fun with it! To keep your pumpkin spice energy bites fresh, store them in an airtight container. Place the container in the refrigerator. They will stay good for up to a week. If you want them to last longer, consider freezing them. Just make sure to separate each bite with parchment paper. This way, they won’t stick together. You can easily tailor these bites to your taste. If you love nuts, add chopped walnuts or pecans. Want more sweetness? Toss in dried cranberries or raisins. You can also switch the pumpkin spice mix for cinnamon or ginger. This allows you to play with flavors and find your favorite combo. These energy bites are great for meal prep. You can make a large batch in just 15 minutes. After rolling them into balls, chill them for 30 minutes. Once set, store them in the fridge. This way, you have a tasty snack ready when hunger strikes. Just grab a few and enjoy! {{image_2}} You can change the taste of your pumpkin spice energy bites easily. Adding nuts is a great way to boost crunch. Try walnuts or pecans for a rich flavor. Dried fruits also work well. Raisins or cranberries can add a sweet touch. If you love chocolate, mix in dark chocolate chips. This makes each bite even more fun! These energy bites can fit many diets. For a vegan option, use maple syrup instead of honey. Almond butter is already vegan, which is great! To make them gluten-free, ensure your oats are labeled gluten-free. This way, everyone can enjoy them without worry. You can also swap out nut butter for sun butter if there are nut allergies. Serving these bites can be fun and creative! Try placing them on a festive plate for a party. You can also pack them in small bags for snacks on the go. For a fun twist, serve them with yogurt or a fruit dip. This adds a tasty layer to your snack time. You can even roll them in shredded coconut for a tropical vibe! To keep your pumpkin spice energy bites fresh, store them in an airtight container. A glass jar or plastic tub works well. This helps prevent them from drying out. You can keep them in the fridge or at room temperature, but the fridge is best for longer freshness. In the refrigerator, these bites last up to one week. I always recommend checking for any signs of spoilage before eating. If you see any changes in color or smell, it's best to toss them. Freezing is a great option if you want to store these bites longer. To freeze, place the energy bites in a single layer on a baking sheet. Freeze them for about one hour until solid. Then transfer them to a freezer-safe bag. They can last up to three months in the freezer. Just thaw them overnight in the fridge before enjoying. Pumpkin spice energy bites last about one week in the fridge. Store them in an airtight container. This keeps them fresh and tasty. If you want to enjoy them longer, you can freeze them. They can last up to three months in the freezer. Yes, you can use a different nut butter. Peanut butter works great if you like its flavor. Sunflower seed butter is a good choice for nut-free diets. Just keep the same amount as almond butter. You can use agave nectar or brown rice syrup. These options keep the sweetness. For a sugar-free choice, try stevia or erythritol. Adjust the amount to match your taste. Yes, these energy bites are healthy. They are full of fiber from oats and flaxseed. The pumpkin puree adds vitamins. Almond butter provides healthy fats. Enjoy them as a quick snack or a post-workout treat. This blog covers making tasty pumpkin spice energy bites. We explored key ingredients and their benefits, plus some fun alternatives. I shared step-by-step instructions for preparing and cooking them. You also learned storage tips and how to customize or vary flavors. In the end, these energy bites are easy to make and perfect for snacks. So, try different twists to find your favorite! Enjoy them fresh, or store them for later.

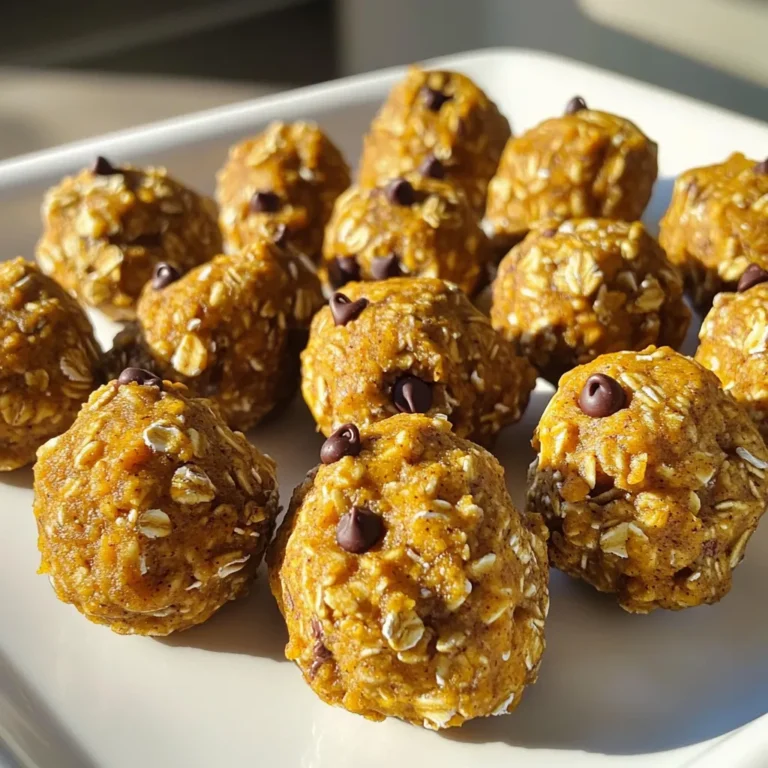
Pumpkin Spice Energy Bites Tasty and Easy Recipe

- 2 medium sweet potatoes, peeled and diced - 1 can (15 oz) black beans, drained and rinsed - 1 can (15 oz) diced tomatoes (with juices) - 1 medium onion, diced - 2 cloves garlic, minced - 1 bell pepper (any color), diced - 1 cup corn kernels (fresh or frozen) - 2 cups vegetable broth - 2 tablespoons chili powder - 1 tablespoon cumin - 1 teaspoon smoked paprika - Salt and pepper to taste - Fresh cilantro, chopped (for garnish) - Avocado slices (for serving) It's key to measure your ingredients well for the best taste. For sweet potatoes, use about two medium ones. You can also use canned black beans. Make sure to drain and rinse them. The diced tomatoes add moisture, so keep the juices. For spices, two tablespoons of chili powder will give a nice kick. One tablespoon of cumin adds warmth, and one teaspoon of smoked paprika gives depth. Salt and pepper should be added to your taste, so start small and adjust. If you don't have sweet potatoes, regular potatoes work too. If you're out of black beans, kidney beans or pinto beans can replace them. For diced tomatoes, you can use fresh tomatoes if preferred. Don’t have corn? Skip it or use another veggie like zucchini. If you want to add heat, toss in jalapeños. For a richer flavor, use chicken broth instead of vegetable broth. First, gather your vegetables. You need two medium sweet potatoes. Peel them and cut them into small cubes. Next, take one medium onion and chop it finely. Then, grab one bell pepper of your choice. Dice it up as well. Lastly, mince two cloves of garlic. This mix will create a strong base for your chili. Now it’s time to build your chili in the slow cooker. Start by adding the diced sweet potatoes. Then, open a can of black beans. Drain and rinse them before adding to the pot. Next, pour in a can of diced tomatoes with their juices. Add the chopped onion, bell pepper, and corn. Finally, sprinkle in the minced garlic. Stir everything together to combine well. Cover the slow cooker with its lid. Set it to low heat for six to eight hours. If you need it faster, use high heat for three to four hours. The sweet potatoes should be tender when done. After the time is up, taste the chili. Adjust the seasonings if needed before serving. Enjoy the warmth and comfort of your chili! To get the best texture, cut the sweet potatoes into small, even pieces. This helps them cook at the same rate as the other ingredients. You should also avoid overcooking the chili. Check it after three hours on high or six hours on low. This way, the sweet potatoes stay soft but not mushy. Seasoning is key to a great chili. I love to use two tablespoons of chili powder for a nice kick. Adding one tablespoon of cumin gives it depth. Smoked paprika adds a warm, smoky flavor. Taste the chili before serving. Adjust the salt and pepper as needed to make it just right. Garnishes can elevate your dish. I recommend chopped fresh cilantro for a burst of color. Slices of avocado add creaminess and richness. You can also add a dollop of sour cream or Greek yogurt for tang. Serve it with tortilla chips for a crunchy contrast. Enjoy your meal with these tasty touches! {{image_2}} You can change up the chili by adding more vegetables. Try carrots or zucchini for a nice crunch. Kale or spinach will add color and nutrients. If you like, toss in some diced jalapeños for a spicy kick. Just remember, cooking times may change based on what you add. You can easily adjust the heat level in this chili. For a mild taste, skip the jalapeños and reduce the chili powder. If you like heat, add extra chili powder or some crushed red pepper. You can even use hot salsa instead of diced tomatoes for a fiery touch. Want your chili to be heartier? Add cooked ground meat like turkey or beef. For a vegetarian option, mix in extra beans or lentils. Tofu is also a great protein choice. Just make sure to adjust the seasoning, as these additions can change the flavor. To store your leftover chili, let it cool first. Transfer the chili to a clean container. Make sure the container has a tight lid. Store it in the fridge for up to five days. This keeps the flavors fresh and tasty. If you want to keep it longer, consider freezing it. When you are ready to eat your chili, reheating is easy. You can use the microwave or a stove. If using a microwave, place the chili in a bowl. Heat it for 1-2 minutes, stirring halfway. If using a stove, pour the chili into a pot. Heat on medium until it’s hot. Stir often to prevent sticking. Freezing is a great way to keep your chili for later. Use freezer-safe bags or containers for best results. Portion the chili into smaller amounts. This way, you can thaw only what you need. Label each bag with the date and contents. The chili can last up to three months in the freezer. When you’re ready to use it, thaw it overnight in the fridge. Reheat as mentioned above for a warm meal. Yes, you can use other beans. Some good options are kidney beans, pinto beans, or cannellini beans. Just be sure to drain and rinse them like you would with black beans. Each type brings a different flavor and texture, so feel free to mix things up! This recipe is already vegan! It uses sweet potatoes, black beans, and vegetable broth. Just make sure your vegetable broth does not contain any animal products. All the ingredients in this chili are plant-based, so you can enjoy it without worry. You can serve this chili with many tasty sides. Here are a few ideas: - Rice or quinoa: These grains add a nice base. - Cornbread: It pairs well and adds a sweet touch. - Tortilla chips: They give a great crunch. - Avocado slices: They add creaminess and flavor. - Fresh cilantro: Use it for a fresh burst on top. Feel free to mix and match based on your taste! This article covered all you need for Sweet Potato Black Bean Chili. You learned about the right ingredients, cooking steps, and how to make it your own. I shared tips for texture, flavor, and garnishes. With variations and storage tips, you can enjoy it many ways. Whether spicy or mild, this dish is easy and tasty. Remember, cooking is fun. Experiment and trust your taste buds to create a meal you'll love.

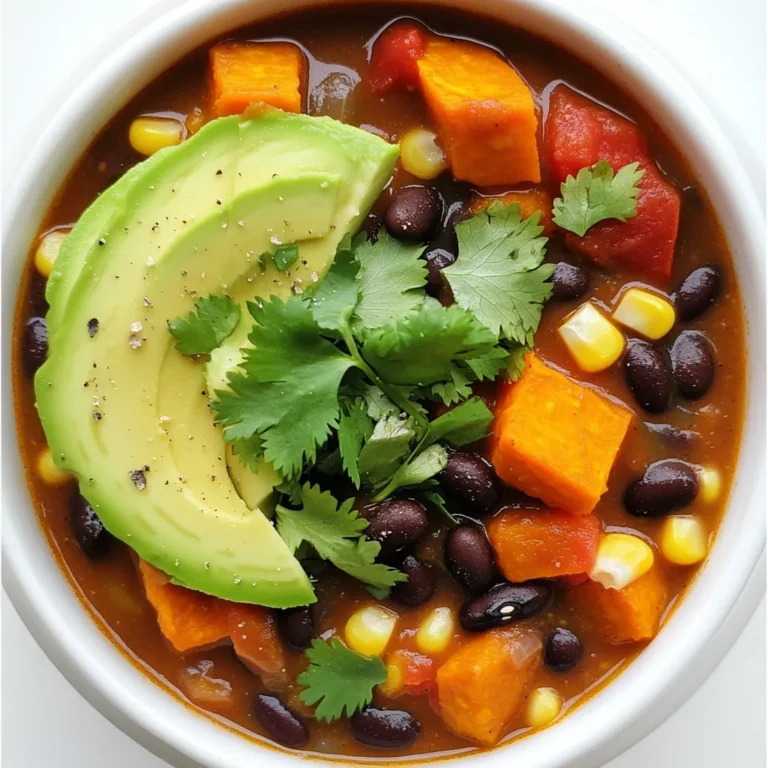
Savory Slow Cooker Sweet Potato Black Bean Chili Recipe

- 2 cups cooked chicken, shredded - 1 cup BBQ sauce (your favorite brand) - 1 bag tortilla chips The main stars of this dish are shredded chicken, BBQ sauce, and tortilla chips. I love using cooked chicken because it saves time. You can use leftover chicken or buy rotisserie chicken for ease. The BBQ sauce adds a smoky, sweet flavor that makes the nachos sing. Choose a sauce you love to really make it shine. Tortilla chips hold everything together and give a nice crunch. - 2 cups shredded cheddar cheese - 1 cup black beans, drained and rinsed - 1 cup corn (fresh or canned) - 1 jalapeño, sliced (optional for heat) Next, we have the toppings. Shredded cheddar cheese is a must for that gooey goodness. Black beans add protein and a hearty texture. Corn gives a sweet pop to each bite. If you like heat, add sliced jalapeños for an extra kick. These toppings balance the flavors and make each bite exciting. - 1/2 cup pickled red onions (for garnish) - Fresh cilantro, chopped (for garnish) - Sour cream (for serving) For the finishing touch, I recommend pickled red onions. They add tang and crunch. Fresh cilantro gives a burst of freshness. Sour cream is perfect for cooling down the heat. You can drizzle it on top or serve it on the side for dipping. These extras make the nachos even more fun and flavorful. Start by preheating your oven to 400°F (200°C). This temperature helps the cheese melt well. While the oven heats, take 2 cups of cooked chicken and shred it into bite-sized pieces. In a mixing bowl, add 1 cup of your favorite BBQ sauce to the chicken. Mix it well to coat every piece. This gives the chicken a rich flavor that pairs great with the nachos. Next, grab a large sheet pan and spread a layer of tortilla chips across the bottom. Make sure to cover the pan evenly. This creates a solid base for your toppings. Now, take the BBQ chicken and distribute it over the chips. After that, sprinkle 1 cup of drained black beans and 1 cup of corn on top. These add texture and nutrition. Finally, cover everything with 2 cups of shredded cheddar cheese. If you like heat, add sliced jalapeños on top. Place the sheet pan in the oven and bake for 15-20 minutes. You want the cheese to melt and become bubbly. Keep an eye on it to avoid burning. Once it’s ready, take it out and add a sprinkle of pickled red onions and fresh cilantro for color. Serve the nachos right away. You can also offer sour cream on the side for dipping. Enjoy your tasty and fun meal! How to shred chicken easily To shred chicken fast, use two forks. Hold one fork steady while pulling with the other. You can also use a stand mixer. Just place the chicken in the bowl and mix on low. It will shred in seconds. Choosing the right BBQ sauce Pick a BBQ sauce that you love. Sweet, spicy, or smoky? Each sauce gives the nachos a different flavor. Try a few brands to find your favorite. Look for sauces with natural ingredients for the best taste. Recommended spices for extra taste Add spices like cumin, paprika, or garlic powder to the chicken. These spices boost the flavor and make the dish more exciting. A pinch of cayenne pepper adds heat if you like spice. Substitutions for healthier options Want a healthier nacho? Use baked tortilla chips instead of fried ones. You can swap cheddar cheese for a lower-fat version. For added fiber, use more black beans or add veggies like peppers. Ideas for serving at gatherings Serve nachos on a large platter for a fun look. You can also use smaller plates for individual servings. Add a bowl of sour cream in the center for easy dipping. How to arrange the nachos for a visual appeal Layer the nachos neatly on the plate. Start with chips, then chicken, beans, and cheese. Add vibrant toppings like jalapeños and pickled onions last. This creates a colorful and tempting dish. {{image_2}} You can make delicious nachos without meat. Substitute chicken with grilled veggies like bell peppers and zucchini. They add great flavor and crunch. You can also use black beans or kidney beans. They are hearty and full of protein. This way, everyone can enjoy the nachos. Want to spice things up? Try using spicy BBQ sauces. They add a kick that many enjoy. You can also add fruits like pineapple for sweetness. The mix of sweet and savory makes each bite exciting. Switch up the cheese for fun. Try pepper jack for a spicy twist or a blend of cheeses for depth. You can also experiment with different chip flavors. Sour cream and onion chips or spicy nacho chips add a new layer of taste. Don't be afraid to get creative! Store nachos in an airtight container. This keeps them fresh. Place them in the fridge right after serving. They stay good for about three days. To reheat, use the oven. Preheat it to 350°F (175°C). Spread the nachos on a baking sheet. Bake for 10 minutes or until warm. This method keeps the chips crispy. Yes, you can freeze nachos! However, it’s best to freeze the toppings separately. Lay tortilla chips flat in a freezer bag. Store cooked BBQ chicken, cheese, and beans in separate bags. This way, the chips won’t get soggy. To use, thaw everything in the fridge overnight. Then reheat in the oven as before. Nachos last about three days in the fridge. After that, they may lose their taste and texture. Use leftovers in new dishes. You can add them to salads or soups. Nachos also work great as a topping for baked potatoes. Get creative and enjoy your leftovers! To keep nachos crispy, follow these tips: - Use fresh tortilla chips. - Spread chips evenly on the pan. - Avoid adding too many toppings. - Bake the nachos, not just broil them. - Serve right away to enjoy the crunch. These steps help prevent sogginess. When you layer too many wet toppings, the chips absorb moisture. The key is to find a good balance. You can pair BBQ chicken nachos with: - Fresh guacamole - Salsa or pico de gallo - A crisp green salad - Sweet potato fries - Coleslaw These sides add flavor and texture. They also offer a mix of tastes that complement the nachos. Try to choose sides that bring freshness or crunch. Yes, rotisserie chicken works great! - It's already cooked and saves time. - It has a tasty flavor from spices. - You can shred it easily. Using rotisserie chicken makes this dish quick and simple. It allows you to focus on making the nachos even better with your favorite BBQ sauce and toppings. BBQ chicken nachos are simple, fun, and packed with flavor. You learned about the main ingredients, toppings, and how to make them from scratch. I shared tips for cooking and presenting the dish, plus variations for different tastes. As you whip up this tasty snack, remember that the key is having fun with it. Try new flavors and enjoy the process. Happy cooking!

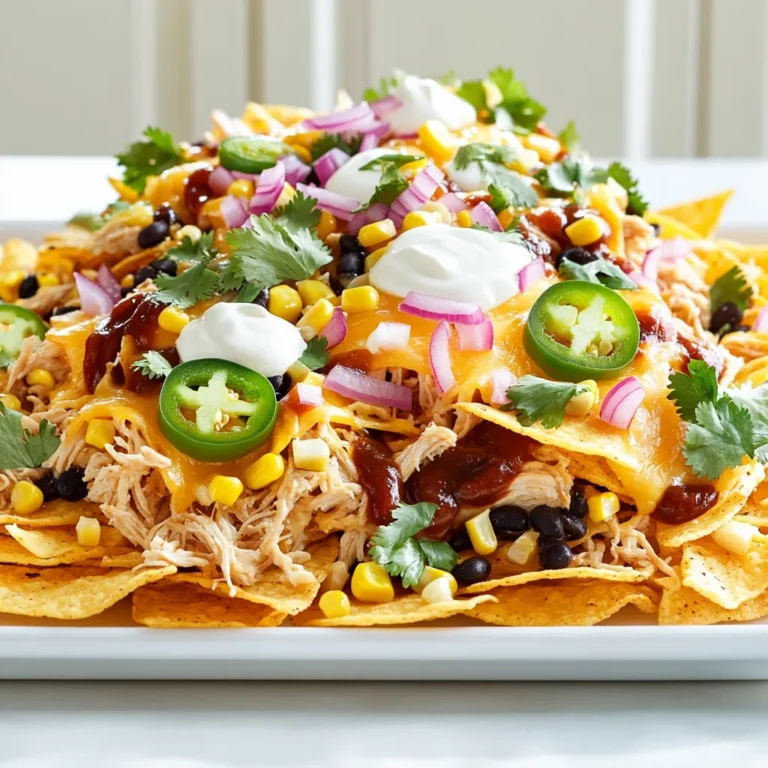
Sheet Pan BBQ Chicken Nachos Tasty and Fun Meal

- 2 cans of refrigerated biscuit dough (16 oz each) - 1 cup shredded mozzarella cheese - 1 cup shredded cheddar cheese - 1/2 cup unsalted butter, melted - 2 tablespoons fresh parsley, chopped - 2 tablespoons fresh basil, chopped - 1 tablespoon fresh thyme, chopped - 2 cloves garlic, minced - 1 teaspoon garlic powder - 1/2 teaspoon onion powder - Salt and pepper to taste - Extra fresh herbs for garnish - Marinara sauce for dipping When making Herb Cheese Monkey Bread, gather all your ingredients first. Start with the main ingredients. You need two cans of refrigerated biscuit dough. This will be the base of your bread. Next, grab one cup of shredded mozzarella cheese. The mozzarella gives that gooey texture we all love. Then, use one cup of shredded cheddar cheese for a sharp flavor. Lastly, have half a cup of melted unsalted butter ready. This butter will help the dough and cheese blend well. Next, let’s talk about the fresh herbs and spices. You want two tablespoons of fresh parsley, chopped. This herb adds a nice touch of color and flavor. Then, include two tablespoons of fresh basil, also chopped. Basil brings a sweet and aromatic aspect to your dish. You will also need one tablespoon of fresh thyme. Thyme has a warm and earthy taste that pairs well with cheese. Don’t forget two cloves of minced garlic for a strong flavor kick. Add one teaspoon of garlic powder and half a teaspoon of onion powder for extra depth. Finally, season with salt and pepper to your liking. For those who want to elevate their dish, consider optional ingredients. Extra fresh herbs can make your monkey bread look even better. Serving marinara sauce on the side for dipping adds a fun twist. It’s great for sharing and enhances the whole experience. - Preheat oven to 350°F (175°C). - Grease the bundt cake pan with a bit of butter or non-stick spray. - In a bowl, combine melted butter, minced garlic, parsley, basil, thyme, garlic powder, onion powder, salt, and pepper. - Mix well to form the herbed butter. This blend gives the bread its awesome flavor. - Open the cans of biscuit dough and cut each biscuit into quarters. - In a large bowl, add the biscuit pieces. Pour half of the herbed butter mixture over them. - Sprinkle half of the mozzarella and cheddar cheese on top. Toss everything until the dough is coated and the cheese is mixed in. - Layer half of the coated biscuit pieces in the prepared bundt pan. - Sprinkle the remaining cheese over this layer. - Pour the rest of the herbed butter mixture on top. - Add the remaining biscuit pieces, spreading them evenly in the pan. - Place the bundt pan in the preheated oven. Bake for 30 to 35 minutes. - Check for a golden brown color and ensure it’s cooked through. - Remove from the oven and let it cool for about 5 minutes. - Carefully invert the bundt pan onto a serving platter. This will let the yummy bread come out easily. This method makes your Herb Cheese Monkey Bread both tasty and fun to share! - Make sure to coat all biscuit pieces evenly with the herbed butter. This step is key. - Taste the herbed butter mixture. Adjust the salt and pepper to your liking. - Sprinkle extra fresh herbs on top for a nice finish. They add color and flavor. - Serve with warm marinara sauce for dipping. The tangy sauce pairs well with the bread. - Always grease the bundt pan well. This helps the bread come out easily. - Watch the baking time closely. Overbaking can lead to dry bread. Aim for a golden brown color. {{image_2}} You can make your Herb Cheese Monkey Bread even more fun by adding different cheeses. Try using pepper jack for a spicy kick. Cream cheese can also add a rich, creamy texture. You can mix and match cheeses based on what you love. If you don't have fresh herbs, don’t worry! You can use dried herbs instead. They work well and add great flavor. Feel free to try different herb mixes. Oregano, rosemary, or dill can change the taste in a fun way. Want to make it heartier? Add cooked meats like bacon or sausage. They bring a savory taste that many enjoy. You can also toss in roasted vegetables. Bell peppers, mushrooms, or even spinach can boost flavor and nutrition. To keep your Herb Cheese Monkey Bread fresh, store it in an airtight container in the fridge. This helps to lock in flavor and moisture. It tastes best when eaten within 2-3 days. After that, the bread may lose its soft texture and cheesy goodness. When you're ready to enjoy the leftovers, warm them in the oven for the best results. Set the oven to 350°F (175°C) and heat for about 10-15 minutes. This makes the bread soft again and brings back the gooey cheese. If you're in a hurry, you can use the microwave. Heat in short bursts of 15-20 seconds until warm. Just be careful not to overheat, or the bread may become tough. You can freeze your Herb Cheese Monkey Bread both before and after baking. If you freeze it before baking, wrap it tightly in plastic wrap and then in foil. When you're ready to bake, thaw it in the fridge overnight. If you freeze it after baking, let it cool completely first. Wrap it the same way. Thaw it in the fridge before reheating. This way, you can enjoy this tasty treat any time! You can prepare the dough and herbed butter a day before. To do this, mix the melted butter, garlic, and herbs. Then, store this herbed butter in the fridge. Cut the biscuit dough into quarters and keep it in an airtight container. When you are ready to bake, combine the dough with the herbed butter and cheese. This saves you time and keeps the flavors fresh. Yes, you can use frozen biscuit dough. It works well for this recipe. Just make sure to thaw it first. Refrigerated dough is also great. Both options will give you a tasty monkey bread, so choose what you prefer or have on hand. If you lack fresh herbs, dried herbs are a good choice. Use about one-third of the amount since dried herbs are stronger. For example, if the recipe calls for 2 tablespoons of fresh parsley, use about 2 teaspoons of dried parsley. This way, you can still enjoy great flavor even without fresh herbs. Yes, this recipe is perfect for vegetarians. It contains no meat or animal products besides butter and cheese. If you want to make it vegan, you can replace the butter with a plant-based option and use vegan cheese. This makes it a great choice for anyone looking for a tasty vegetarian dish. In this blog post, we explored how to make herb cheese monkey bread with simple ingredients and steps. From prepping the dough to baking, the process is easy and fun. Don't forget to experiment with herbs and cheese to create your own twist. Use the tips for serving and storage to enjoy this dish later. This monkey bread is perfect for gatherings or a cozy night in. With a few adjustments, it can be a crowd-pleaser every time. Enjoy your delicious creation!

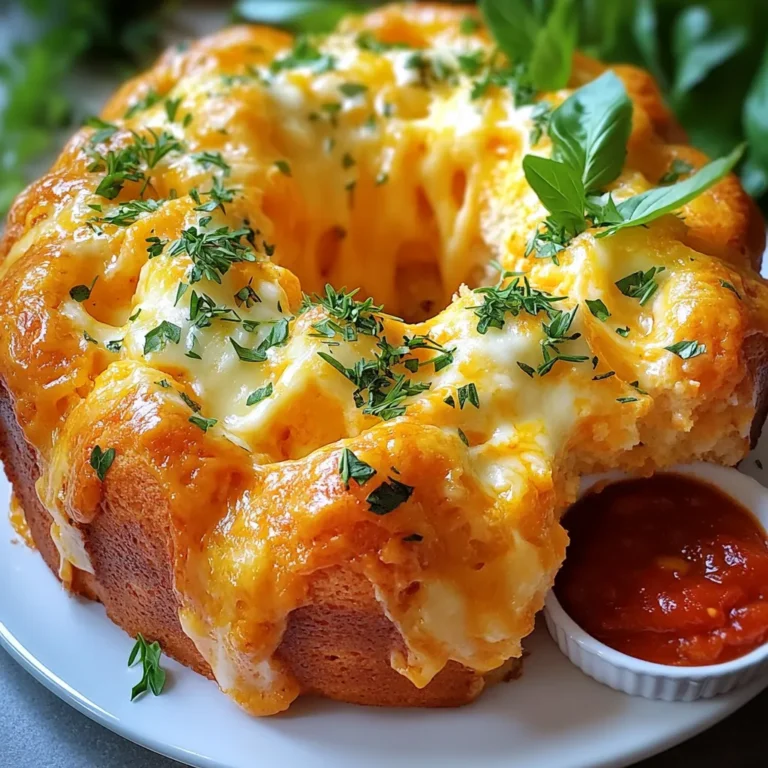
Herb Cheese Monkey Bread Flavorful and Easy Recipe

- 9 oz cheese tortellini (fresh or frozen) - 1 tablespoon olive oil - 1 small onion, finely chopped - 3 garlic cloves, minced - 1 (14 oz) can crushed tomatoes - 1 cup heavy cream - 1 teaspoon dried basil - Salt and pepper to taste - 1/4 cup grated Parmesan cheese - Fresh basil leaves for garnish To make creamy tomato basil tortellini, you need the right ingredients. First, I use cheese tortellini, either fresh or frozen. This pasta adds a rich flavor that pairs well with the sauce. Next, I sauté onion and garlic in olive oil. This step builds a great base for the sauce. Crushed tomatoes bring a delicious tang to the dish. Heavy cream adds a smooth and rich texture. I sprinkle in dried basil, salt, and pepper to enhance the taste. Finally, grated Parmesan cheese gives a salty kick. Fresh basil leaves add a pop of color and freshness on top. - Additional herbs or spices - Different types of cheese - Protein additions (e.g., chicken, shrimp) You can customize your dish with optional ingredients. For more flavor, try adding herbs like oregano or thyme. Different cheeses, like mozzarella or goat cheese, can change the taste. If you want protein, chicken or shrimp work well. These additions make the dish even more satisfying. To start, fill a large pot with water and add salt. Bring the water to a boil. The salt helps flavor the pasta. Once boiling, add the cheese tortellini. You can use fresh or frozen tortellini. Follow the package instructions for cooking time. Usually, it takes about 3 to 5 minutes. Cook until they are al dente, which means they are firm but not hard. When done, drain the tortellini and set them aside. Next, it's time to make the sauce. In the same pot, add a tablespoon of olive oil over medium heat. Once hot, add the finely chopped onion. Sauté the onion for about 3 to 4 minutes. You want it to be translucent. Then, add in the minced garlic. Sauté for one more minute until the garlic smells great. Now, pour in the can of crushed tomatoes and stir well. Let the sauce simmer for about 5 minutes. This helps the flavors mix nicely. Now, let’s make the sauce creamy. Lower the heat and add one cup of heavy cream. Stir it in well. Cook for another 3 to 4 minutes until the sauce thickens a bit. After that, add a teaspoon of dried basil, salt, and pepper to taste. Mix everything together. Now, grab the cooked tortellini and add them to the sauce. Toss gently until the tortellini is well-coated. Finally, stir in 1/4 cup of grated Parmesan cheese. This cheese should melt into the sauce, adding a rich flavor. When you are ready to serve, divide the creamy tortellini into bowls. Garnish each bowl with fresh basil leaves. Enjoy your delicious meal! To make sure your tortellini is al dente, follow this simple step. Boil water and add salt before cooking. Check the package for the cooking time. Often, it takes about 3-5 minutes. When you taste it, it should be firm yet tender. If your sauce is too thick, don’t worry. You can easily adjust it. Add a splash of pasta water or more heavy cream. Mix well until you reach your desired consistency. A creamy sauce coats the tortellini perfectly. You can make this dish vegan or dairy-free with a few swaps. Use plant-based tortellini made from chickpeas or lentils. For the sauce, replace heavy cream with coconut milk or cashew cream. This keeps the flavor rich and creamy. Feel free to add vegetables or proteins. Spinach, mushrooms, or zucchini work great. For protein, try grilled chicken or sautéed shrimp. These additions make the dish heartier and even more satisfying. Choose the right pots and pans for best results. A large pot is great for boiling tortellini. Use a deep skillet or saucepan for the sauce. This will help prevent spills while cooking. Also, keep essential kitchen tools handy. A wooden spoon is perfect for mixing. A slotted spoon helps you transfer the tortellini without extra water. Having these tools ready makes cooking easier and more fun. {{image_2}} You can change the flavor of creamy tomato basil tortellini easily. Adding spices or herbs gives a unique twist. Try red pepper flakes for heat. Fresh parsley or oregano can brighten the dish. You might also add a pinch of smoked paprika for a deep flavor. Incorporating roasted vegetables adds great taste. Roasted zucchini, bell peppers, or even spinach work well. Simply toss these veggies into the sauce. They add color and nutrients to your meal. For those needing gluten-free options, look for gluten-free tortellini. Many brands offer this now, so you don’t lose flavor. Just follow the package instructions closely. This makes it easy to enjoy the dish without worry. If you follow a low-carb or keto diet, use zucchini noodles instead of tortellini. This keeps the meal light and healthy. You still get that creamy sauce, making it satisfying. Creamy tomato basil tortellini pairs well with salads or bread. A light green salad with vinaigrette complements the dish nicely. Garlic bread or crusty rolls work well too. They soak up the delicious sauce perfectly. For presentation, divide the tortellini into bowls. Top with fresh basil leaves for a touch of color. A sprinkle of extra Parmesan cheese adds flair. It makes your meal look as good as it tastes! To store leftovers of creamy tomato basil tortellini, place them in an airtight container. This helps keep the dish fresh. You can store it in the fridge for up to three days. Make sure to let it cool down before sealing. For freezing, divide the tortellini into portions. Use freezer-safe containers or bags. Removing as much air as possible helps prevent freezer burn. It can last up to three months in the freezer. When you’re ready to eat, thaw the tortellini in the fridge overnight. For reheating, warm it gently on the stove. Add a splash of cream to restore its creamy texture. You can also microwave it, stirring occasionally to heat evenly. Yes, you can use store-bought tortellini. Fresh or frozen tortellini works well. Just follow the cooking time on the package. This saves time and still gives you great flavor. To add spice, try adding red pepper flakes. A teaspoon will give a nice kick. You can also use spicy sausage or hot sauce for more heat. Adjust the amount to your taste. You can use half-and-half or coconut cream. If you want a lighter option, use milk with a bit of flour. This will help thicken the sauce without heavy cream. This dish lasts about three to four days in the fridge. Store it in an airtight container. Reheat on the stove or in the microwave for best results. This blog post covered how to make a delicious tortellini dish. We explored the main and optional ingredients, along with step-by-step cooking instructions. I shared tips for perfecting your dish and ideas for customization. You learned about different flavor profiles and dietary adaptations. Don't forget to store your leftovers properly to enjoy later. Cooking should be fun and creative. Now, it’s time for you to try this recipe and make it your own!

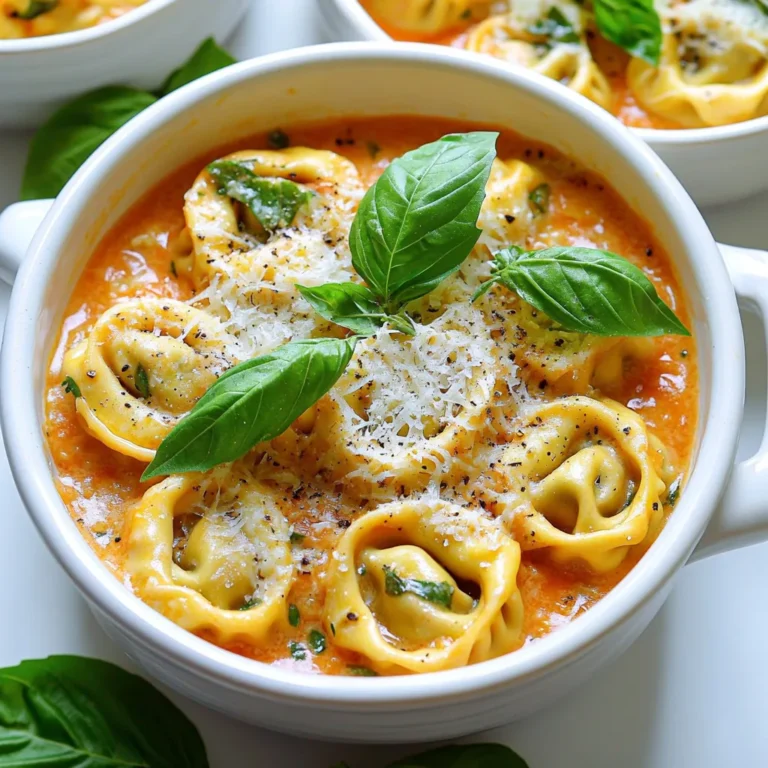
Creamy Tomato Basil Tortellini Flavorful Dinner Idea

- 2 chicken breasts, cut into bite-sized pieces - 1 cup fresh pineapple, diced - 1 bell pepper (red or yellow), sliced - 1 medium onion, chopped - 2 cloves garlic, minced - 3 tablespoons soy sauce (low sodium) - 2 tablespoons honey - 1 tablespoon cornstarch - 1 cup chicken broth - 2 cups jasmine rice - 2 tablespoons vegetable oil - Fresh cilantro for garnish - Lime wedges for serving This dish brings together bright flavors. The chicken pairs well with the sweet pineapple. Fresh bell pepper adds crunch. Onion gives a nice sweetness. Garlic adds a punch of flavor. The sauce ties everything together with a savory taste. The jasmine rice serves as a perfect base. It soaks up all the tasty sauce. You can choose low-sodium soy sauce for a healthier option. Honey adds a touch of sweetness. It balances the savory notes in the dish. Cornstarch helps thicken the sauce. This gives it a glossy finish. Chicken broth adds rich flavor to the sauce. Using fresh cilantro as garnish adds a pop of color. Lime wedges bring brightness to each bite. This dish looks beautiful on your table. Each ingredient plays a role in making pineapple chicken a delight. Enjoy cooking and savoring every bite! {{ingredient_image_1}} To make the chicken flavorful, I mix soy sauce, honey, minced garlic, grated ginger, salt, and pepper in a bowl. This marinade brings out the best in the chicken. I add the chicken pieces and toss them well. Letting the chicken sit in this mix for at least 30 minutes makes a big difference. Next, I rinse jasmine rice under cold water. Rinsing until the water runs clear helps remove extra starch. Then, I put the rice in a pot with 3 cups of water. I bring it to a boil, cover it, and reduce the heat to low. I let it simmer for about 18 to 20 minutes. Afterward, I keep it covered for 5 minutes to finish cooking. I heat vegetable oil in a large skillet over medium-high heat. Once the oil is hot, I add the marinated chicken pieces. I cook them until they turn golden brown and are fully cooked, which takes about 5 to 7 minutes. After that, I remove the chicken from the skillet and set it aside. In the same skillet, I add chopped onion and sliced bell pepper. I sauté them until they become soft, which takes about 3 to 4 minutes. Next, I toss in the pineapple chunks and stir-fry for another 2 to 3 minutes. This adds a sweet twist to the dish. Now it’s time to make the sauce. In a small bowl, I mix cornstarch with chicken broth until it dissolves. I pour this mixture over the sautéed vegetables and pineapple. I stir constantly until the sauce thickens, which takes about 2 to 3 minutes. Finally, I return the cooked chicken to the skillet. I stir everything together to coat the chicken in the sauce. I cook for just one more minute to ensure that everything is heated through. Now, the dish is ready to serve! - Use fresh ingredients: Fresh chicken and ripe pineapple make a big difference. They add bright taste and texture. - Adjust sweetness with honey: If your dish needs more sweetness, add a bit of honey. It balances the savory flavors well. - Best practices for marinating: Marinate your chicken for at least 30 minutes. This helps infuse flavor deeply. For best results, marinate overnight in the fridge. - Stir-frying tips for even cooking: Cook the chicken in batches if your skillet is small. This avoids steaming and helps each piece brown nicely. - Garnish with cilantro: Fresh cilantro adds color and flavor. Sprinkle it on just before serving for a nice touch. - Serve with lime wedges for brightness: Lime wedges bring a fresh zing. Squeeze them over your dish right before eating for extra flavor. Pro Tips Marination Matters: Allow the chicken to marinate for at least 30 minutes to enhance the flavors. For even better results, marinate it overnight in the fridge. Perfect Rice: Rinse jasmine rice thoroughly to remove excess starch, which helps achieve fluffy rice without clumping. Vegetable Crunch: Don't overcook the vegetables; they should remain vibrant and slightly crisp for the best texture and flavor contrast. Garnish Wisely: Fresh cilantro and lime wedges not only add color but also a burst of freshness that elevates the dish's tropical vibe. {{image_2}} You can switch out the chicken for shrimp or tofu. Shrimp cooks fast and adds a nice taste. Tofu is great for a meat-free meal and soaks up flavors well. To use shrimp, cook it just until pink, about 3-5 minutes. For tofu, use firm tofu and cut it into cubes. Sauté until golden brown for the best texture. Feel free to get creative with your veggies. Broccoli, snap peas, or carrots work well in this dish. You can also try zucchini or bok choy for a different twist. Just make sure to cut them into small pieces for even cooking. Sauté them until they are tender but still crisp for a nice bite. You can change the flavor to fit your taste. If you want it sweeter, add more honey. For a spicy kick, toss in some red pepper flakes or a splash of hot sauce. You can even use fresh chili peppers if you like it hot! Adjust these flavors to find the perfect balance for your meal. To store leftovers safely, let the dish cool first. Place the pineapple chicken with rice in an airtight container. This keeps moisture in and prevents odors from other foods. Store it in the fridge for up to three days. Always label the container with the date. This way, you won't forget how long it has been there. When you're ready to enjoy leftovers, the best way to reheat is in a skillet. Add a splash of water or broth to keep it moist. Heat over low to medium heat. Stir often until it's warmed through. You can also use a microwave. Place it in a microwave-safe dish and cover it with a lid or wrap. Heat in short bursts, stirring in between. This helps heat evenly and avoids cold spots. To freeze your pineapple chicken with rice, wait for it to cool completely. Then, portion it into freezer-safe bags or containers. Remove as much air as possible to prevent freezer burn. It can stay frozen for up to three months. When you want to eat it, thaw it overnight in the fridge. For a quick thaw, you can use the microwave. After thawing, reheat as noted above for the best taste. Yes, you can make this dish gluten-free. Substitute regular soy sauce with gluten-free soy sauce or tamari. Use cornstarch without additives. Ensure your chicken broth is gluten-free as well. This keeps the dish tasty and safe for those avoiding gluten. You can prepare the chicken and marinade ahead of time. Marinate the chicken and store it in the fridge for up to a day. Cook the rice just before serving. You can chop the veggies in advance too. Keep them in the fridge for easy cooking later. Jasmine rice works best for this dish. It has a nice aroma and fluffy texture. You can also use basmati rice for a different flavor. Brown rice is a healthier choice but takes longer to cook. Choose your rice based on your taste and time. This dish blends chicken, fresh fruit, and vibrant veggies for a delightful meal. We covered how to marinate the chicken, cook the rice, and stir-fry the vegetables. With simple tweaks, you can adjust flavors and even change proteins. Store any leftovers correctly for later enjoyment. Always use fresh ingredients for the best taste. Enjoy your cooking and make this dish yours!

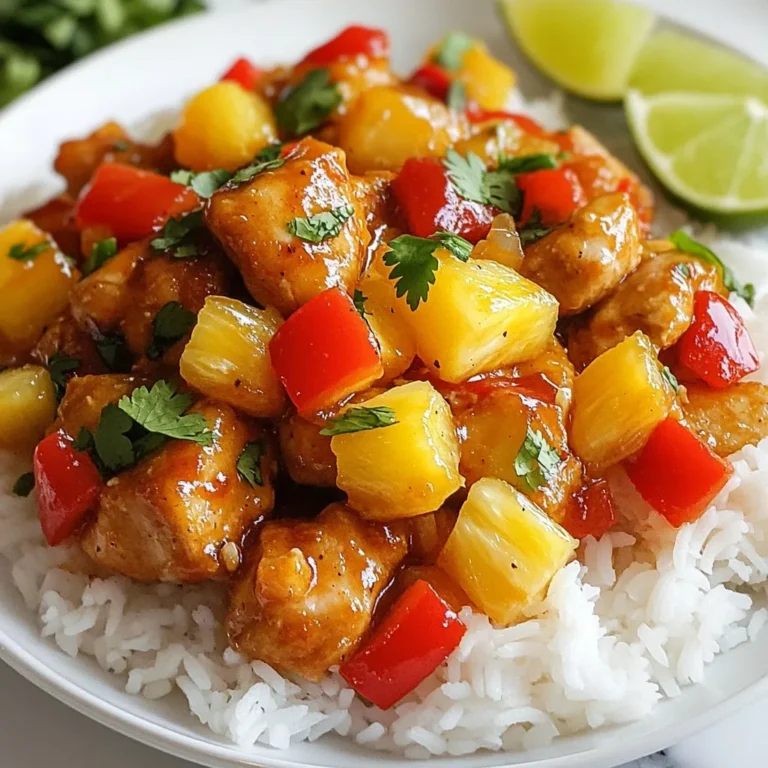
Pineapple Chicken with Rice Flavorful Dinner Delight

- Eggs and Gruyère cheese The base of our frittata is six large eggs. They provide the main structure. Gruyère cheese adds a rich, nutty flavor. You will need one cup, grated. - Onions and flavorings Use two large onions, thinly sliced. They become sweet when caramelized. To season, add half a teaspoon of salt, a quarter teaspoon of black pepper, and a quarter teaspoon of thyme. Fresh or dried thyme works well. - Butter and olive oil Combine one tablespoon of unsalted butter and one tablespoon of olive oil. This mixture helps caramelize the onions. It also adds a nice depth of flavor to the dish. By carefully selecting each ingredient, you create a balanced and tasty frittata. The blend of eggs, cheese, and caramelized onions makes each bite delicious. Enjoy the process of gathering these fresh ingredients for your next meal. {{ingredient_image_1}} To start, I heat a large skillet over medium heat. I add 1 tablespoon of olive oil and 1 tablespoon of unsalted butter. Once the butter melts, I add 2 large, thinly sliced onions. I cook the onions slowly, stirring them often. This takes about 20 to 25 minutes. The key is to let them caramelize until they turn a deep golden brown. If they start to burn, I reduce the heat. This slow cooking brings out their sweet flavor and soft texture. While the onions cook, I whisk together 6 large eggs in a bowl. I add ½ teaspoon of salt, ¼ teaspoon of black pepper, and ¼ teaspoon of thyme. Fresh thyme is great, but dried works too. I always use fresh eggs for the best flavor and texture. Fresh eggs make the frittata rise nicely and taste better. Once the onions are ready, I spread them evenly in the skillet. Next, I pour the egg mixture over the onions. I make sure the eggs cover the onions well. I then sprinkle 1 cup of grated Gruyère cheese on top. I cook this on the stove for about 5 minutes without stirring. I watch for the edges to start to set. Now, I preheat my broiler. When the edges are set, I move the skillet to the broiler. I let it cook for an extra 2 to 3 minutes. I look for the top to puff and turn golden brown. After broiling, I take it out and let it cool a bit. I slice it into wedges and enjoy! For a fluffy frittata, start with fresh eggs. Whisk them well to incorporate air. This helps create lightness. When cooking, avoid high heat. Medium heat allows the eggs to cook evenly. If you see the edges starting to brown too fast, lower the heat. To prevent overcooking, watch for firmness. The edges should set first. The center can stay slightly jiggly. This ensures a creamy texture. To boost flavor, add herbs or spices. Fresh herbs like parsley or basil work well. You can also add a pinch of cayenne for heat. If Gruyère isn't your favorite, try other cheeses. Feta adds a tangy twist. Cheddar gives a classic taste. Goat cheese offers creaminess and depth. Each cheese brings its unique flavor to the frittata. Pro Tips Use Low Heat for Caramelizing: Cooking the onions slowly over low to medium heat allows them to caramelize without burning, enhancing their natural sweetness. Whisk Eggs Well: Ensure the eggs are whisked thoroughly for a uniform texture, which will result in a fluffier frittata. Experiment with Cheese: While Gruyère is delicious, feel free to mix in other cheeses like feta or cheddar for different flavor profiles. Let it Rest: Allowing the frittata to cool for a few minutes before slicing helps it set and makes for cleaner cuts. {{image_2}} You can make your frittata more colorful and tasty by adding veggies. Some good choices are bell peppers, spinach, or zucchini. These add nutrients and flavor. - Seasonal veggie ideas: - In spring, try asparagus or peas. - In summer, add tomatoes or corn. - In fall, use mushrooms or kale. - In winter, consider root veggies like sweet potatoes. Mixing these veggies into your frittata gives it a fresh twist and keeps it exciting! Looking to add some protein? You have many choices! You can include diced ham, cooked bacon, or sausage for a heartier frittata. - Meat alternatives: - Try tofu or tempeh for a plant-based option. - Chickpeas can also add protein and texture. If you want a vegetarian or gluten-free option, stick with the eggs and veggies. Adding beans or lentils also boosts protein without meat. These options let you customize your frittata to fit your taste and diet! How long can the frittata last? You can store your frittata in the fridge for about 3-4 days. This time frame keeps it fresh and safe to eat. Best practices for refrigeration To store the frittata, let it cool to room temp first. Then, wrap it tightly in plastic wrap or place it in an airtight container. This helps keep it moist and prevents it from picking up odors from other foods. Tips for freezing and reheating If you want to freeze the frittata, slice it first. Place slices in a single layer on a baking sheet. Freeze until solid, then transfer them to a freezer bag. They can last for up to 2 months in the freezer. When you’re ready to eat, reheat slices in the oven or microwave. Texture preservation tips To keep the frittata's texture, avoid reheating in the microwave for too long. A gentle oven heat works best. This way, the frittata stays fluffy and moist, just like when you first made it. Yes, you can! Gruyère is rich and nutty, but other cheeses work well too. Try using cheddar for a sharp taste. Feta adds a tangy flavor that pairs nicely. Goat cheese gives a creamy texture. Mozzarella makes it stretchy and mild. Mix and match to find your favorite! Look for a few signs. The edges should be firm and set. The top may look puffed and slightly golden. A knife inserted in the center should come out clean. If it wobbles too much, give it more time. Cooking on low heat helps it cook evenly. Absolutely! You can prepare the frittata ahead of time. Cook it fully and let it cool. Store it in the fridge for up to three days. To reheat, warm it in the oven or microwave. If you want to freeze it, slice it first. This way, you can thaw just what you need. You learned about the key ingredients, like eggs and Gruyère cheese, for a great frittata. We stepped through caramelizing onions and mixing the egg base. Cooking methods included stovetop and broiling tips. I shared tricks for fluffiness and ways to enhance flavors. You also saw variations with veggies and proteins, plus storage advice. A frittata is simple yet tasty. With these tips, you can impress anyone. Enjoy making your perfect frittata!

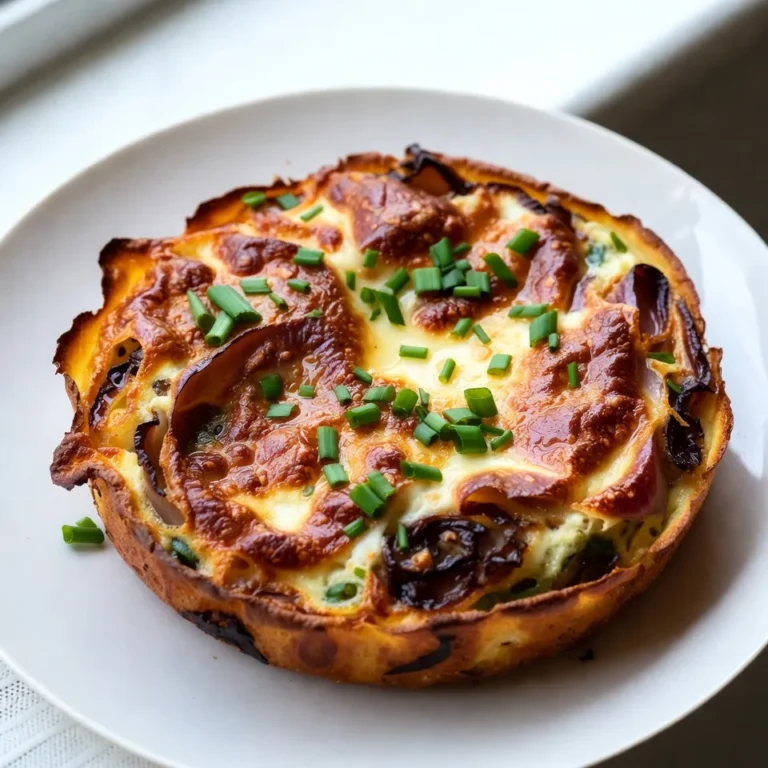
Caramelized Onion Gruyère Frittata Flavor Boost Recipe

- 1 pound large shrimp, peeled and deveined - 1 pound smoked sausage, sliced into rounds - 3 bell peppers (red, yellow, green), sliced - 1 red onion, sliced The main ingredients create a colorful and tasty dish. The shrimp brings a sweet, tender bite, while the smoked sausage adds a rich, savory flavor. The bell peppers add crunch and brightness, and the red onion gives a slight sweetness. - 3 tablespoons olive oil - 2 tablespoons Cajun seasoning - 4 cloves garlic, minced - 1 teaspoon smoked paprika - 1 teaspoon dried oregano The seasoning and oils are key to bold flavor. Olive oil adds richness and helps the spices stick. Cajun seasoning packs heat and depth, while garlic gives a robust taste. Smoked paprika adds a warm, smoky note. Oregano offers a hint of earthiness. - Fresh parsley, chopped for garnish Fresh parsley is the perfect garnish. It adds a pop of color and a fresh taste. Just sprinkle it on top before serving. This simple step makes the dish look even better and brightens the flavors. First, preheat your oven to 425°F (220°C). This step is key for crispy edges. Next, prepare your shrimp and sausage. Peel and devein the shrimp if needed. Slice the sausage into rounds. Now, let’s combine the vegetables with proteins. In a large mixing bowl, add the shrimp, sausage, sliced bell peppers, and red onion. This mix gives great color and taste. In a small bowl, whisk together the olive oil, Cajun seasoning, minced garlic, smoked paprika, oregano, salt, and pepper. This seasoning mixture will bring all the flavors together. Spread the mixture out on a large sheet pan in a single layer. This helps everything cook evenly. Bake in the preheated oven for about 15-20 minutes. Check for doneness by looking for pink shrimp and heated sausage. Once done, remove from the oven and stir to redistribute the flavors. Serve it hot, garnished with fresh parsley for a vibrant touch. Seasoning makes this dish shine. Use Cajun seasoning to bring heat and depth. Adjust spiciness by adding more seasoning or using a milder blend. You can also mix in hot sauce for extra kick. Always taste as you go to find your perfect balance. I love a sheet pan for this recipe. It allows even cooking and easy cleanup. The high heat helps create a nice char on the shrimp and sausage. If you don't have a sheet pan, try a skillet on the stove. You can sauté the ingredients until cooked through. Garnish with fresh parsley for color and flavor. You can also add lemon wedges for a zesty finish. This dish pairs well with rice, crusty bread, or a fresh salad. Enjoying it with friends makes it even better! {{image_2}} You can change the sausage type for a new twist. Try chicken sausage or turkey sausage. Both give a lighter taste. You can also use andouille sausage for a spicy kick. Alternatives for shrimp include scallops or firm fish like cod. These options work well with the seasoning. You might also try diced chicken for a different flavor. Different seasoning blends can change the dish a lot. Consider using Creole seasoning for a milder taste. You can also mix in some chili powder for heat. Adding extra vegetables can boost nutrition and flavor. Try zucchini, asparagus, or carrots. Just cut them into even pieces for even cooking. For gluten-free options, ensure your sausage is gluten-free. Most brands offer this choice. You can also skip the seasoning that contains gluten. If you want low-carb suggestions, skip the sausage or use less. You can add more shrimp or veggies instead. Cauliflower can be a great substitute for rice as a side. To store leftovers, place them in an airtight container. This keeps the dish fresh. You can store it in the fridge for up to three days. When reheating, use a microwave or oven. For the best taste, reheat in the oven at 350°F (175°C) for about 10 minutes. Stir halfway through to heat evenly. Yes, you can freeze this dish! Make sure it cools completely before freezing. Place it in freezer-safe bags or containers. Remove excess air to prevent freezer burn. For thawing, move it to the fridge overnight. You can also thaw in the microwave on low power. Enjoy the dish within three days for the best flavor. If frozen, it can last up to three months. Look for signs of spoilage, like off smells or changes in color. If it smells bad or looks strange, it’s best to toss it. You can add more Cajun seasoning for a kick. Try using fresh jalapeños for heat. You can also mix in some cayenne pepper. Adjust to your taste. Yes, frozen shrimp works fine. Just make sure to thaw them first. Rinse the shrimp under cold water to speed up thawing. This ensures even cooking. This dish pairs well with rice, quinoa, or crusty bread. You can also serve a fresh salad on the side. These options will balance the rich flavors. Absolutely! This dish is great for meal prep. You can store leftovers in the fridge for up to three days. Just reheat before serving for best taste. Shrimp are done when they turn pink and opaque. They should curl into a C shape. If they are still gray or translucent, give them more time to cook. This blog post explored the key ingredients and steps for making Cajun Shrimp and Sausage Sheet Pan. We discussed main ingredients like shrimp and smoked sausage, along with important seasonings. You learned easy prep steps, baking details, and tips to enhance flavors and presentation. Remember, you can personalize this dish with swaps and variations. So, gather your ingredients, try new flavors, and enjoy a tasty meal that’s simple and satisfying. Now, go make something delicious!

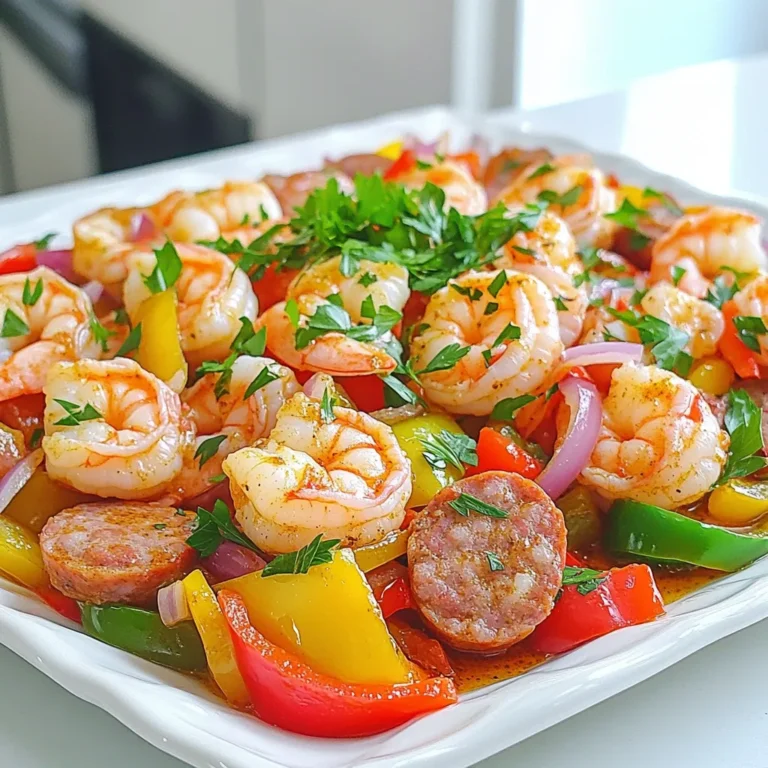
Cajun Shrimp and Sausage Sheet Pan Flavorful Delight

PREV 1 … 9 10 11 … 86 NEXT
spicy fork kitchen

explore

DessertsDinnerAppetizersDrinks

Our Policies

  • Cookie Policy
  • Copyright Policy
  • Disclaimer
  • GDPR Policy
  • Terms Of Use
Back to Top
  • About
  • Contact Us
  • Privacy Policy
© 2025 spicy fork kitchen