FREE DINNER EBOOK! Get your copy!
  • Cookie Policy
  • GDPR Policy
  • Disclaimer
  • Terms Of Use
  • Visit my other site: Fun Cookie Recipes
spicy fork kitchen
  • Home
  • Dinner
  • Desserts
  • Drinks
  • Appetizers
  • Contact
  • About
  • Privacy Policy
  • Home
  • Dinner
  • Desserts
  • Drinks
  • Appetizers
  • Contact
  • About
  • Privacy Policy
  • Cookie Policy
  • GDPR Policy
  • Disclaimer
  • Terms Of Use
Visit my other site: Fun Cookie Recipes

HOME / CATEGORIES /

Latest

- 1 package (16 oz) refrigerated cinnamon roll dough - 2 medium apples, peeled, cored, and diced - 1 tablespoon lemon juice - 1 teaspoon ground cinnamon - 1/4 cup brown sugar - 1/4 teaspoon nutmeg - 1/2 cup chopped pecans (optional) - 1/2 cup raisins (optional) - 1/2 cup icing (included in cinnamon roll dough package or homemade) To make this Apple Cinnamon Roll Bake, gather all the ingredients first. Start with a package of cinnamon roll dough. The dough gives us quick and easy rolls. Next, grab two medium apples. I like using firm apples, as they hold their shape well when baked. Peel, core, and dice them into small pieces. This helps them cook evenly. Add a tablespoon of lemon juice to the apples. This keeps them from turning brown and adds brightness. Then, mix in a teaspoon of ground cinnamon, a quarter cup of brown sugar, and a pinch of nutmeg. These spices create that warm, cozy flavor we love in fall treats. If you like a little crunch, consider adding half a cup of chopped pecans. They add a lovely texture. You might also want to add half a cup of raisins for some sweetness. Finally, we need icing to drizzle on top after baking. The icing comes with the cinnamon roll dough or you can make your own. With all these ingredients ready, you set the stage for a warm and comforting bake that will delight everyone. {{ingredient_image_1}} 1. Preheat your oven to 350°F (175°C). This helps get the bake nice and warm. 2. Grease a 9x13-inch baking dish to prevent sticking. It makes clean-up easier. 3. In a medium bowl, toss the diced apples with 1 tablespoon of lemon juice. 4. Add 1 teaspoon of ground cinnamon, 1/4 cup of brown sugar, and 1/4 teaspoon of nutmeg. Mix well. 5. If you like, fold in 1/2 cup of chopped pecans and 1/2 cup of raisins for extra flavor. 1. Open the package of cinnamon roll dough. Separate the rolls and cut each one into quarters. 2. In the greased baking dish, layer half of the cinnamon roll pieces evenly on the bottom. 3. Spread the apple mixture over this first layer of rolls. Make sure to cover them well. 4. Top with the remaining cinnamon roll pieces, spreading them evenly over the apples. 1. Bake in the preheated oven for 25-30 minutes. You want the cinnamon rolls to turn golden brown. 2. When done, remove the dish from the oven. Drizzle the included icing over the warm bake. Let it melt into all the spots. 3. Allow it to cool for a few minutes before serving. This makes it easier to slice and enjoy. To get the best texture, watch your baking time. If you like soft rolls, bake for 25 minutes. For a more golden finish, leave them for 30 minutes. Always check for doneness by sticking a fork into the middle. The rolls should be firm and not doughy. Serve your Apple Cinnamon Roll Bake warm in bowls. This makes it cozy and inviting. You can add a scoop of vanilla ice cream on top for a sweet touch. A sprinkle of powdered sugar can also give it a nice look and extra flavor. One mistake is overbaking the rolls. This can make them hard and dry. Keep an eye on them as they bake. Another mistake is not preparing the apples properly. Make sure to peel, core, and dice them well. This helps them cook evenly and mix nicely with the rolls. Pro Tips Use Fresh Apples: Opt for tart apples like Granny Smith for a nice balance of sweetness and acidity in your bake. Customize Your Fillings: Feel free to add other fruits like berries or chopped bananas for a twist on the classic recipe. Control the Sweetness: Adjust the amount of brown sugar based on the sweetness of your apples to achieve your desired flavor. Serve Warm: This dish is best enjoyed warm, so consider reheating leftovers in the oven for a few minutes before serving. {{image_2}} You can change the taste of your Apple Cinnamon Roll Bake by adding different fruits. Try using pears or berries for a new twist. Each fruit brings its own sweet touch. You can also mix in nuts like walnuts or almonds. They add a nice crunch and flavor. Just remember to chop them well. If you need a gluten-free option, look for gluten-free cinnamon roll dough. It works well in this recipe. You can also make vegan changes. Use plant-based butter and non-dairy milk in place of regular ingredients. This way, everyone can enjoy the bake, no matter their diet. To make it feel like fall, add pumpkin spice or cranberries. These flavors warm up the dish and bring a cozy feeling. For the holidays, think about candy canes or eggnog flavors. These add fun and festive tastes to your bake. You can easily change it up for any season! To keep your Apple Cinnamon Roll Bake fresh, place it in the fridge. Use an airtight container or wrap it tightly in plastic wrap. This keeps out air and moisture. The bake will stay good for about three days. If you want to keep it longer, consider freezing. You can reheat your bake in two ways: the oven or the microwave. For the oven, preheat it to 350°F (175°C). Place the bake in a baking dish and cover it with foil. Heat for about 10-15 minutes. This keeps the texture nice. If using the microwave, place a slice on a plate. Heat for about 30 seconds. Check to see if it’s warm enough. Microwaving may make the rolls a bit softer. You can freeze the Apple Cinnamon Roll Bake before or after cooking. If freezing before cooking, assemble it in the dish, cover tightly, and freeze. Thaw it overnight in the fridge before baking. If freezing cooked, let it cool completely first. Then, wrap it well and freeze. To thaw, place it in the fridge overnight. Reheat as mentioned above for the best results. Apple Cinnamon Roll Bake lasts about 3-4 days in the fridge. Store it in an airtight container. If you freeze it, it can last up to 2 months. Just wrap it well to avoid freezer burn. Yes, you can use homemade dough! To make your own cinnamon roll dough, mix flour, sugar, yeast, milk, butter, and eggs. Knead until smooth. Let it rise until doubled in size. Roll it out, add cinnamon sugar, and cut into rolls. Yes, you can prepare it ahead. To prep in advance, follow these steps: - Mix the apple filling and layer it with the rolls in the baking dish. - Cover and refrigerate overnight. - When ready, bake it straight from the fridge, adding a few extra minutes to the time. For reheating, just warm it in the oven at 350°F for about 10-15 minutes. This keeps it soft and tasty. This blog post shares an easy recipe for Apple Cinnamon Roll Bake. You learned about the ingredients, preparation steps, and baking instructions. I included tips to help you avoid mistakes and suggestions for serving. You can try variations with different fruits and dietary options. Remember to store leftovers properly and reheat them for the best taste. This dish is perfect for any season and occasion. Enjoy making this delightful treat and share it with loved ones!

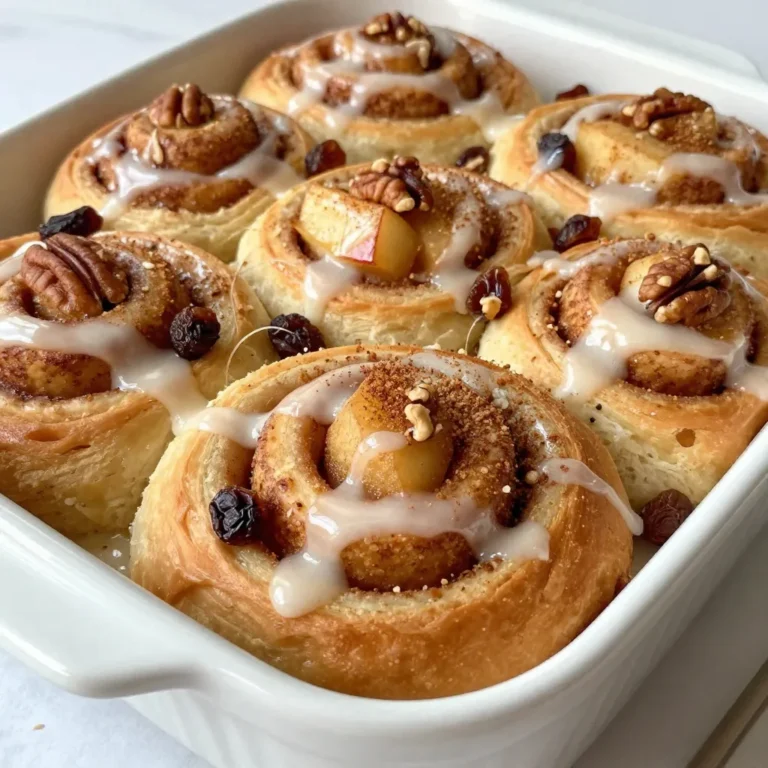
Apple Cinnamon Roll Bake Warm and Comforting Treat

- 12 lasagna noodles - 1 lb ground beef or turkey - 1 onion, chopped For my lasagna, I always use 12 lasagna noodles. They create a firm base. I prefer ground beef, but turkey works well too. It gives a lighter touch. I chop one onion to add flavor to the meat sauce. - 15 oz ricotta cheese - 2 cups shredded mozzarella cheese - 1 cup grated Parmesan cheese I love to use 15 ounces of ricotta cheese. It makes the layers creamy. I add 2 cups of shredded mozzarella for that gooey texture. A sprinkle of 1 cup of grated Parmesan adds a nice salty kick. - 1 tablespoon dried oregano - 1 tablespoon fresh basil (or 1 teaspoon dried) - Olive oil for cooking, salt, and pepper Seasonings are key for great flavor. I use 1 tablespoon of dried oregano and fresh basil. If I don’t have fresh basil, dried works too. I cook with a splash of olive oil, and I always season with salt and pepper. These simple ingredients make a big difference in taste. {{ingredient_image_1}} First, I boil a large pot of salted water. I cook the lasagna noodles according to the package instructions. This usually takes about 8 to 10 minutes. You want them al dente, not too soft. Once cooked, I drain them and lay the noodles flat on a baking sheet. This keeps them from sticking together. In a large skillet, I heat a tablespoon of olive oil over medium heat. Then, I add the chopped onion and minced garlic. I sauté them for about 3 to 4 minutes until they soften. Next, I add the ground beef or turkey to the skillet. I cook it until browned, breaking it apart with a spatula. After it’s cooked, I drain any excess fat. I then stir in the marinara sauce along with oregano, basil, salt, and pepper. I let it simmer for 5 to 10 minutes. This helps meld the flavors together. In a separate bowl, I mix the ricotta cheese with one egg. I add a pinch of salt and pepper. I stir it until smooth. This mixture adds creaminess to the lasagna. To assemble, I spread a thin layer of meat sauce at the bottom of my baking dish. I place 4 lasagna noodles over the sauce. Then, I spread half of the ricotta mixture over the noodles. Next, I layer more meat sauce and sprinkle mozzarella cheese on top. I repeat these layers. For the final layer, I top with the last 4 noodles, the remaining meat sauce, and mozzarella cheese. I finish with grated Parmesan cheese on top. I cover it with foil and bake it in the preheated oven for 25 minutes. After that, I remove the foil and bake for an additional 15 to 20 minutes until the cheese is bubbly and golden. Finally, I let the lasagna cool for 10 to 15 minutes before slicing. This helps it keep its shape. Layering your lasagna right makes all the difference. Start with a thin layer of meat sauce on the bottom. This prevents sticking. Next, lay down four noodles side by side. Make sure they don’t overlap. Add half of the ricotta mixture on top. Then, spread more meat sauce and sprinkle mozzarella cheese. Repeat this twice. To avoid sogginess, don’t over-sauce. Use just enough liquid to flavor the noodles. Drain cooked noodles well before layering. This keeps them firm. The best temperature for baking lasagna is 375°F (190°C). This lets the cheese melt perfectly. Cover the dish with foil for the first 25 minutes. This helps the cheese melt without burning. After that, remove the foil. Bake uncovered for an extra 15-20 minutes. You want the cheese golden and bubbly. For a great presentation, cut the lasagna into squares. Serve it hot on a bright plate. A sprinkle of fresh basil adds color and flavor. Pair your lasagna with garlic bread for a hearty meal. You can also add a side salad for a fresh touch. These extras make your dish feel special and inviting. Pro Tips Tip for Layering: Make sure to spread the ricotta mixture evenly for a balanced flavor in every bite. Tip for Meat Options: Feel free to substitute the ground beef with Italian sausage for an extra kick of flavor! Tip for Cheese: For a cheesier lasagna, mix different types of cheese like provolone or gouda with the mozzarella. Tip for Resting: Let the lasagna rest after baking; this helps it hold its shape when you slice it. {{image_2}} You can easily make a vegetarian lasagna. Just swap the meat for your favorite veggies. Try using spinach, mushrooms, or zucchini. These add great flavor and color. You can also mix in bell peppers or artichokes. For cheese, look for vegetarian options. Many brands offer plant-based mozzarella and ricotta. This keeps the dish creamy without meat. If you need a gluten-free lasagna, use gluten-free noodles. They come in many types, so pick your favorite. Some options are made from rice, corn, or quinoa. Make sure your sauce and cheese are gluten-free too. Most marinara sauces are safe, but check the label. Some cheeses may have added ingredients, so read closely. To make your lasagna unique, add spices and herbs. Try red pepper flakes for heat or fresh parsley for freshness. You can also add a pinch of nutmeg to your ricotta for warmth. Mix different cheese types for a fun twist. Use gouda or fontina for a richer flavor. A blend of cheeses creates a tasty surprise in every bite. To keep your leftover lasagna fresh, you can refrigerate or freeze it. If you plan to eat it soon, refrigerating works best. Use an airtight container or wrap it tightly with plastic wrap. For longer storage, freeze the lasagna. A heavy-duty freezer bag or a freezer-safe container works well. Make sure to remove as much air as possible to prevent freezer burn. When it's time to enjoy your lasagna again, proper reheating is key. The best way is to use the oven. Preheat it to 350°F (175°C). Place the lasagna in an oven-safe dish. Cover it with foil to keep it moist. Heat for about 20-25 minutes. You can also microwave it if you're in a hurry. Use a microwave-safe plate and heat in short bursts. Stir or check often to avoid cold spots. In the fridge, your lasagna lasts about 3-5 days. If you freeze it, it can last up to 3 months. Always check for signs of spoilage. Look for an off smell, color changes, or mold. If you notice any of these, it's best to throw it away. Enjoy your delicious homemade lasagna safely! Yes, you can use no-boil lasagna noodles. They save time, and you don’t have to cook them first. Just layer them in with your meat sauce and ricotta mixture. You may need to add a bit more sauce to ensure they cook well in the oven. You can prep your lasagna the day before. Assemble it but do not bake it yet. Cover it tightly with foil and place it in the fridge. When ready to bake, let it sit at room temperature for about 30 minutes before putting it in the oven. This helps with even cooking. Lasagna goes great with a simple green salad. A Caesar salad or garlic bread also works well. You can serve roasted vegetables or a nice tomato salad for a fresh touch. These sides balance the richness of the lasagna. Look for the cheese on top to be golden and bubbly. You can also check if the sauce is bubbling around the edges. If you insert a knife in the center, it should come out hot. Let it cool for 10-15 minutes before serving to help it hold together. In this article, we covered how to make delicious lasagna from start to finish. We looked at the main ingredients, like noodles, meat, and cheese. You learned how to prepare the sauce and layer everything properly. We also shared tips for perfecting your dish and keeping leftovers fresh. Remember, you can make variations to fit any taste or diet. Making lasagna is fun and rewarding. Enjoy your cooking and share this tasty meal with others!

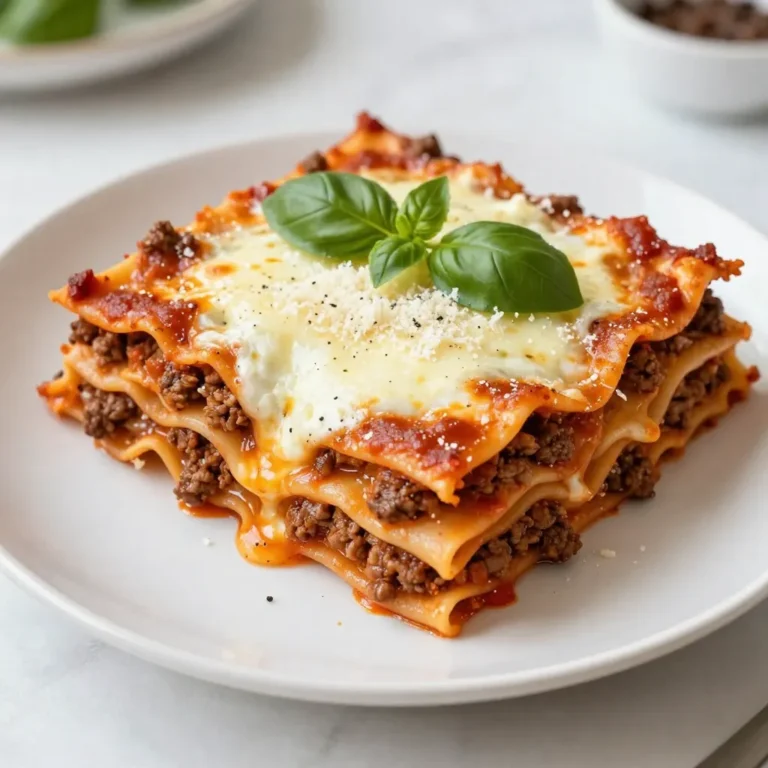
My Best Homemade Lasagna Delightful and Hearty Dish

To make Santa Hat Cheesecake Bites, you need simple yet tasty ingredients. Here’s what you will need: - 1 cup finely crushed graham crackers - 3 tablespoons unsalted butter, melted - 8 oz cream cheese, softened - 1/2 cup powdered sugar - 1 teaspoon vanilla extract - 1 cup whipped cream (plus extra for topping) - 1 cup strawberries, hulled and tops removed - Mini chocolate chips for garnish These ingredients work together to create a creamy and fun dessert that looks festive. You can add extra touches to make your cheesecake bites stand out. Here are some ideas: - A drizzle of chocolate sauce around the platter - Fresh mint leaves for color - More whipped cream at the base of each strawberry These garnishes add flair and flavor to your bites. If you need to swap out any ingredients, here are some options: - Use graham cracker crumbs for a smoother crust. - Swap cream cheese for mascarpone for a different texture. - For a gluten-free option, use gluten-free graham crackers. - If you want a lighter version, use Greek yogurt instead of cream cheese. These substitutes keep the recipe flexible and fun to make! {{ingredient_image_1}} To start, gather your ingredients for the crust. You need 1 cup of finely crushed graham crackers and 3 tablespoons of melted unsalted butter. In a mixing bowl, combine these two. Mix them well until the crumbs are coated in butter. This makes a tasty base for our cheesecake bites. Next, grab a muffin tin and line it with mini cupcake liners. Take a tablespoon of the crust mixture and press it firmly into each liner. This forms the bottom of your bites. Now, place the muffin tin in the fridge for 15 to 20 minutes. This helps the crust firm up nicely. Now, let’s move on to the cheesecake filling. You will need 8 ounces of softened cream cheese in a large mixing bowl. Beat it until it's smooth and creamy. Then, add in 1/2 cup of powdered sugar and 1 teaspoon of vanilla extract. Mix these together until they blend well. Next, take 1 cup of whipped cream and gently fold it into your mixture. This step makes your filling light and fluffy. Be careful not to stir too hard; you want to keep that airy texture. We are almost there! Now, it’s time to assemble the bites. Spoon or pipe the cheesecake filling over the chilled graham cracker crusts. Fill them generously, as this is the star of the show. Next, grab your hulled strawberries. Place one upside down on each cheesecake bite. This will look like a Santa hat! For extra flair, add a small dollop of whipped cream at the base of each strawberry. This mimics the fur of Santa's hat. To make these bites even more festive, sprinkle mini chocolate chips on top of the whipped cream. This creates a cute little bobble for the hat. Once you finish assembling, chill the bites in the fridge for at least 2 hours. This helps them set. When ready to serve, arrange the cheesecake bites on a festive platter. You might even drizzle some chocolate sauce around for a beautiful touch. Fresh mint leaves can add a pop of color too! Enjoy your holiday treat! To get a smooth and creamy cheesecake, start with softened cream cheese. Cold cream cheese will not mix well. Beat the cream cheese until there are no lumps. This step is key. Adding powdered sugar next helps to sweeten it up. Mix until fully combined. When you fold in whipped cream, do it gently. This keeps the mixture light and airy. Make your Santa Hat Cheesecake Bites pop with fun decorations. Use fresh strawberries turned upside down for the hat shape. Add a dollop of whipped cream at the bottom for a fluffy look. For a fun touch, sprinkle mini chocolate chips on top. This makes the bites look like they have a little bobble. Arrange them on a bright platter for a festive feel. Drizzling chocolate sauce around the bites adds a nice touch too. Avoid using cold cream cheese; it clumps. If you rush mixing, you may get lumps. Don’t skip chilling the crust. It helps the bites hold their shape. Be careful not to overfold the whipped cream. If you do, the filling may lose its fluffiness. Lastly, don’t forget to chill the assembled bites for at least two hours. This helps them set properly. Pro Tips Chill the Cheesecake Filling: For a firmer texture, chill the cheesecake filling for about 30 minutes before assembling the bites. Use Fresh Strawberries: Choose ripe, fresh strawberries to ensure the best flavor and presentation for your Santa hats. Whipped Cream Alternatives: For a lower-calorie option, consider using a light whipped topping or Greek yogurt in place of whipped cream. Decorative Touch: Enhance the festive look by adding edible glitter to the whipped cream for a sparkling effect! {{image_2}} You can switch up the cheesecake filling to create new flavors. Instead of plain cheesecake, try adding lemon juice or zest for a bright, zesty twist. You can also mix in melted chocolate for a rich chocolate cheesecake. If you like fruit flavors, add pureed raspberries or blueberries to the filling. This will give your bites a delicious fruity taste. While strawberries are perfect for Santa hats, you can use other fruits too. For a tropical flair, try using pineapple or kiwi. If you want a winter touch, consider pomegranate seeds for a pop of color. Each fruit adds its own flavor and look, making your cheesecake bites even more festive and fun. To make these cheesecake bites gluten-free, use gluten-free graham crackers or crushed nuts for the crust. Almond flour works great as a nutty base. Make sure all other ingredients, like cream cheese and whipped cream, are gluten-free. This way, everyone can enjoy this festive treat without worry. To keep your Santa Hat Cheesecake Bites fresh, store them in an airtight container. Place a layer of wax paper between layers to avoid sticking. Keep them in the fridge for up to three days. This way, the bites stay cool and creamy. If you want to keep your cheesecake bites longer, freezing is a great option. Place the bites in a single layer on a baking sheet. Freeze them for about one hour until firm. Then, transfer them to a freezer-safe bag. They can last for up to a month in the freezer. Just remember to label the bag with the date. These cheesecake bites are best served cold. If you want to serve them warm, let them sit at room temperature for 10-15 minutes. This brings back their creamy texture. You can also add a fresh whipped cream dollop on top before serving. It adds a nice touch and extra flavor. Enjoy these festive treats anytime during the season! Yes, you can make these cheesecake bites ahead of time. Prepare them up to two days in advance. Just store them in the fridge. This helps the flavors blend well. You can also keep the crust and filling separate. Assemble them the day you serve. Yes, you can create a vegan version. Use vegan cream cheese and coconut whipped cream. Substitute melted coconut oil for butter. Use agave syrup instead of powdered sugar. These swaps keep the taste and texture similar. You can add more colors and flavors. Use colored sprinkles or edible glitter. Drizzle melted chocolate on top. You can also use flavored whipped cream. Peppermint or raspberry adds a fun twist. These bites are perfect for holiday parties and family gatherings. They are great for Christmas and New Year’s celebrations. Serve them at potlucks or cookie swaps. Their fun design impresses guests of all ages. In this post, we explored how to make Santa Hat Cheesecake Bites. We covered key ingredients, step-by-step instructions, and helpful tips. You learned about various garnishes and substitutes. We also discussed storage and variations for your bites. These festive treats are fun to make and share. With these easy steps, you can impress family and friends. Enjoy making your Santa Hat Cheesecake Bites this season!

Santa Hat Cheesecake Bites Festive Holiday Treat

- 4 bone-in, skin-on chicken thighs - 1/4 cup low-sodium soy sauce - 2 tablespoons honey - 2 tablespoons rice vinegar - 1 tablespoon sesame oil - 2 cloves garlic, minced - 1 teaspoon fresh ginger, grated - 1 tablespoon cornstarch - 1 tablespoon water - Sesame seeds and sliced green onions for garnish For best taste, stick to the exact amounts listed. If you want less salt, use regular soy sauce. You can also try maple syrup instead of honey for a vegan option. Rice vinegar is key, but apple cider vinegar works too. If ginger is not handy, use ground ginger instead, but reduce the amount. Choose fresh chicken thighs with good skin. Look for thighs that are plump, not dried out. When picking soy sauce, go for low-sodium to control salt intake. Fresh garlic and ginger make a big difference in flavor. Always check the expiration date on your ingredients. This ensures you get the best taste and quality in your air fryer teriyaki chicken thighs. {{ingredient_image_1}} First, we need to make the marinade. In a bowl, whisk together the soy sauce, honey, rice vinegar, sesame oil, minced garlic, and grated ginger. This mix adds great flavor. Next, take your chicken thighs and place them in a resealable bag or a shallow dish. Pour the marinade over the chicken. Make sure every piece is coated well. Seal the bag or cover the dish. Let it marinate in the fridge for at least 30 minutes. You can marinate for up to 2 hours for more flavor. While the chicken marinates, it's time to preheat your air fryer. Set it to 375°F (190°C). Preheating helps the chicken cook evenly. Now, let’s cook the chicken. Take the thighs out of the marinade and shake off any extra liquid. Place them skin-side down in the air fryer basket. Cook them for 10 minutes. After 10 minutes, carefully flip the chicken thighs. Use tongs for safety. Brush them with some of the thickened marinade you made earlier. Cook for another 10 to 12 minutes. To check if the chicken is done, use a meat thermometer. The internal temperature should be 165°F (75°C). The skin should be crispy and golden brown. Once done, remove the chicken from the air fryer. Let it rest for 5 minutes before serving. To get crispy skin on your chicken thighs, make sure to dry them well before cooking. Pat the skin with paper towels to remove any moisture. The air fryer needs dry skin to create that perfect crunch. Cook the chicken skin-side down first. This helps render the fat and crisp the skin. Flip it halfway through and brush with thickened marinade for extra flavor. For the best flavor, marinate your chicken thighs for at least 30 minutes. If you have time, marinating for up to 2 hours works wonders. This allows the soy sauce, honey, and garlic to seep in deeply. You can even marinate overnight for a stronger taste. Just remember to keep it in the fridge. Do not throw away the leftover marinade! Instead, bring it to a boil in a saucepan. This step kills any bacteria from the raw chicken. Once it simmers for about five minutes, mix in cornstarch and water to thicken it. Use this as a tasty sauce to drizzle over your cooked chicken. It adds flavor and makes your dish look great. Pro Tips Marinate for Maximum Flavor: For the best flavor, marinate the chicken thighs for at least 2 hours, or overnight if possible. This allows the flavors to penetrate the meat deeply. Check for Crispiness: If the skin is not crispy enough after cooking, you can increase the temperature to 400°F (200°C) for the last few minutes to achieve that perfect crunch. Thicker Sauce Option: If you prefer a thicker sauce, add an extra teaspoon of cornstarch mixed with water to the marinade while it simmers. This will give you a glaze-like consistency. Resting is Key: Always let the chicken rest for about 5 minutes after cooking. This helps the juices redistribute, resulting in a juicier bite. {{image_2}} You can create many flavors with different marinades. Try a spicy marinade by adding chili paste. For a sweet twist, mix in orange juice. You can also use pineapple juice for a fruity taste. Experiment with different herbs, like cilantro or basil. Each change will give your dish a new flair. You can use other cuts of chicken. Boneless thighs cook fast and are tender. Chicken breasts are a lean option but may dry out. Chicken drumsticks also work well, but adjust cooking time. The key is to watch for that perfect juicy finish. Air fryers are great for cooking many proteins. Try air frying shrimp for a quick meal. Set the temperature to 375°F (190°C) and cook for about 5-7 minutes. Pork chops can be juicy and crispy too. Just remember to check internal temps for safety. Fish fillets cook nicely at a lower temp of 350°F (175°C). Always aim for that golden brown color! After you enjoy your Air Fryer Teriyaki Chicken Thighs, store any leftovers properly. Let the chicken cool down first. Place the chicken in an airtight container. This helps keep it fresh. Store it in the fridge for up to three days. To reheat, you can use the air fryer again. Set it to 350°F (175°C). Place the chicken thighs in the basket. Heat them for about 5-7 minutes. This will help keep the skin crispy. You can also use a microwave. Just cover it with a damp paper towel and heat for 1-2 minutes. If you want to freeze your teriyaki chicken, wrap each piece well. Use plastic wrap or aluminum foil. Then place them in a freezer bag. Remove as much air as possible. You can freeze the chicken for up to three months. When you're ready to eat, thaw it in the fridge overnight before reheating. Yes, you can use boneless chicken thighs. They will cook faster than bone-in thighs. Adjust the cooking time to about 8 to 10 minutes per side. Check the internal temperature to reach 165°F (75°C). Boneless thighs are tasty and easy to eat. Use a meat thermometer to check the thickest part of the chicken. The safe internal temperature is 165°F (75°C). If you don’t have a thermometer, cut into the chicken. The juices should run clear, not pink. Teriyaki chicken pairs well with steamed rice or fried rice. You can add stir-fried veggies for color and crunch. A fresh salad with a light dressing also works great. For a fun twist, serve with pineapple slices for a sweet touch. This blog post covered everything you need for making teriyaki chicken thighs. We explored key ingredients, how to cook in an air fryer, and tips for crispy skin. We shared various marinades and alternate protein options as well. Proper storage and reheating tips ensure your leftovers taste great. Remember, using quality ingredients makes a difference. Try out these steps and watch your cooking skills grow. Enjoy your delicious, homemade teriyaki chicken!

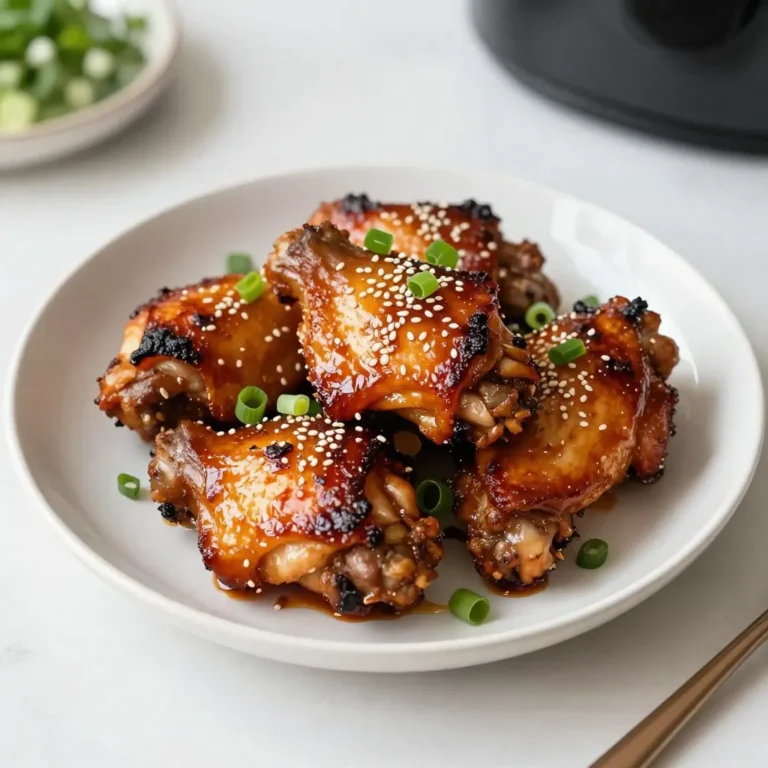
Air Fryer Teriyaki Chicken Thighs Flavorful Dish

- 1 cup rolled oats - 1 cup unsweetened almond milk - 1 large apple, diced - 1 teaspoon ground cinnamon - 1 tablespoon maple syrup - 1/2 teaspoon vanilla extract - Pinch of salt - 1/4 cup Greek yogurt - 2 tablespoons chopped walnuts - Fresh apple slices - Granola These ingredients make the best apple pie overnight oats. The rolled oats give a hearty base. Almond milk keeps it creamy and dairy-free. Diced apples add sweetness and crunch. Ground cinnamon gives that warm spice flavor. Maple syrup brings out the natural sweetness. Vanilla extract adds a nice touch, and a pinch of salt balances it all. You can add Greek yogurt for extra creaminess. Chopped walnuts work well for a crunchy bite. For toppings, fresh apple slices and granola add great flavor and texture. Enjoy mixing these ingredients for a breakfast that feels like dessert! {{ingredient_image_1}} - In a medium bowl, combine: - 1 cup rolled oats - 1 cup unsweetened almond milk - 1 large diced apple - 1 teaspoon ground cinnamon - 1 tablespoon maple syrup - 1/2 teaspoon vanilla extract - Pinch of salt - Stir until well mixed. Make sure all ingredients blend nicely. - Divide the mixture evenly into two jars or containers. - Seal the jars tightly and place them in the fridge. - In the morning, stir the oats well. If they are too thick, add a splash of almond milk. - Top with chopped walnuts for extra crunch. You can also sprinkle more cinnamon on top for flavor. To taste and modify sweetness, simply use a spoon to sample the oat mixture. If you want it sweeter, add a little more maple syrup. You can also use honey instead of maple syrup. Honey has a lovely floral note and blends well with apples. Just remember, honey is sweeter, so use a bit less. For extra creaminess, I recommend adding Greek yogurt. It makes the oats smooth and rich. If you prefer, you can use milk alternatives like oat milk or coconut milk. These options can add unique flavors that pair well with apple pie. Serving in mason jars makes for a charming presentation. The jars look rustic and inviting. For a finishing touch, garnish with a slice of fresh apple or a sprinkle of granola. This adds color and texture to your dish. Enjoy the beautiful look before you dive in! Pro Tips Choose the Right Apple: For the best flavor and texture, use tart apples like Granny Smith. They hold their shape well and provide a nice contrast to the creamy oats. Add More Toppings: Customize your oats by adding toppings like fresh berries, a dollop of nut butter, or a sprinkle of chia seeds for added nutrition and flavor. Experiment with Milk Alternatives: While almond milk is a great choice, feel free to try oat milk, coconut milk, or even regular dairy milk for different flavors and creaminess. Make It Vegan: To keep this recipe completely plant-based, use maple syrup instead of honey and ensure your yogurt is dairy-free. {{image_2}} You can spice up your oats in many ways. Try adding a pinch of nutmeg or ginger. These spices will give your oats a warm, cozy taste. You can also switch up the apples. For a sweeter bite, use Fuji or Honeycrisp apples. If you prefer tart flavors, stick with Granny Smith apples. Each type of apple brings its own charm to the dish. If you want dairy-free or vegan options, use almond milk or any plant-based milk. You can skip the Greek yogurt for a lighter version. For gluten-free oats, make sure to use certified gluten-free rolled oats. This way, everyone can enjoy this tasty treat. Feel free to get creative with mix-ins. You can add raisins or other dried fruits for extra sweetness. Incorporating seeds like chia or flax can boost nutrition. They add fiber and healthy fats, making your meal even better. Experiment with what you like best! To keep your apple pie overnight oats fresh, store them in the refrigerator. Use airtight containers or mason jars for best results. This helps to lock in moisture and flavor. Make sure to seal them tightly before placing them in the fridge. This keeps out any unwanted odors. Your oats will last about 4 to 5 days in the fridge. After that, they may not taste as good. Look for signs that the oats have gone bad. If you see mold or the oats smell sour, it’s best to throw them out. Freshness is key for the best flavor. Can you freeze overnight oats? Yes, you can! Freezing can extend their shelf life. To freeze, place the oats in a freezer-safe container. Leave some space at the top, as they will expand. When ready to eat, thaw the oats in the fridge overnight. You can also warm them up in the microwave. Enjoy your tasty and easy breakfast! Overnight oats are a no-cook method of making oatmeal. You mix rolled oats with milk and let them sit overnight. This softens the oats and makes them creamy. They are easy to prepare and save time in the morning. You can add fruits, nuts, and spices to create flavors you love. The benefits include a healthy breakfast packed with fiber and nutrients. They are also quick, customizable, and can be made in advance. Yes, you can easily make these oats vegan. Just swap the Greek yogurt for a plant-based yogurt. You can use maple syrup as a sweetener instead of honey. Choose unsweetened almond milk or any other plant milk you like. These simple changes keep the recipe tasty and vegan-friendly. Overnight oats should sit for at least 4 hours or overnight. This soaking time allows the oats to absorb the liquid. The ideal soaking time gives a creamy and soft texture. If you want them ready for breakfast, prepare them the night before. This way, you can enjoy a quick and filling meal in the morning. This blog post covered how to make delicious overnight oats. We discussed the main and optional ingredients, and how to prepare them. I shared tips for sweetness and creaminess, along with variations for flavor and dietary needs. Storing the oats properly is key for freshness and taste. Incorporating these ideas will make your breakfast satisfying and fun. Enjoy exploring different flavors while keeping it healthy and easy!

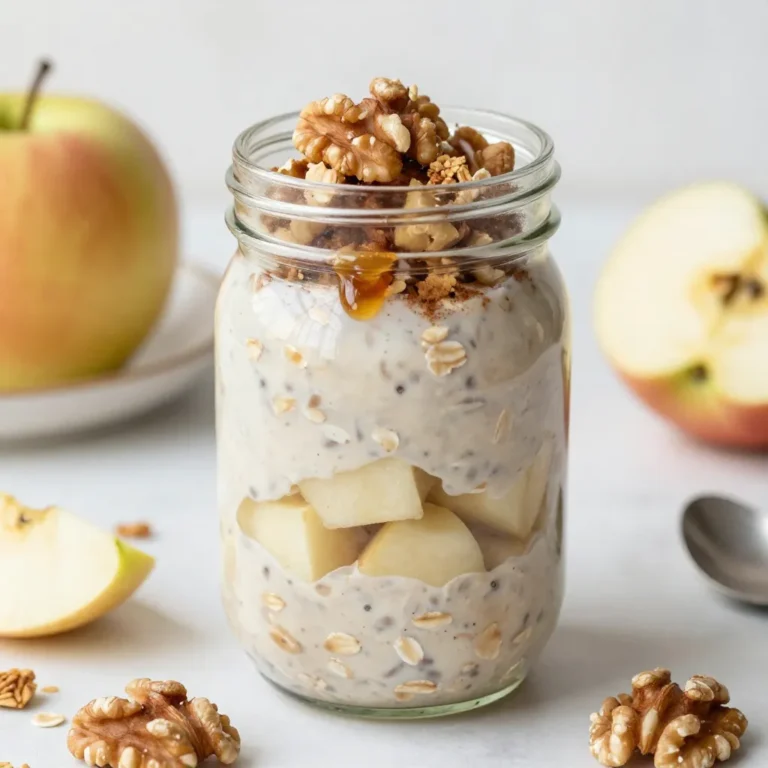
Delicious Apple Pie Overnight Oats Recipe

To make this yummy bread, gather these key ingredients: - 1 ½ cups all-purpose flour - ½ cup unsweetened cocoa powder - 1 teaspoon baking soda - ½ teaspoon baking powder - ½ teaspoon salt - ½ cup granulated sugar - ½ cup brown sugar, packed - 2 large eggs - 1 teaspoon vanilla extract - ¾ cup vegetable oil - 1 ½ cups grated zucchini (about 1 medium zucchini) - 1 cup chocolate chips (semi-sweet or dark) These ingredients create a rich and moist loaf. The cocoa powder gives it that deep chocolate taste. The zucchini adds moisture and a hidden veggie twist. You can add extra ingredients to boost the flavor of your bread: - ½ cup chopped walnuts (optional) Adding walnuts gives a nice crunch. They also add a nutty flavor that complements the chocolate. If you have allergies, you can make some easy swaps: - Use gluten-free flour instead of all-purpose flour. - Replace eggs with flaxseed meal mixed with water. - Swap vegetable oil with applesauce for a lighter option. These substitutions help you enjoy the bread while catering to dietary needs. Just be sure to adjust cooking times if needed. {{ingredient_image_1}} First, preheat your oven to 350°F (175°C). This ensures even baking. Next, take a 9x5-inch loaf pan. You can grease it or line it with parchment paper. Lining makes it easy to remove the bread later. In a medium bowl, grab your flour, cocoa powder, baking soda, baking powder, and salt. Whisk them together until they blend well. This step is important as it helps create a smooth batter. Set this bowl aside for now. Now, in a large mixing bowl, add granulated sugar, brown sugar, eggs, and vanilla extract. Whisk these ingredients until the mixture becomes smooth. This should take about a minute. Then, slowly pour in the vegetable oil. Keep whisking until everything is well mixed. Take your grated zucchini and fold it into the wet mixture. Use a spatula to mix gently. This adds moisture and flavor. Next, slowly add the dry ingredients. Stir carefully until just combined. Be sure not to overmix. Finally, fold in the chocolate chips and walnuts if you like them. Pour the batter into your prepared loaf pan. Spread it evenly with a spatula. Place it in the oven and bake for 50-60 minutes. To check for doneness, insert a toothpick into the center. If it comes out clean, your bread is ready. Let it cool in the pan for about 10 minutes before transferring it to a wire rack. Enjoy the lovely aroma as it cools! Overmixing can ruin your bread. When you mix the wet and dry ingredients, do it gently. Stir until you see no dry flour. Lumps are okay; they help keep the bread soft. If you mix too much, the bread becomes tough. Trust me, it’s better to stop early than to mix too long. Zucchini is the secret to moist bread. Grate your zucchini finely to mix well. Do not squeeze out the water. The moisture from the zucchini adds a nice texture. If you do not use enough, your bread will dry out. Aim for 1 ½ cups of grated zucchini for best results. Baking time is key. Keep an eye on the bread as it cooks. Every oven is different, so check at 50 minutes. Insert a toothpick in the center. If it comes out clean, it's done. If it’s wet, bake for a few more minutes. Let it cool in the pan for 10 minutes before moving it. This helps it set and makes it easier to slice. Pro Tips Use Fresh Zucchini: For the best flavor and moisture, use fresh, firm zucchini. Older zucchini can be watery and less flavorful. Don't Overmix: When combining the wet and dry ingredients, mix just until combined. Overmixing can lead to a dense bread. Cool Before Slicing: Allow the bread to cool completely before slicing to prevent it from falling apart and to enhance the flavors. Storage Tips: Store leftover zucchini bread in an airtight container at room temperature for up to 3 days, or freeze for longer storage. {{image_2}} You can switch up the nuts in this recipe. Try using pecans or almonds instead of walnuts. You can also skip the nuts if you prefer a nut-free option. This bread still tastes great without them. If you use nuts, chop them into small pieces to mix in easily. They add a nice crunch. Feel free to mix up the chocolate! You can use milk chocolate for a sweeter taste. Dark chocolate adds a rich flavor that many people love. You can even use white chocolate for a fun twist. Just make sure to adjust the sugar if you use sweeter chocolate. Each type changes the taste and texture a bit, so have fun experimenting. To make this bread gluten-free, swap the all-purpose flour for a gluten-free blend. Look for a blend that has xanthan gum to help with texture. The result will still be soft and moist. Just follow the same mixing and baking steps. You'll enjoy a delicious treat that fits your needs. To keep your double chocolate zucchini bread fresh, wrap it tightly. Use plastic wrap or foil to cover it well. Store it at room temperature for up to three days. If you want it to last longer, place it in the fridge. This will help it stay moist and tasty. If you have more than you can eat, freeze it! First, let the bread cool completely. Then, slice it into pieces for easy serving. Wrap each slice in plastic wrap, then place them in a freezer bag. This way, you can enjoy a slice anytime. It can last up to three months in the freezer. When you're ready to eat your frozen bread, take a slice out of the freezer. You can let it thaw at room temperature for a bit. For a warm treat, use the microwave. Heat it for about 20-30 seconds. If you want a crispy crust, pop it in the oven at 350°F for 10 minutes. Enjoy your delicious, warm bread! Yes, you can use frozen zucchini for this recipe. Just make sure to thaw and drain it well. Excess water can make your bread soggy. Frozen zucchini works just as well as fresh zucchini. It keeps the bread moist and adds great flavor. Double chocolate zucchini bread stays fresh for about 3 to 4 days at room temperature. Store it in an airtight container to keep it moist. You can also refrigerate it to extend the shelf life up to a week. If you want to save it longer, freeze it. Yes, you can make this recipe vegan. Substitute eggs with flax eggs. Use 1 tablespoon of ground flaxseed mixed with 2.5 tablespoons of water for each egg. Replace the vegetable oil with applesauce or a plant-based oil. Also, check the chocolate chips to ensure they are dairy-free. You can serve this bread with many tasty options. A dollop of whipped cream adds a nice touch. Vanilla ice cream pairs well for a sweet treat. You can also enjoy it with a cup of coffee or tea. For extra fun, try spreading some nut butter on top! This article covered essential elements for making delicious double chocolate zucchini bread. We looked at key ingredients and how to mix them well. You learned tips for baking and storing leftovers. Vary the recipe with nuts or different chocolates for fun. Enjoying this treat is simple if you follow these steps. Your friends and family will love your baking. Now, get started, and enjoy every slice!

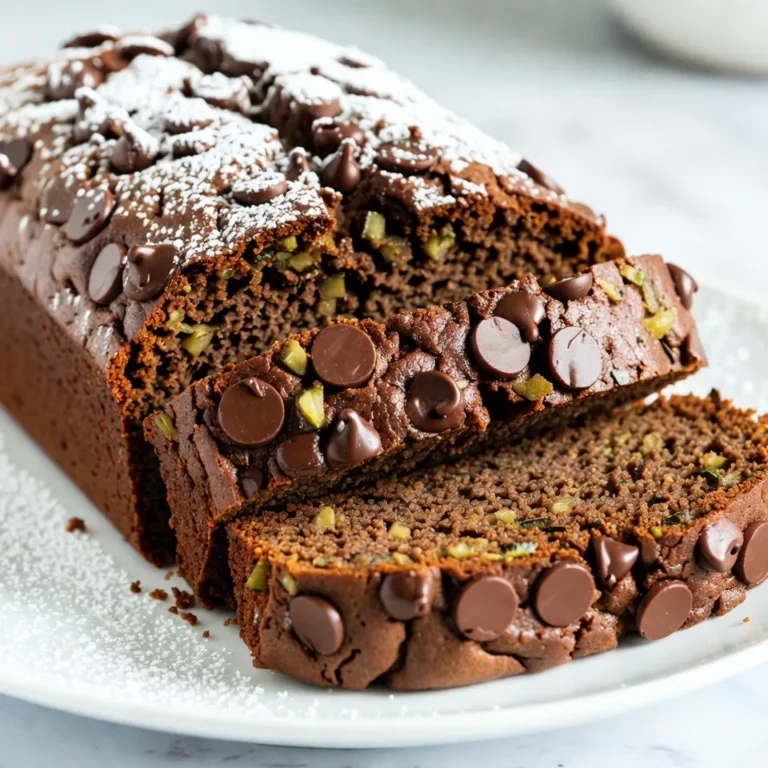
Delicious Double Chocolate Zucchini Bread Recipe

To make Red Velvet Crinkle Cookies, gather these items: - 2 cups all-purpose flour - 1 tablespoon cocoa powder - 1 teaspoon baking powder - 1/2 teaspoon baking soda - 1/4 teaspoon salt - 1 cup granulated sugar - 1/2 cup vegetable oil - 2 large eggs - 1 tablespoon red food coloring - 1 teaspoon vanilla extract - 1 cup powdered sugar (for coating) You can swap some ingredients if needed. Here are good options: - All-purpose flour: Use a gluten-free blend for gluten-free cookies. - Vegetable oil: Canola oil or melted coconut oil works well. - Eggs: Use flaxseed meal mixed with water for a vegan option. - Red food coloring: Natural beet juice gives a nice color too. Each ingredient plays a key role in the cookie's texture. Here’s how: - All-purpose flour gives structure. Too much can make cookies tough. - Cocoa powder adds flavor and a rich color. It balances the sweetness. - Baking powder and baking soda help cookies rise. They create that crinkle effect. - Granulated sugar adds sweetness and moisture. It helps cookies stay soft. - Vegetable oil keeps cookies chewy. It helps them not dry out. - Eggs add moisture and bind the dough. They help cookies rise. - Red food coloring makes them visually appealing. It’s all about that signature look! These ingredients combined create a delightful cookie that melts in your mouth. {{ingredient_image_1}} First, gather all your ingredients. You need: - 2 cups all-purpose flour - 1 tablespoon cocoa powder - 1 teaspoon baking powder - 1/2 teaspoon baking soda - 1/4 teaspoon salt - 1 cup granulated sugar - 1/2 cup vegetable oil - 2 large eggs - 1 tablespoon red food coloring - 1 teaspoon vanilla extract - 1 cup powdered sugar (for coating) Start by preheating your oven to 350°F (175°C). Line a baking sheet with parchment paper. This helps the cookies not stick. In a medium bowl, mix the flour, cocoa powder, baking powder, baking soda, and salt. Whisk well and set it aside. In a large bowl, combine the granulated sugar and vegetable oil. Whisk them together until they blend well. Add the eggs, red food coloring, and vanilla extract. Whisk again until the mix turns smooth and bright red. Now, slowly add the dry flour mix to the wet ingredients. Stir until the dough is fully mixed. It may feel sticky, which is fine. Place the dough in the fridge for about 30 minutes. This makes it easier to roll. Once the dough is chilled, take it out. Use a tablespoon or cookie scoop to portion the dough. Roll each piece into a ball. Then, roll the ball in powdered sugar until it’s fully coated. Place the dough balls on your baking sheet with 2 inches of space in between each one. Bake in your preheated oven for 10-12 minutes. The edges should be set, but the centers may look underbaked. This is normal and gives the cookies a soft texture. After baking, take the cookies out of the oven. Let them cool on the baking sheet for 5 minutes. This helps them firm up a bit. Then, transfer them to a wire rack to cool completely. For serving, I like to present the cookies on a nice plate. You can dust them with extra powdered sugar. Add some fresh berries or a scoop of vanilla ice cream for a fun twist! To get that signature crinkle on your cookies, chill the dough first. This step helps the cookies keep their shape when baking. After rolling the dough balls, coat them well in powdered sugar. This coating will crack as the cookies bake, giving you those beautiful crinkles. Bake them until the edges set but the centers remain soft. This timing helps enhance the crinkle effect. One common mistake is skipping the chilling step. If the dough is too warm, it spreads too much, losing its shape. Another mistake is not coating the dough balls enough in powdered sugar. Make sure they are fully covered for an even look. Lastly, avoid overbaking. Cookies that are too dry won’t have that chewy texture we love. When making the dough, use a sturdy bowl to mix your ingredients. Be gentle when combining the wet and dry ingredients to avoid overmixing. Overmixing can make the cookies tough. After chilling, scoop the dough quickly to keep it cool. Always wash your hands before handling the dough to keep it clean. Store any leftover dough in the fridge if you want to bake later. Pro Tips Chill the Dough: Refrigerating the cookie dough for at least 30 minutes helps in handling the sticky mixture and results in a better shape during baking. Use Gel Food Coloring: For a more vibrant red color, opt for gel food coloring instead of liquid food coloring, as it provides a richer hue without altering the dough's consistency. Don't Overbake: Keep an eye on the cookies while baking. They should look slightly underbaked in the center; they will continue to cook as they cool on the baking sheet. Experiment with Flavor: Add a pinch of cinnamon or almond extract to the dough for an extra layer of flavor that complements the red velvet perfectly. {{image_2}} You can make these cookies even more fun by adding other flavors. Try mixing in some mint extract for a fresh twist. Almond extract also pairs well with the rich red color. Just use a teaspoon of your chosen flavor. This small change can make a big impact. If you need gluten-free cookies, you can use a gluten-free flour blend. Many blends work well to keep the taste and texture great. Look for a blend with xanthan gum; it helps the cookies hold together. Check the package for the right amount to use. You can change the cookies for any season. For fall, add a pinch of cinnamon or nutmeg. This gives them a warm, cozy flavor. In winter, try mixing in some crushed candy canes for a minty crunch. For Valentine's Day, add heart-shaped sprinkles to make them festive. These ideas keep your cookies fun and fresh! To keep your cookies fresh, place them in an airtight container. Line the bottom with parchment paper. This helps prevent sticking. You can store them at room temperature for up to five days. For longer freshness, the fridge works too. Just ensure they are sealed tightly to avoid drying out. Freezing these cookies is easy and a great way to save them. First, let the cookies cool completely. Then, place them in a single layer on a baking sheet. Freeze for about one hour. After that, move them to a freezer-safe bag or container. They can last for up to three months in the freezer. Remember to label the bag with the date. To enjoy your cookies warm, reheat them in the oven. Preheat the oven to 350°F (175°C). Place the cookies on a baking sheet. Heat them for about 5 to 7 minutes. This helps keep the texture soft and the flavors fresh. You can also use a microwave for quick reheating. Just heat for 10 to 15 seconds. Enjoy your delightful treat! Red Velvet Crinkle Cookies come from the popular red velvet cake. This cake has roots in the Southern United States. The bright red color makes it stand out. People enjoy it for its rich flavor and soft texture. Bakers adapted this cake into cookie form. This led to the crinkle effect, which adds a fun look. The cookies are soft and chewy, with a hint of cocoa. They are perfect for any celebration or just a sweet treat. Yes, you can make these cookies without eggs. Use a substitute for eggs to keep the texture. Common choices are unsweetened applesauce or mashed bananas. Use 1/4 cup of applesauce for each egg. This helps bind the ingredients together. You can also try flaxseed meal. Mix 1 tablespoon of flaxseed meal with 3 tablespoons of water. Let it sit for a few minutes to thicken. This mix works well in cookies and keeps them moist. To make these cookies less sweet, reduce the sugar used in the recipe. You can cut the granulated sugar by 1/4 cup. This change won’t affect the texture much. Use a sugar substitute like stevia or erythritol for less sugar. Adjust the amount based on the product's instructions. You can also add a bit more cocoa powder to balance the sweetness. This adds depth without making the cookies too sweet. In this post, I discussed the key ingredients, steps, tips, and varieties for Red Velvet Crinkle Cookies. Each part plays a role in creating the perfect treat. Remember to choose the right ingredients for texture and flavor. Don’t forget the tips to avoid mistakes. You can swap ingredients to fit your taste. With these details, you can bake and enjoy your cookies to the fullest. Get ready to impress your friends and family with your baking skills!

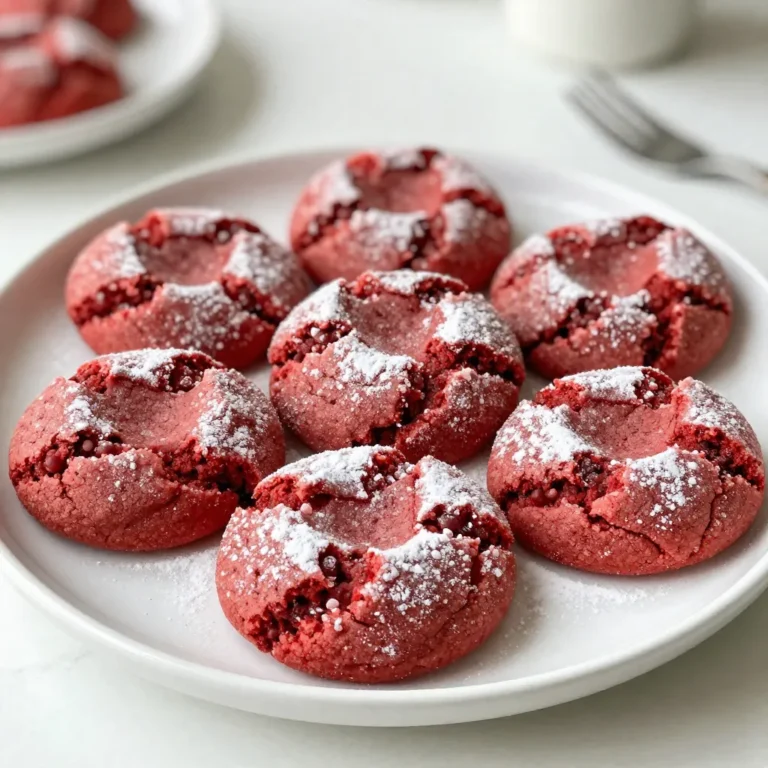
Red Velvet Crinkle Cookies Delightful and Easy Treat

- 4 cups fresh baby spinach, washed and dried - 2 cups fresh strawberries, hulled and sliced - 1/2 cup crumbled feta cheese - 1/4 cup red onion, thinly sliced - 1/4 cup slivered almonds (toasted if desired) For a lively salad, I love using fresh ingredients. Baby spinach adds a nice crunch and bright color. Strawberries bring sweetness and a pop of red. The red onion offers a sharp bite. Crumbled feta cheese gives a creamy texture. Slivered almonds add crunch and nutty flavor. - 1/4 cup olive oil - 3 tablespoons apple cider vinegar - 2 tablespoons honey or agave syrup - Salt and pepper to taste The dressing makes the salad shine. I mix olive oil with apple cider vinegar for a tangy base. Honey or agave syrup balances the flavors with sweetness. A pinch of salt and pepper enhances the taste. Combine these in a bowl, and you’ll have a perfect dressing. {{ingredient_image_1}} To start, grab a small mixing bowl. In this bowl, whisk together the olive oil, apple cider vinegar, honey, salt, and pepper. Make sure each ingredient blends well. This creates a nice balance of sweet and tangy flavors. Once mixed, set the dressing aside. Letting it sit allows the flavors to meld together. Now, let's move to the salad. Take a large salad bowl and add the fresh baby spinach. Then, add the sliced strawberries on top. Next, sprinkle in the thinly sliced red onion. Finally, crumble the feta cheese over the salad. These ingredients will bring a mix of colors and flavors to your dish. Next, it’s time to mix! Drizzle the dressing over the salad mixture. Gently toss everything together until the spinach, strawberries, and feta are coated in the dressing. For added crunch, sprinkle the toasted slivered almonds and poppy seeds on top. Serve your salad right away for the best taste, or chill it for about 10 minutes if you prefer it cold. Enjoy your refreshing Strawberry Spinach Poppy Seed Salad! When picking strawberries, look for bright red ones. They should be firm, not soft. Check for green caps, which mean they are fresh. Seasonal strawberries taste the best in spring and summer. They are sweet and juicy at this time. Avoid berries with dark spots or bruises. These signs mean they might be overripe. You can prepare the dressing a day before. Just mix the olive oil, apple cider vinegar, honey, salt, and pepper. Store it in the fridge in a sealed jar. This saves you time when you want to make the salad. For fresh ingredients, wash and cut them ahead of time. Keep the strawberries and spinach in separate containers. This keeps them fresh and crisp. To boost the flavor, consider adding fresh herbs. Mint or basil pairs well with the strawberries. You can also add a pinch of cinnamon for warmth. If you like sweeter flavors, add more honey or agave syrup. Taste as you go to find the right balance. You can adjust the sweetness level to your liking. Pro Tips Freshness is Key: Use fresh, organic strawberries and spinach to enhance the flavor and nutritional value of your salad. Customize Your Dressing: Feel free to adjust the sweetness of the dressing by adding more or less honey or agave syrup based on your taste preference. Add Protein: For a heartier salad, include grilled chicken or chickpeas for added protein and a more filling meal. Make Ahead: You can prepare the dressing in advance and store it in the refrigerator for up to a week. Just give it a good shake before using! {{image_2}} You can switch feta cheese with goat cheese or blue cheese. Both add a rich taste. If you're looking for a non-dairy option, try vegan feta. It gives a nice creaminess. For nuts, slivered almonds are great, but walnuts or pecans also work well. They add a different crunch and flavor. In summer, add fresh peaches or blueberries for a sweet twist. They pair well with spinach and strawberries. In fall, consider using apples or pears. They bring a lovely crunch and a hint of sweetness, perfect for autumn. You can change the dressing for a new flavor. Try a balsamic vinaigrette or a creamy ranch. These dressings bring different tastes that complement the salad well. For a vegan option, mix tahini with lemon juice and maple syrup. This dressing is both rich and tasty. To keep your salad fresh, store it in the fridge. Use an airtight container. This helps to keep the flavors intact. If you want to keep it longer, consider freezing. However, the texture of spinach and strawberries can change after thawing. Freezing is best for the dressing only. You can store it in a bottle or jar. Enjoy your salad within three days for the best taste. After that, the spinach wilts, and the strawberries lose their crispness. Look for signs of spoilage. If the spinach turns brown or slimy, it’s time to toss it. Strawberries should also be bright red and firm. If they get mushy or moldy, they are no longer good. To make this salad vegan, replace the feta cheese with a plant-based cheese. You can also use a different sweetener like maple syrup instead of honey. This keeps the flavor bright and fresh. Yes, you can use frozen strawberries. Thaw them first and drain any extra juice. They may be softer than fresh ones but still taste great in the salad. The salad can last about 1 to 2 days in the fridge. Store it in an airtight container to keep it fresh. If you add the dressing, eat it sooner for the best taste. You can prepare the salad but add the dressing just before serving. This keeps the spinach crisp and fresh. If you don’t have slivered almonds, try walnuts or pecans. They add a nice crunch and flavor. To make the dressing healthier, use less oil or substitute with yogurt. You can also reduce the amount of sweetener for a lighter option. Add grilled chicken or chickpeas for extra protein. Both will make the salad more filling and tasty. This salad pairs well with grilled meats or sandwiches. It also works great as a side for a picnic or barbecue. In this blog post, we explored how to create a delicious salad using fresh ingredients like baby spinach and strawberries. We discussed the important steps for making a flavorful dressing and assembling your salad. I shared tips on choosing the best strawberries and how to enhance flavors. You can also customize the salad with various ingredient options. With these tips, you can make this salad your own. Enjoy the freshness and flavor of each bite. Your salad is bound to impress!

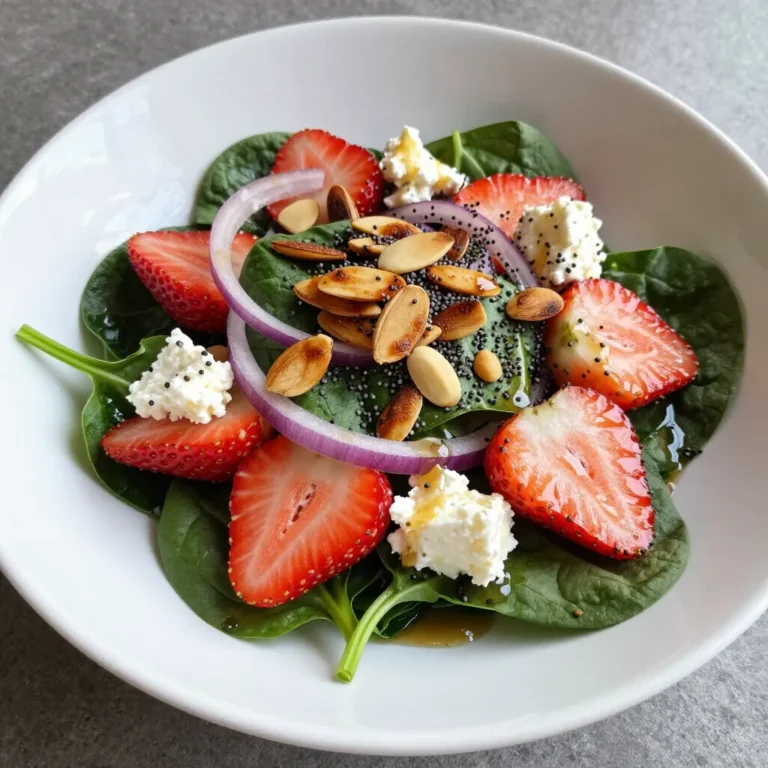
Strawberry Spinach Poppy Seed Salad Delightful Recipe

For a tasty Teriyaki Chicken Stir Fry, you need these key ingredients: - 1 lb boneless, skinless chicken thighs, sliced into thin strips - 2 tablespoons vegetable oil - 1 cup broccoli florets - 1 bell pepper, sliced (red or yellow for sweetness) - 1 medium carrot, julienned - 1 cup sugar snap peas - 3 green onions, chopped - 2 cloves garlic, minced - 1 tablespoon fresh ginger, grated - 1/4 cup low-sodium soy sauce - 2 tablespoons honey - 1 tablespoon rice vinegar - 1 teaspoon sesame oil - 1 tablespoon cornstarch mixed with 2 tablespoons of water (slurry for thickening) - Sesame seeds for garnish You can enhance the dish with these optional ingredients: - Red pepper flakes for heat - Additional vegetables like mushrooms or zucchini - Fresh herbs like cilantro or basil for garnish To make this dish, gather these tools: - A large non-stick skillet or wok - A sharp knife for cutting - A cutting board - Mixing bowls for the sauce and ingredients - A whisk for blending the sauce These ingredients and tools make it easy to whip up a delicious Teriyaki Chicken Stir Fry. Enjoy cooking! {{ingredient_image_1}} First, slice 1 pound of boneless, skinless chicken thighs into thin strips. This helps them cook quickly. Heat 1 tablespoon of vegetable oil in a large skillet or wok over medium-high heat. Once the oil is hot, add the chicken. Stir-fry the chicken for about 5 to 7 minutes. You want it to turn golden brown and cook all the way through. When it’s done, take the chicken out of the skillet and set it aside. In the same skillet, add another tablespoon of vegetable oil. Next, add 2 minced garlic cloves and 1 tablespoon of grated ginger. Stir-fry this mix for about 30 seconds until it smells great. Now, it’s time to add the veggies! Toss in 1 cup of broccoli florets, 1 sliced bell pepper, 1 julienned carrot, and 1 cup of sugar snap peas. Stir-fry these for about 3 minutes. You want them to be tender but still a bit crunchy. In a small bowl, mix 1/4 cup of low-sodium soy sauce, 2 tablespoons of honey, 1 tablespoon of rice vinegar, and 1 teaspoon of sesame oil. Don't forget to add the cornstarch slurry made from 1 tablespoon of cornstarch and 2 tablespoons of water. Pour this sauce over the chicken and veggies in the skillet. Stir well so everything gets coated. Cook for another 2 to 3 minutes to let the sauce thicken. Just before serving, stir in 3 chopped green onions. Finally, sprinkle sesame seeds on top for a nice touch. To cook chicken just right, use boneless, skinless thighs. They stay juicy and tender. Cut the chicken into thin strips for even cooking. Heat your pan before adding oil. This helps the chicken brown nicely. Stir the chicken often. This keeps it from sticking and ensures even cooking. Cook for about 5-7 minutes until golden brown. Always check if the chicken is cooked through. It should have no pink inside. When stir-frying, keep your veggies bright and crunchy. Cut them into uniform sizes. This helps them cook evenly. Start with harder vegetables like carrots and broccoli. Add softer ones like bell peppers and snap peas later. This way, everything cooks just right. Use high heat and a non-stick pan. It helps the veggies stay crisp. Stir constantly to avoid burning. Cook for about 3 minutes for that tender-crisp texture. If your teriyaki sauce is too thin, use cornstarch. Mix 1 tablespoon of cornstarch with 2 tablespoons of water. This slurry will thicken your sauce. Add it to the pan while cooking. Stir well and let it cook for a few minutes. If the sauce is too thick, add a splash of water or broth. Adjust it to your liking. The goal is a glossy, thick sauce that coats the chicken and veggies. Pro Tips Use High Heat: For the best stir-fry results, make sure to use high heat. This helps the chicken and vegetables cook quickly while retaining their texture and flavor. Prep Ahead: To save time, prepare all your ingredients in advance. Chop the vegetables and slice the chicken before you start cooking to ensure a smooth cooking process. Customize Your Veggies: Feel free to mix and match your vegetables based on what you have on hand. Snow peas, bell peppers, and zucchini all work beautifully in this recipe. Let the Sauce Thicken: After adding the sauce, give it a couple of minutes to thicken properly. This step ensures that the flavors meld beautifully with the chicken and vegetables. {{image_2}} You can swap chicken for other proteins. Try shrimp, beef, or tofu. Each adds a different taste and texture. If you choose shrimp, cook it for about 3-5 minutes until pink. For beef, thin strips work best. Cook them until brown, about 5-7 minutes. Tofu needs pressing to remove water. Then, fry it until golden. To make this dish vegetarian or vegan, skip the chicken. Use tofu or tempeh instead. Both soak up flavors well. Cook them as you would chicken. For a better taste, marinate tofu in soy sauce before cooking. You can also add mushrooms for a meaty feel. Feel free to mix in your favorite veggies. Snap peas, bell peppers, and carrots work great. You can also add zucchini, bok choy, or baby corn. These add color and crunch. Be creative and use what you have at home. Just keep the cooking time similar for even cooking. To store leftover teriyaki chicken stir fry, let it cool down first. Then, place it in an airtight container. This keeps the flavors fresh. You can store it in the fridge for up to three days. Make sure to label the container with the date. This way, you can track how long it’s been stored. When you want to eat your leftovers, you can reheat them easily. The best way is to use a skillet. Just heat it over medium heat. Add a splash of water or oil to prevent sticking. Stir often until it's hot. You can also use a microwave. Place the stir fry in a microwave-safe dish and cover it. Heat it for one to two minutes. Stir halfway through to make sure it heats evenly. If you want to keep it longer, freezing works well. First, let the stir fry cool completely. Then, place it in a freezer-safe container or bag. Make sure to remove as much air as possible. This helps prevent freezer burn. You can freeze it for up to three months. When you're ready to eat, thaw it overnight in the fridge before reheating. Enjoy your tasty meal anytime you like! Yes, you can use chicken breasts. They will cook faster than thighs. Breasts are leaner, so they may dry out if overcooked. Keep an eye on them. Cut the chicken into thin strips for even cooking. You can still enjoy a tasty stir fry! You can use tamari as a great soy sauce substitute. It has a similar flavor and is often gluten-free. Coconut aminos is another option that is sweeter and less salty. You can also try making your own sauce with vegetable broth, vinegar, and spices. To make this teriyaki chicken stir fry gluten-free, use gluten-free soy sauce or tamari. Check all other sauces for gluten. Using fresh vegetables and chicken ensures your meal is safe. Always read labels to avoid hidden gluten in sauces or pre-packaged items. Teriyaki chicken stir fry is simple and tasty. We explored key ingredients, tools, and steps to make it. You can adjust flavors and try different proteins. Remember to store leftovers properly to enjoy later. This dish offers great flexibility. Feel free to mix veggies or change up your protein. Overall, creating your stir fry can be fun and rewarding. Enjoy your cooking and the tasty results!

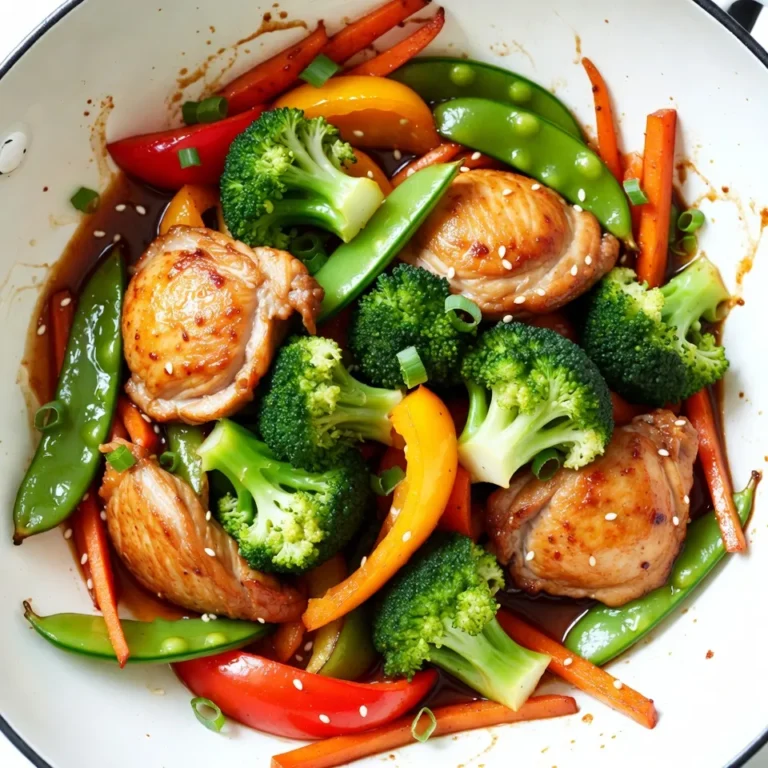
Teriyaki Chicken Stir Fry Flavorful and Easy Recipe

- 2 everything bagels (fresh or stale) - 2 tablespoons olive oil - 1 teaspoon garlic powder - 1 teaspoon onion powder - 1 teaspoon poppy seeds - 1 teaspoon sesame seeds - 1 teaspoon dried oregano - 1 teaspoon coarse sea salt When making Air Fryer Everything Bagel Chips, you need a simple list of ingredients. Start with two everything bagels. You can use fresh ones, or stale ones work too. The bagels are the base for your chips. Next, grab two tablespoons of olive oil. This helps the seasonings stick to the bagel slices. Garlic powder and onion powder each need one teaspoon. They add bold flavors that make these chips pop. You will also need one teaspoon each of poppy seeds and sesame seeds. These seeds give crunch and a nice look to the chips. Add one teaspoon of dried oregano for a fresh taste. Lastly, use one teaspoon of coarse sea salt to enhance all the flavors. With these ingredients ready, you're set to make a tasty, crunchy snack! {{ingredient_image_1}} - Preheat air fryer to 300°F (150°C). - Slice bagels into thin rounds (1/4 inch thick). To start, I preheat my air fryer. This step is key for even cooking. Next, I slice the bagels into thin rounds. Aim for 1/4 inch thick slices. This helps them crisp up nicely. - Mix olive oil and spices in a bowl. - Toss bagel slices in the oil mixture. Now, I grab a bowl and mix olive oil with spices. I use garlic powder, onion powder, poppy seeds, sesame seeds, dried oregano, and coarse sea salt. This blend packs a lot of flavor. After mixing, I toss the bagel slices in the oil mixture. I make sure every piece gets coated well. This step is vital for tasty chips. - Arrange slices in air fryer basket. - Cook for 8-10 minutes, checking halfway. Next, I arrange the coated bagel slices in the air fryer basket. I keep them in a single layer for even cooking. Depending on the size of your air fryer, you might need to cook in batches. I set the timer for 8-10 minutes. Halfway through, I check and shake the basket. This flips the chips for more crunch. When they turn golden brown, I remove them and let them cool on a wire rack. Cooling helps them get even crispier! When making bagel chips, you can use fresh or stale bagels. Fresh bagels give a soft crunch, while stale bagels are drier and crispier. I often prefer using stale bagels for the best texture. The best types of everything bagels have a strong flavor and seasoning. Look for bagels with a good mix of garlic, onion, and seeds. This will boost the taste of your chips. To ensure even cooking, slice your bagels into thin rounds. Aim for 1/4 inch thick slices. Uniform slices cook at the same rate, giving you a consistent crunch. If you have a large batch, cook them in batches. This will prevent overcrowding in the air fryer. Overcrowding can lead to uneven cooking and soggy chips. You can play with the seasoning mix to suit your taste. Try adding a pinch of cayenne for heat or some smoked paprika for a deeper flavor. You can also adjust the salt based on your preference. If you want a milder taste, reduce the salt. Adding herbs like dill or thyme can bring a new twist to your chips. Experiment and find what you love! Pro Tips Use Stale Bagels: Stale bagels work perfectly for this recipe as they will crisp up nicely in the air fryer. Adjust the Seasoning: Feel free to customize the seasoning blend to your taste; add more spices or herbs for extra flavor. Check for Doneness: Keep an eye on the chips during the last few minutes of cooking to avoid burning, as air fryers can vary in temperature. Store Properly: Store any leftover bagel chips in an airtight container to maintain their crispiness for up to a week. {{image_2}} You can change the flavor of your Everything Bagel Chips easily. Here are some fun ideas: - Spicy Blend: Add cayenne pepper or chili powder to your oil mix for a kick. - Cheesy Flavor: Mix in grated Parmesan or nutritional yeast for a cheesy taste. - Herb Mix: Use dried basil or thyme instead of oregano for a fresh twist. For dietary needs, you can make these chips gluten-free. Just choose gluten-free bagels. If you want a vegan option, skip cheese and use nutritional yeast. These chips taste great on their own, but you can enjoy them with dips. - Best Dips: Try hummus, guacamole, or a simple yogurt dip. - Creative Uses: Crush leftover chips and sprinkle them on salads for extra crunch. These ideas make your Everything Bagel Chips even more fun! To keep your leftover Everything Bagel Chips fresh, use an airtight container. Mason jars or plastic containers with lids work well. Make sure the chips are cool before sealing the container. This helps keep moisture out. Store them at room temperature, away from sunlight. They can last up to one week when stored properly. You can also add a small packet of silica gel to keep the chips extra crispy. To reheat your bagel chips, the air fryer is the best choice. Simply place the chips in the basket and set the temperature to 300°F (150°C). Heat for about 2-3 minutes, checking often to avoid burning. If you don't have an air fryer, you can use a microwave. Place the chips on a paper towel and heat in short bursts of 10 seconds. This method may not be as crisp but will still warm them. Enjoy your crunchy snack! You can tell when the bagel chips are done by their color and texture. Look for a golden brown color. They should feel crispy when you touch them. I recommend checking them after about 8 minutes. If they need more time, give them a few extra minutes. Make sure to shake the basket halfway through. This helps cook them evenly. Yes, you can use different types of bagels! Try bagels with flavors like garlic, onion, or even sesame. Each bagel adds its own taste to the chips. You can also use plain bagels if you want a simple snack. The seasoning mix will still give them great flavor. You can make these chips in a traditional oven! Preheat your oven to 350°F (175°C). Arrange the coated bagel slices on a baking sheet in a single layer. Bake them for 10-15 minutes. Check them often to avoid burning. Flip them halfway through for even crispiness. Enjoy your oven-baked everything bagel chips! This article shows you how to make easy everything bagel chips using simple steps. You learned about the key ingredients, step-by-step cooking, and tips for perfect chips. Remember to choose your bagels wisely and slice them evenly for the best result. Feel free to customize your seasoning to match your taste. Store any leftovers properly to enjoy later. With these simple tricks, you can make tasty snacks at home anytime! Enjoy your cooking adventure and have fun experimenting with flavors.

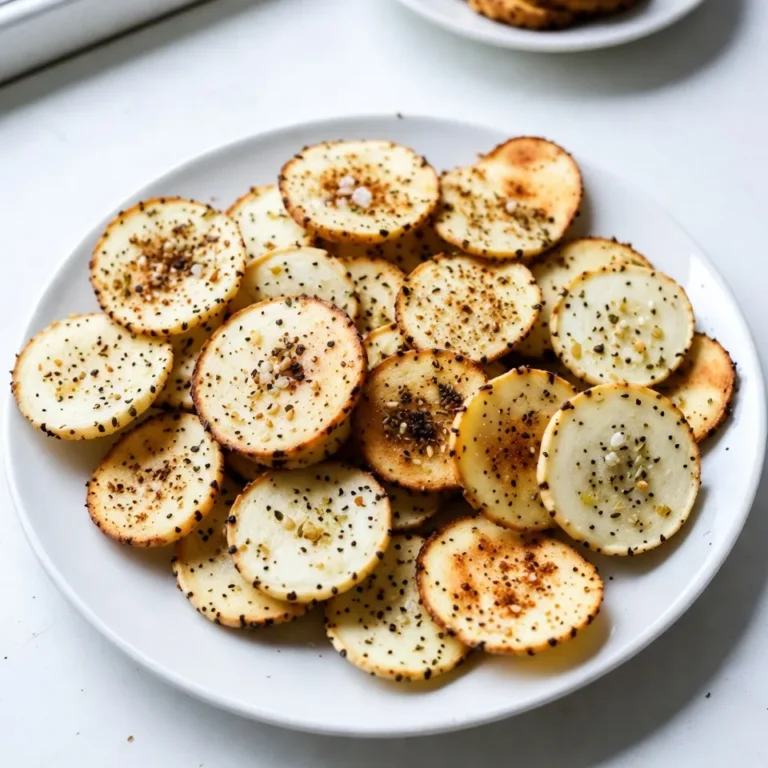
Air Fryer Everything Bagel Chips Crunchy Snack Delight

1 2 … 86 NEXT
spicy fork kitchen

explore

DessertsDinnerAppetizersDrinks

Our Policies

  • Cookie Policy
  • Copyright Policy
  • Disclaimer
  • GDPR Policy
  • Terms Of Use
Back to Top
  • About
  • Contact Us
  • Privacy Policy
© 2025 spicy fork kitchen