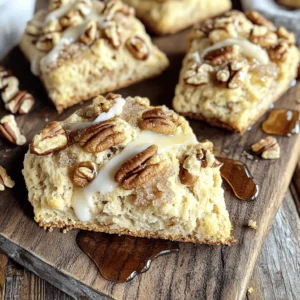
If you’re craving a delightful treat that bursts with rich flavors, you’ve come to the right place! My Bakery-Style Brown Sugar Maple Pecan Scones recipe combines sweet maple syrup and crunchy pecans for a heavenly bite. These scones are perfect for breakfast or a cozy afternoon snack. Join me as I guide you through simple steps to create this bakery classic right in your kitchen. Get ready for a delicious adventure!

Ingredients
List of Essential Ingredients
– 2 cups all-purpose flour
– 1/2 cup brown sugar, packed
– 2 teaspoons baking powder
– 1/2 teaspoon baking soda
– 1/2 teaspoon salt
– 1/2 cup unsalted butter, cold and cubed
– 1/2 cup chopped pecans, toasted
– 3/4 cup heavy cream
– 1/4 cup maple syrup
– 1 teaspoon vanilla extract
– Additional cream for brushing
– Maple syrup and chopped pecans for topping
Each ingredient plays a key role in making your scones rich and tasty.
All-purpose flour gives the scones structure. Brown sugar adds sweetness and a hint of caramel. Baking powder and baking soda help the scones rise. Salt balances the flavors.
Use cold, cubed unsalted butter for a flaky texture. Chopped pecans provide crunch and flavor. Heavy cream enriches the dough, while maple syrup adds a delightful sweetness. Vanilla extract enhances the overall taste.
Lastly, you’ll need extra cream for brushing the tops before baking. This gives them a nice golden color. Maple syrup and pecans on top serve as a perfect finish.
Gather these ingredients, and you’ll be ready to make bakery-style scones that impress!
Step-by-Step Instructions
Prepping Your Ingredients
1. Preheating the oven: Start by preheating your oven to 400°F (200°C). This ensures your scones bake evenly and rise nicely.
2. Preparing the baking sheet: Line a baking sheet with parchment paper. This helps prevent sticking and makes cleanup easier.
Mixing and Combining
1. Mixing dry and wet ingredients: In a large bowl, whisk together 2 cups of all-purpose flour, 1/2 cup of packed brown sugar, 2 teaspoons of baking powder, 1/2 teaspoon of baking soda, and 1/2 teaspoon of salt. Make sure everything is well combined.
2. Proper incorporation techniques: Now, add 1/2 cup of cold, cubed unsalted butter. Use a pastry cutter or your fingers to mix it in until it looks like coarse crumbs. Then, gently fold in 1/2 cup of toasted, chopped pecans.
3. In a separate bowl, whisk together 3/4 cup of heavy cream, 1/4 cup of maple syrup, and 1 teaspoon of vanilla extract. Pour this wet mixture into the dry mix and combine until just moistened. You want to see a few flour streaks; do not over-mix.
Shaping and Baking
1. Forming the scone dough: Turn the dough out onto a lightly floured surface. Pat it into a circle about 1 inch thick. Cut the dough into 8 wedges and place them on the baking sheet.
2. Baking duration and temperature: Brush the tops with a bit of heavy cream for a nice golden color. Bake for 18-20 minutes, or until they turn lightly golden brown and are cooked through.
Tips & Tricks
Achieving Perfect Texture
– Use cold butter. Cold butter makes scones flaky. It creates air pockets while baking.
– Do not over-mix the dough. Mix until just combined. A few flour streaks are fine. Over-mixing makes scones tough.
Enhancing Flavor
– Toast your pecans before adding them. Toasting brings out their rich flavor. Just a few minutes in the oven will do.
– Choose quality maple syrup. Real maple syrup adds depth. It gives your scones that sweet, warm flavor.
Baking Efficiency
– Use a pastry cutter for mixing butter. It breaks butter into small pieces easily. Your hands may warm the butter too much.
– Use parchment paper on your baking sheet. It prevents sticking and makes cleanup easy. A good non-stick sheet also works well.
Variations
Flavor Alternatives
You can change up these scones in fun ways. If you want to add a seasonal twist, try mixing in spices. For fall, a pinch of cinnamon or nutmeg gives warmth. In spring, consider adding lemon zest for a fresh taste. You can also swap out the pecans for other nuts. Walnuts or almonds can bring new flavors. Just remember to toast them for the best taste.
Dietary Considerations
If you need gluten-free scones, use gluten-free flour. Many brands work well without changing the texture much. For a dairy-free version, use coconut cream instead of heavy cream. You can also find plant-based butter as a good alternative.
Serving Suggestions
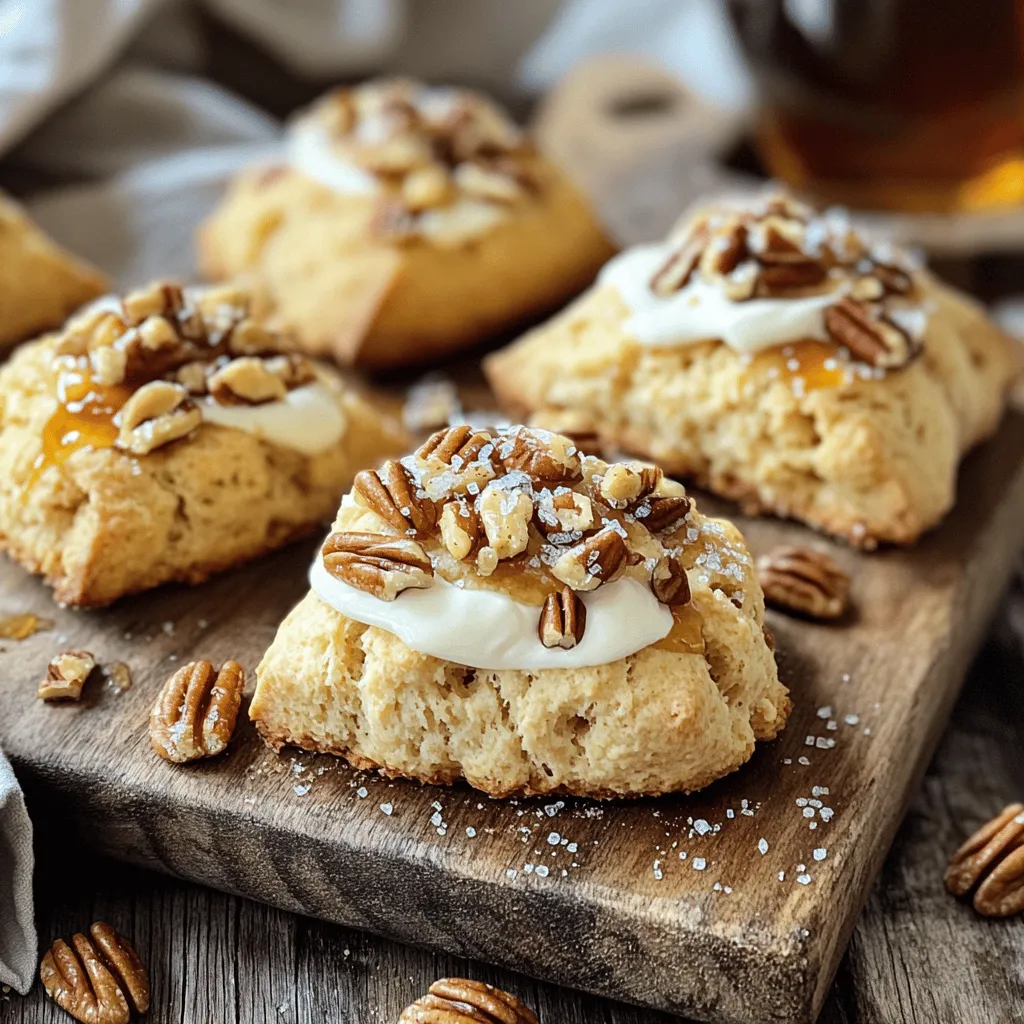
These scones are perfect with coffee or tea. They pair well with a warm drink on a chilly day. For toppings, try a dollop of clotted cream or a spread of fruit preserves. You can also drizzle more maple syrup on top for extra sweetness. Chopped nuts sprinkled on the scones add a nice crunch, making each bite special.
Storage Info
Best Storage Practices
To keep your scones fresh, store them in airtight containers. This prevents air and moisture from ruining their texture. If you plan to eat them within a few days, just keep them on the counter. If you want to save them for longer, consider freezing. Wrap each scone tightly in plastic wrap, then place them in a freezer bag. This method keeps them safe from freezer burn.
Shelf Life
At room temperature, these scones will last about three days. If you refrigerate them, they may stay fresh for up to a week. However, always check for signs of spoilage. If you notice any mold or an off smell, it’s best to toss them out.
Reheating Instructions
To reheat your scones, use an oven set to 350°F (175°C). Place the scones on a baking sheet and cover them with foil. Heat for about 10 minutes, and they’ll be warm and soft. If you want to microwave them, do so for about 15-20 seconds. Be careful not to dry them out. Adding a little butter or cream before reheating can help keep them moist.
FAQs
What can I substitute for heavy cream?
You can use milk or half-and-half. These options will make your scones lighter. If you prefer non-dairy, try almond milk or coconut cream. Both add a nice flavor. Remember, these substitutes may change the texture slightly.
Can I make the dough ahead of time?
Yes, you can make the dough ahead. Wrap it tightly in plastic wrap. Store it in the fridge for up to 24 hours. When you’re ready, just cut and bake it. It saves time and still tastes great!
How do I know when the scones are done?
Look for a light golden color on top. You should also feel a firm texture. If you tap the bottom, it should sound hollow. This means they are baked through. Enjoy the smell as they cool!
This blog post covered all the steps to make tasty scones from scratch. We explored the key ingredients, mixing and baking methods, and helpful tips for perfect results. You can also customize your scones with various flavors or dietary needs. Store them properly to keep them fresh longer. Remember, baking scones is simple and fun! With practice, you can create delicious treats that everyone will enjoy. Happy baking, and enjoy your scones!