If you love a quick and tasty treat, you’ll want to try my Brown Butter Rice Krispie Treats. This simple twist on a classic adds a rich, nutty flavor that makes snacks extra special. I’ll show you how to create the perfect texture and explore fun variations. Plus, I’ll share tips to keep treats fresh. Get ready to impress your friends and family with this easy recipe!

Ingredients
Complete List of Ingredients for Brown Butter Rice Krispie Treats
To make these tasty treats, you will need:
– 4 tablespoons unsalted butter
– 1 package (10 oz) mini marshmallows
– 1/4 teaspoon salt
– 6 cups Rice Krispies cereal
– 1 teaspoon vanilla extract
– 1/2 cup dark chocolate chips (optional)
– Flaky sea salt for garnish (optional)
These ingredients come together to create a rich and chewy snack that everyone loves.
Optional Add-Ins and Substitutions
You can change the flavor of your treats easily. Here are some fun ideas:
– Nut butters: Swap some butter for peanut or almond butter for a nutty flavor.
– Dried fruits: Add raisins or cranberries for a fruity twist.
– Sprinkles: Mix in colorful sprinkles for a festive touch.
– Coconut: Add shredded coconut for extra texture.
– Different cereals: Use other cereals like Cheerios or Fruity Pebbles for variety.
Feel free to mix and match to find your favorite version.
Recommended Tools and Equipment
To make these treats, you will need a few simple tools:
– Large saucepan: This is for melting the butter and marshmallows.
– Spatula: Use it for mixing and pressing the treats into the pan.
– 9×13 inch baking dish: This will hold your treats as they set.
– Parchment paper: Lining the dish makes it easy to remove the treats later.
– Measuring cups and spoons: Accurate measurements are key to success.
Having these tools will make the process smooth and fun!
Step-by-Step Instructions
Detailed Cooking Instructions
1. Brown the Butter: Start by melting 4 tablespoons of unsalted butter in a large saucepan over medium heat. Stir it often. In about 4 to 5 minutes, the butter will bubble and turn a golden brown. You’ll smell a nutty aroma. This is the key to great flavor.
2. Add Marshmallows & Salt: Once your butter is brown, reduce the heat. Add 10 ounces of mini marshmallows and 1/4 teaspoon of salt to the pan. Keep stirring until the marshmallows melt completely and become smooth.
3. Mix in Rice Krispies: Remove the pan from heat. Quickly stir in 6 cups of Rice Krispies cereal. Make sure every piece is coated with the marshmallow mix. Pour in 1 teaspoon of vanilla extract and mix until well combined.
4. Add Chocolate Chips (Optional): If you want a richer taste, fold in 1/2 cup of dark chocolate chips. This is optional but adds a nice touch.
5. Transfer to a Pan: Lightly grease a 9×13 inch baking dish. You can also use parchment paper for easy removal. Pour the mixture into the dish and press it down firmly with a spatula or your hands.
6. Let Cool: Allow the treats to cool at room temperature for about 30 minutes. If you like, sprinkle flaky sea salt on top before they fully set. This adds great flavor.
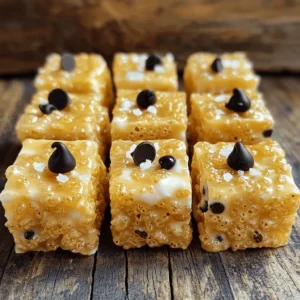
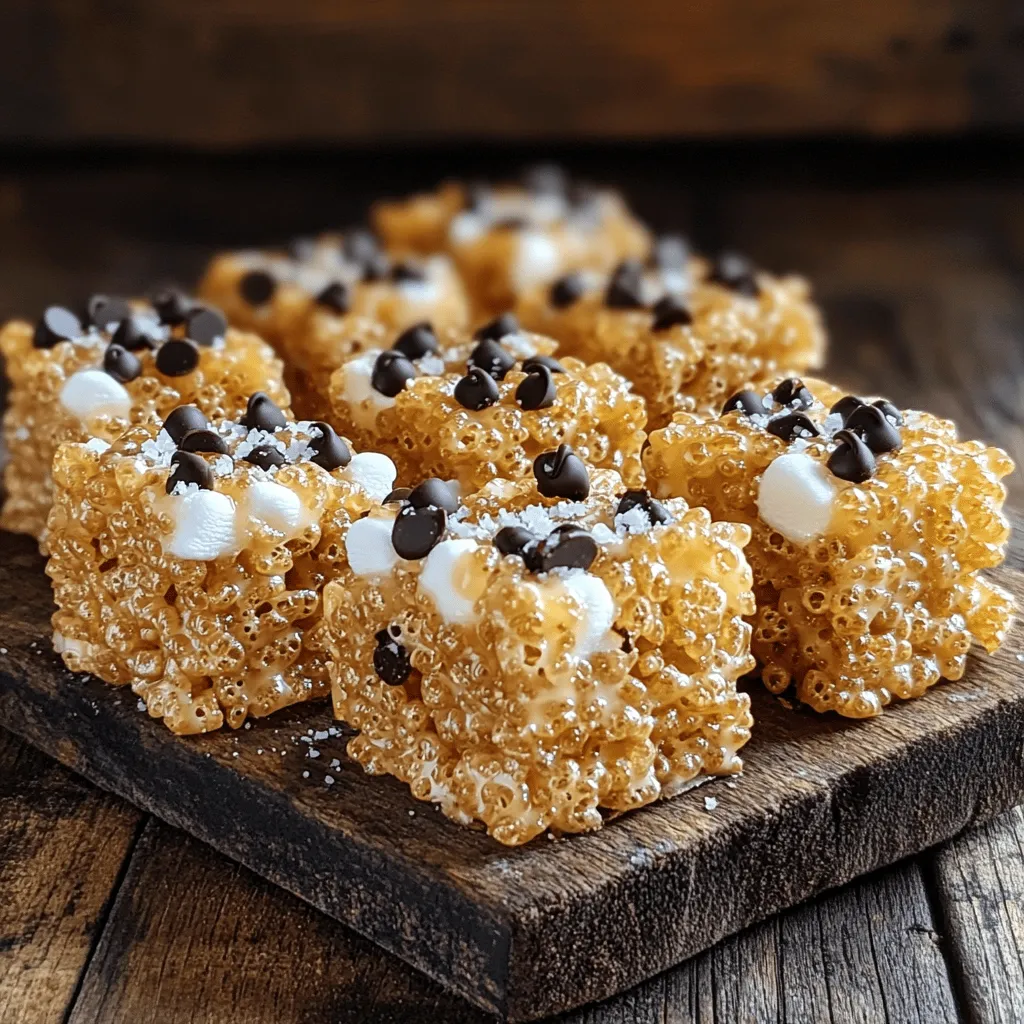
7. Cut and Serve: Once set, cut the treats into squares or rectangles. Enjoy your delicious Brown Butter Rice Krispie Treats!
Tips for Perfect Browning of Butter
– Watch Closely: Butter can go from brown to burnt quickly. Keep a close eye on the color.
– Use a Light-Colored Pan: A light pan helps you see the color change more clearly.
– Stir Often: Stirring helps distribute the heat evenly and prevents burning.
Techniques for Mixing Rice Krispies
– Use a Rubber Spatula: A rubber spatula helps you mix without crushing the Rice Krispies.
– Fold Gently: When mixing, fold the cereal into the marshmallow mixture instead of stirring vigorously. This keeps the treats light and airy.
– Work Quickly: The marshmallow mixture will start to set as it cools. Mix in the Rice Krispies as fast as you can for even coating.
Tips & Tricks
Common Mistakes to Avoid
When making Brown Butter Rice Krispie Treats, avoid these common mistakes:
– Burning the Butter: Watch the butter closely. If it burns, start over.
– Not Stirring Enough: Stir the marshmallows until fully melted. This keeps the mix smooth.
– Using Warm Rice Krispies: Make sure your Rice Krispies are cool. Warm cereal can make the treats gummy.
– Not Pressing Firmly: Press the mixture firmly into the pan. This helps them hold their shape.
How to Achieve the Perfect Texture
To get the best texture, follow these tips:
– Brown the Butter Right: Aim for a golden color and nutty smell. This adds depth.
– Don’t Overmix: Stir just enough to coat the Rice Krispies. Over-mixing can lead to tough treats.
– Use Fresh Marshmallows: Fresh marshmallows melt better and give a fluffier texture.
Serving and Presentation Tips
Presentation matters! Here are ideas to make your treats stand out:
– Cut Neatly: Use a sharp knife for even squares. This makes for a clean look.
– Add Flaky Sea Salt: Sprinkle it on top for a nice contrast in flavor.
– Serve on a Colorful Plate: A bright plate makes the treats pop visually.
– Pair with Milk: Serve with a glass of cold milk for a classic touch.
These tips will help you create delightful treats that look and taste amazing!
Variations
Creative Flavor Additions
You can make your Brown Butter Rice Krispie Treats even more fun with flavor twists. Here are a few ideas:
– Peanut Butter: Swirl in 1/2 cup of peanut butter after melting the marshmallows. This adds a nutty flavor.
– Cocoa Powder: Mix in 1/4 cup of cocoa powder with the marshmallows. This gives a chocolatey taste.
– Fruit: Add dried fruits like cranberries or apricots for a chewy texture. Toss in about 1/2 cup.
– Nuts: Chopped nuts like almonds or walnuts can add crunch. Use 1/2 cup for a great bite.
Dietary Modifications
If you have dietary needs, you can still enjoy these treats:
– Gluten-Free: Use gluten-free Rice Krispies. Most brands offer this option.
– Vegan: Replace the butter with coconut oil and use vegan marshmallows. This keeps the treats plant-based.
– Nut-Free: Skip nuts and stick with plain Rice Krispies. This makes them safe for schools.
Seasonal Variations for Holidays
You can change these treats to fit any holiday:
– Halloween: Add orange and black sprinkles for fun. You can also use pumpkin spice in the mix.
– Christmas: Add peppermint extract and crushed candy canes. This gives a festive flavor.
– Easter: Use pastel-colored sprinkles and add mini chocolate eggs for a springtime twist.
These variations let you create a treat that suits your taste and the season!
Storage Info
Best Practices for Storing Rice Krispie Treats
To keep your Brown Butter Rice Krispie Treats fresh, store them in an airtight container. This helps prevent them from getting hard or stale. If you have leftovers, layer parchment paper between the treats. This will keep them from sticking together. Store the container at room temperature, away from heat and direct sunlight. They stay soft and tasty this way.
How to Freeze Brown Butter Rice Krispie Treats
You can freeze Brown Butter Rice Krispie Treats for later. First, let them cool completely. Then, cut them into squares. Wrap each square in plastic wrap tightly. Place the wrapped treats in a freezer-safe bag or container. Be sure to label the bag with the date. They can last up to three months in the freezer. When you’re ready to eat them, let them thaw at room temperature.
Shelf Life and Reheating Tips
These treats are best enjoyed within a week. After that, they might become a bit dry. If you want to reheat them, you can use the microwave. Place a treat on a plate and heat it for about 10 seconds. This will bring back some softness. Just be careful not to overheat, or they may melt. Enjoy your treats fresh for the best taste!
FAQs
Can I use regular butter instead of unsalted?
Yes, you can use regular butter. Just note that it will add salt to your treats. If you do use salted butter, skip adding any extra salt. This way, your treats stay balanced in flavor. Unsalted butter is best for controlling salt levels.
What can I substitute for Rice Krispies?
You can use other cereals like Corn Pops or Chex Mix. These options will change the texture but still taste great. You can also use gluten-free cereals if you need a gluten-free treat. Just make sure they are crispy to hold the marshmallow mixture.
How do I make these treats less sticky?
To reduce stickiness, you can grease your hands with butter or cooking spray. This helps when you press the mixture into the pan. You can also add a bit more cereal to soak up the marshmallow. Mixing in powdered sugar can help too, but be careful not to overdo it!
Brown butter Rice Krispie treats are easy and fun to make. We covered the essential ingredients, cooking tips, and common mistakes to avoid. You learned how to add your own twist with flavors and dietary changes. Storage and reheating tips keep your treats fresh. Remember, the right tools and techniques lead to the best results. Enjoy making your treats, and share them with friends. You now have everything to create delicious, gooey snacks that everyone will love!